15
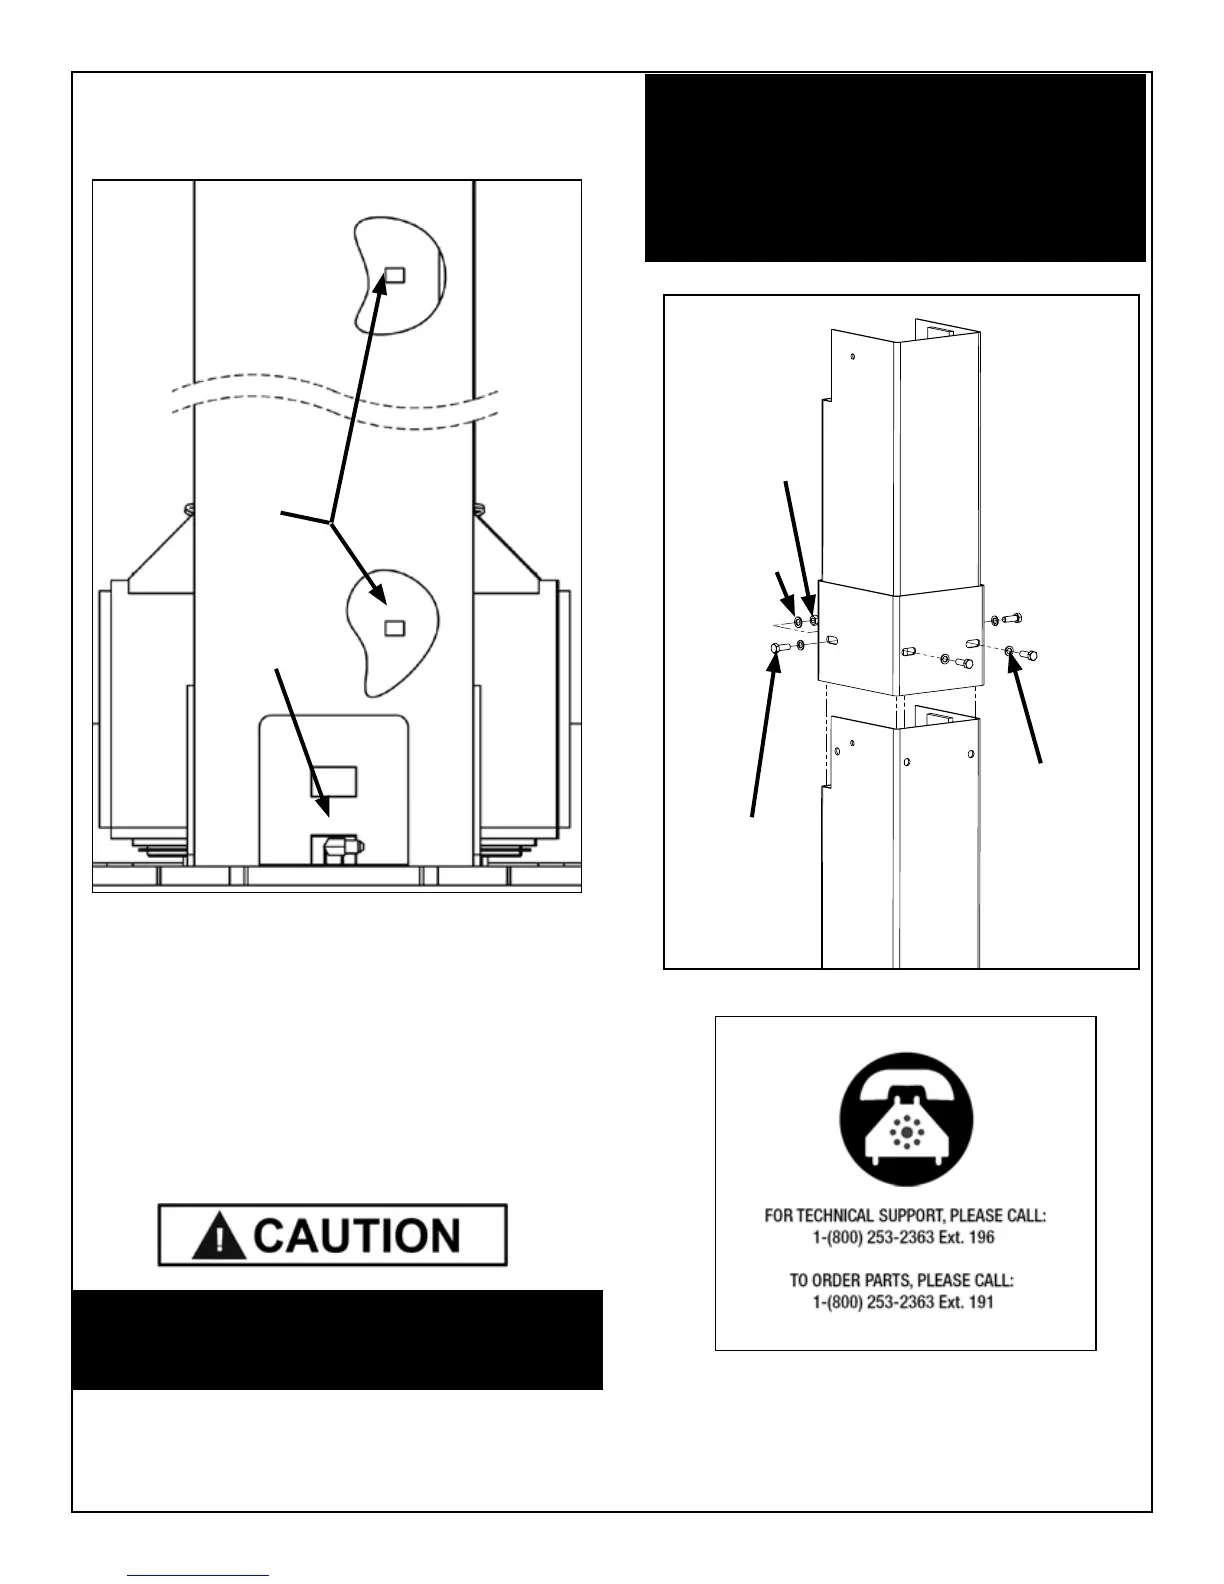
5. Install the cylinder ttings in cylinder ports. Pay attention
when installing the ttings to ensure that each tting points
towards the side of the post that the hose retainer clips are
located on. (See Fig 3.7)
6. Route both hoses in their respective posts PRIOR to
raising posts to their vertical position. When routing the
hydraulic hoses through the post, make sure to route
through the hose clips welded inside each post. Make
sure that the hoses are clear of any moving parts. It
may be necessary to tie hoses clear of obstructions by
using nylon tie straps or wire. Refer to Step 10 for further
instructions.
Fig 3.7
Fitting must be
turned towards
hose clips for
hydraulic hose
routing
NOTE: Portions of Post cut away for clarity
Notice that
the hose clips
are offset for
hydraulic hose
routing
NOTE FOR EXTENDED HEIGHT MODELS:
FOR XPR-10S-168, XPR-10AS-168, XPR-10TS-168,
XPR-10S-168-LP, XPR-10AS-LP-168 MODELS, FIT
EXTENSION WELDMENTS TO POST ASSEMBLY
IN THIS STEP FOR EASE OF INSTALLATION
AND BOLT TOGETHER AS SHOWN BELOW
WITH M12 HARDWARE.
M12 Hex
Head Bolt
M12 Spring
Lock Washer
M12 Flat
Washer
M12 Hex
Nut
Fig 3.8
BE SURE TO ROUTE THE HYDRAULIC HOSES
THROUGH THE HOSE CLIPS WELDED
INSIDE EACH POST.