9
STEP 3
(Post Preparation)
COMPLETE THE FOLLOWING
PRIOR TO STANDING UP POSTS.
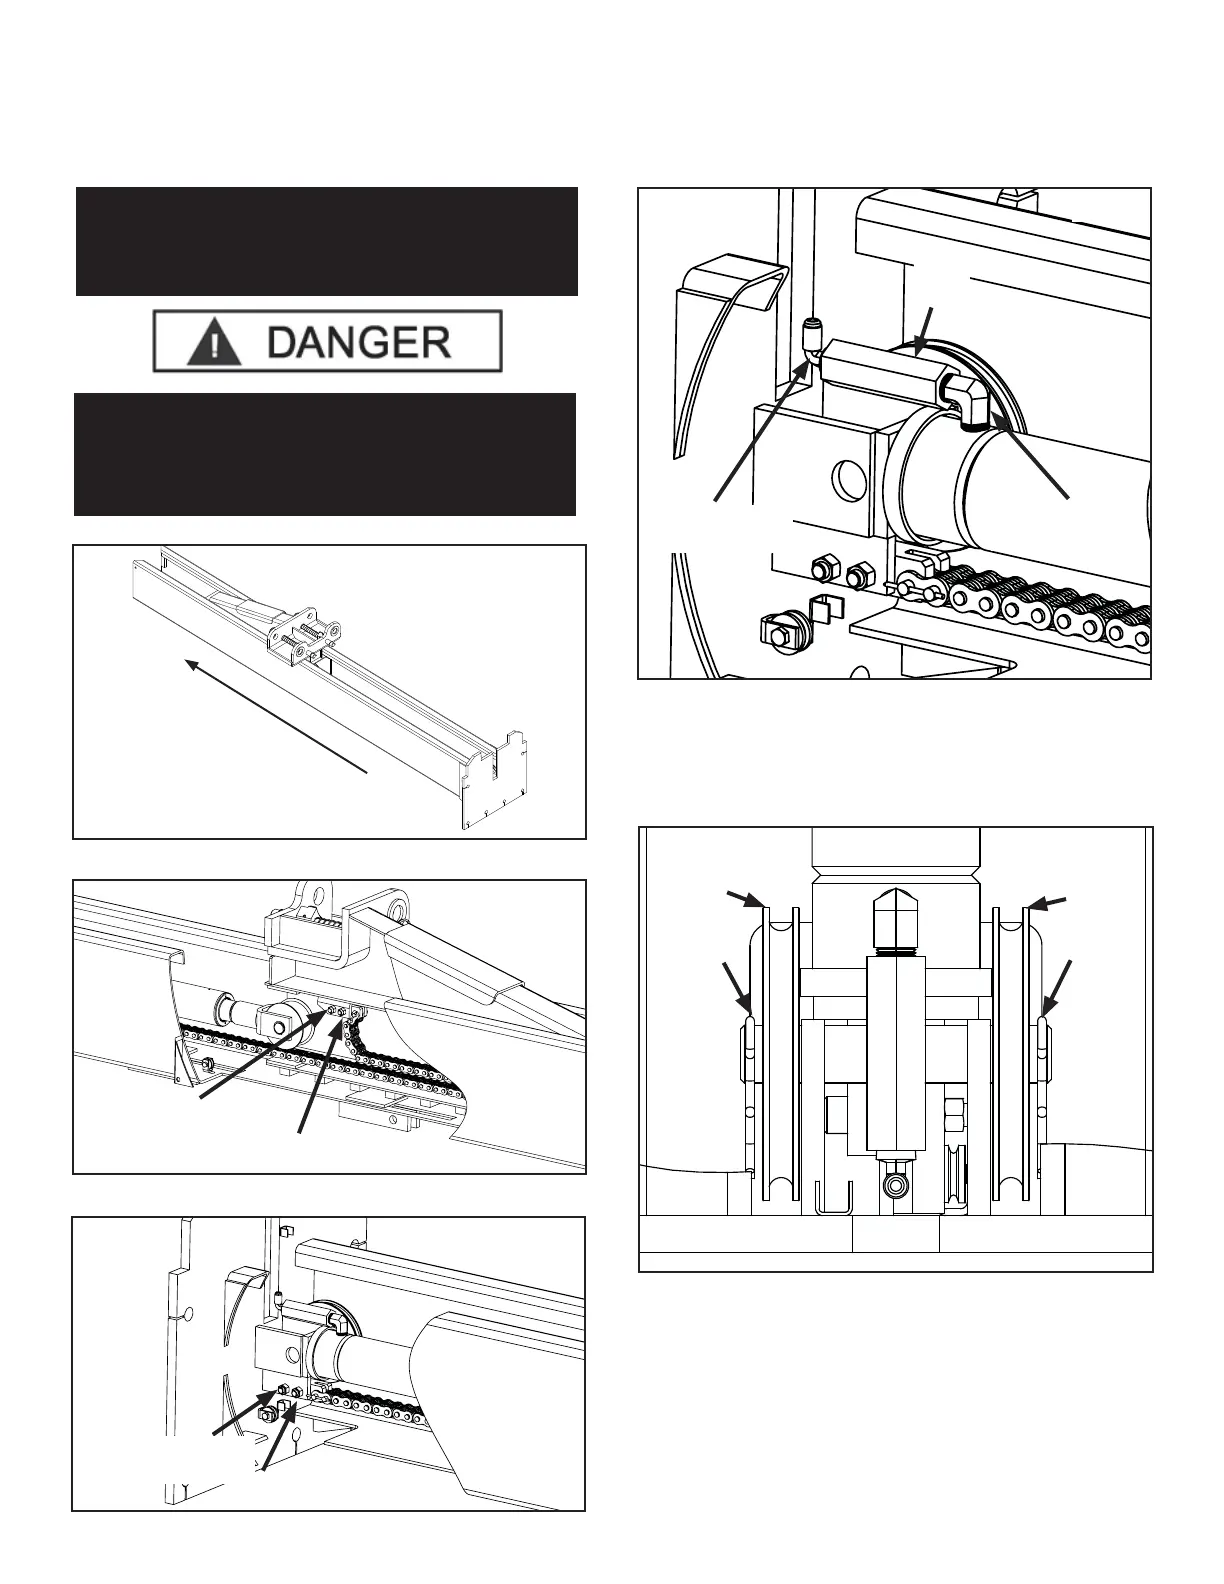
1. With the post assemblies laying on the oor, slide
the carriage up towards the top of the post. Inspect and
ensure all socket head cap screws and hex nuts are tight.
(See Fig 3.1 - 3.3)
2. Install cylinder ttings. First install the 90° 3/8” Fitting
into the cylinder port using te on tape on the pipe threads.
Next, assemble the tube tting and 3/8” to 1/4” Hose Fitting
together. Again, use te on tape on all pipe threads. DO NOT
use te on tape on the JIC hose ttings. (See Fig 3.4)
3. With the carriage still slid towards the top of the post,
remove the sheaves on the post base plate to aid in
equalizer cable routing by rst removing the two cotter
pins securing them, then by sliding the sheaves off of the
sheave shaft. (See Fig 3.5)
DANGER!
FAILURE TO TORQUE LIFT CHAIN BOLTS PROPERLY
MAY RESULT IN PERSONAL INJURY AND/OR DEATH.
ENSURE THE SOCKET HEAD CAP SCREWS ARE
TIGHT PRIOR TO LIFT OPERATION.
Slide Carriage
Upwards
Fig 3.1
Fig 3.3
MUST BE
TIGHT
Fig 3.2
MUST BE
TIGHT
Fig 3.4
90° 3/8” to 1/4”
JIC Fitting
Tube
Fitting
90° 3/8” to 1/4”
Fitting
NOTE:
DETERMINE DESIRED LOCATION AND WIDTH
LAYOUT BEFORE RAISING COLUMNS. REFER TO
LAYOUT CHARTS ON PAGE 12.
Fig 3.5
Cotter
Pin
Cotter
Pin
Sheave
Sheave
NOTE: When installing ttings DO NOT use te on tape on JIC tting end