13
Choose one of the three following options as a
means of fastening the subframe.
Install the lift strap by making a loop around
the front suspension arm of the vehicle.
Don’t install the strap on a cutting
edge. Tighten the loop firmly.
Remove the nut and bolt from the vehicle’s front
suspension arm. Secure the bracket with a
bolt, flat washer and nut.
Do not tighten the nut too firmly.
Remove the nut and bolt from the vehicle’s front
suspension arm. Secure the bracket with a
bolt, flat washer and nut.
Do not tighten the nut too firmly.
Repeat the operation on the other side of
vehicle.
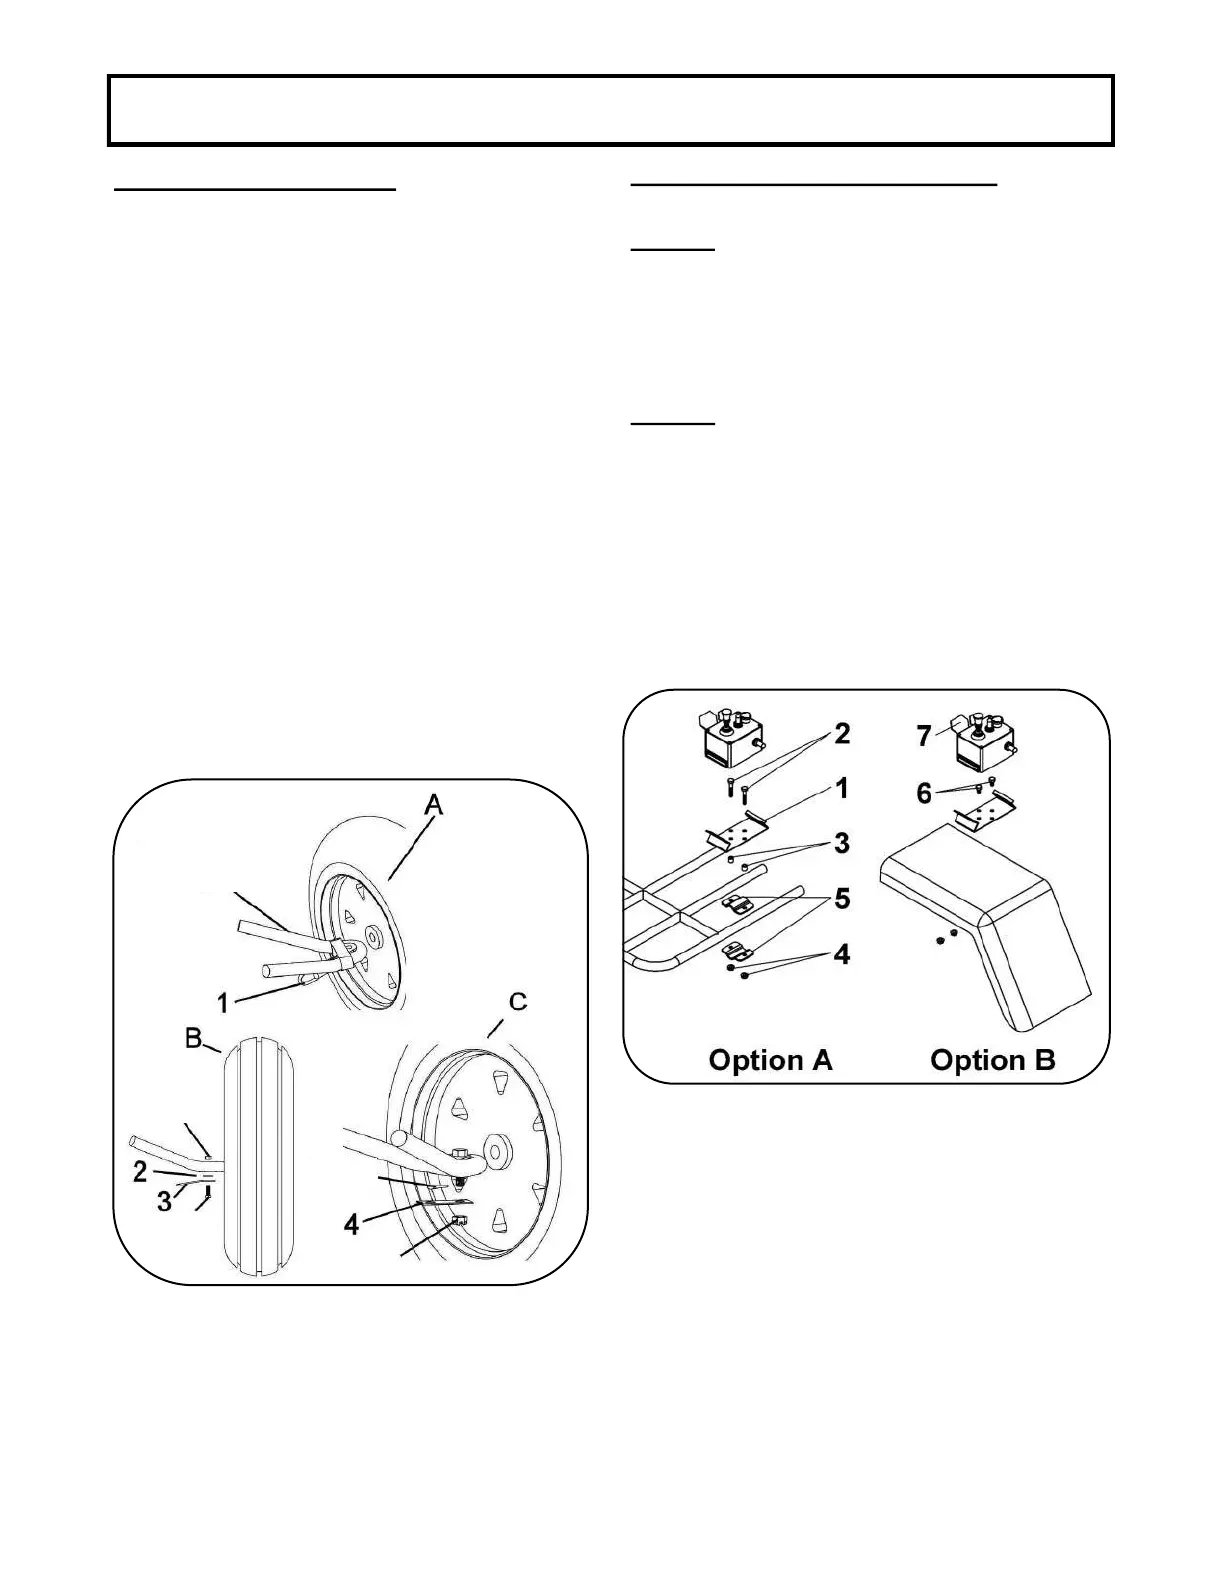
1. Choose between the two different ways of
securing the control box support
Use two hex bolts 1/4" x 1 1/2" , two spacers
and two flange nuts 1/4" in order to
secure the control box support to the support
brackets.
Choose the right combination of holes on the
control box support so that the front of the control box
is facing the front of the vehicle.
Use the support as a template and drill two holes in
an appropriate place on the vehicle.
Secure the control box support with two bolts 1/4" x
1/2" and two flange nuts 1/4".
2. Insert the control box in the control box
support.
In order to avoid damages due to water
accumulation, make sure the control box is installed
horizontally.
Suspension arm
Nut
Bolt
Pin
Nut