82 Decorative Stitches – Applications
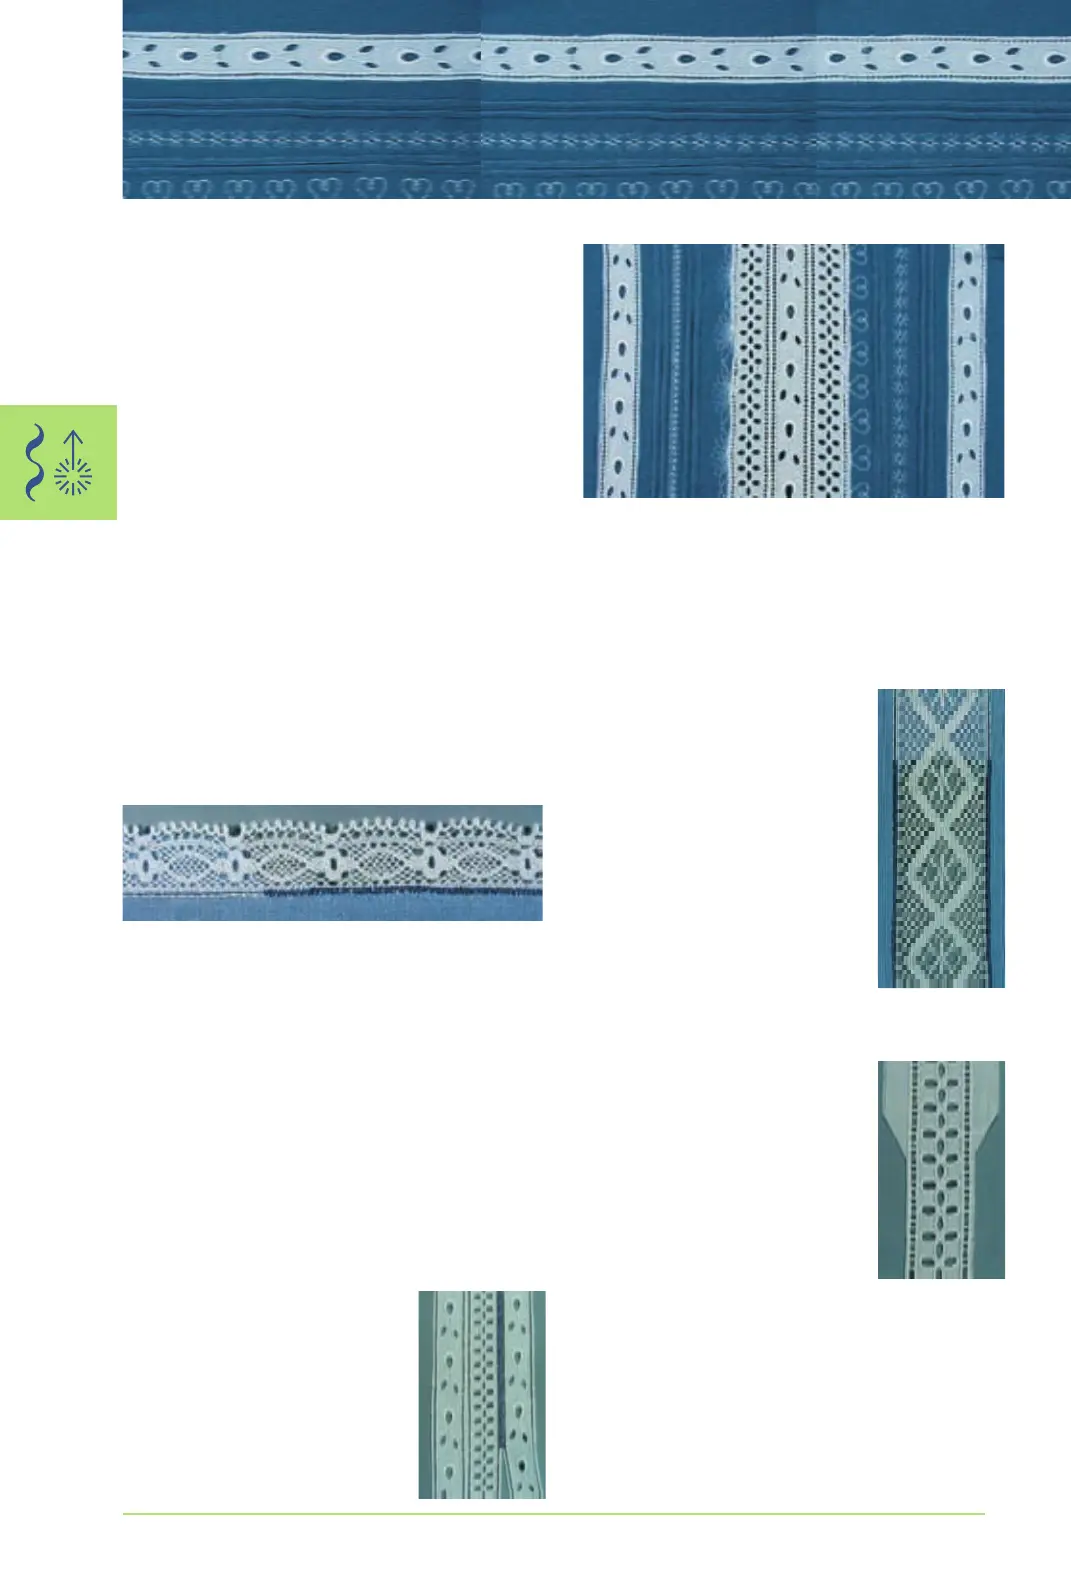
Heirloom Sewing
•
is one of the oldest and most traditional
needlework techniques
• embellishments such as lace of a matching shade
are sewn on white cotton or linen to be used in
making home furnishings and garments
• heirloom embroidery includes - among others -
techniques like hemstitching, attaching and
inserting lace, padded satin scallops
Attaching and Inserting Lace
Stitch:
Needle:
Thread:
Feed dog:
Presser foot:
Zig-zag No. 2
size and type suitable for the fabric selected
cotton or decorative
up (sewing position)
Reverse pattern foot No. 1C or Edge stitch foot No.10C (special accessory)
Attaching Lace to Fabric
place lace on right side of the fabric, edges
overlapping at least 3/8” (1cm)
(= seam allowance) and pin
• lace header lies on the fabric
use Straight stitch No. 1 to attach lace
press seam allowance back to wrong side of fabric
from the right side, use a narrow zig-zag (stitch
width approx. 11/2 - 21/2, length approx. 1/2) to
sew on lace. Stitch along the edge of the lace so
that the stitches enclose the edge
trim excess fabric on wrong side
Attaching Lace to Lace
place pieces of lace next to each
other (edges touching exactly)
use a fine zig-zag stitch (stitch
width approx. 11/2 - 2, length
approx. 1/2) to sew the pieces
of lace together. The needle
swing should alternately catch
the two lace edges. Use the
Edge stitch foot No. 10
Preparation
use the same color thread as the lace
•
lace which has been spray-starched before
stitching is easier to use
Heirloom Techniques / Sewing Lace
overcast raw edge of Entredeux/fabric seam with a
narrow zig-zag stitch (stitch No. 2, stitch width
2mm, stitch length 1.5mm)
Attaching Entredeux to Lace, etc.
trim away seam allowance of Entredeux along one
bead only
follow technique lace to lace as desrcibed above
Inserting Lace into Fabric
pin or baste lace onto fabric. Use
Straight stitch No. 1 to
stitch along both edges
carefully slit open the fabric in the
center between the seam lines
press the seam allowances back
to the wrong side of the fabric
from the right side of the fabric,
use a fine zig-zag (stitch width
approx. 11/2- 2, length approx.
1/2) along both lace edges to
enclose them
trim excess fabric on wrong side
Entredeux
Attaching Entredeux to Fabric
place Entredeux on fabric, right
sides together, raw edges
together
stitch Entredeux to fabric using
straight stitch, Edge stitch foot
No. 10 (special accessory), guiding
the guide in center of foot along
seam allowance bead in Entredeux
trim seam allowance to 1/8”(3mm)
s073-96_e 19.4.2004 16:21 Uhr Seite 82
030794.71.04_0401_a200_EN
 Loading...