3
TABLE OF CONTENTS
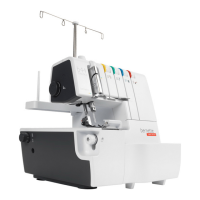
NAME OF PARTS 7
Details of machine 7
ACCESSORIES 9
Standard 9
Needle Information 9
HOW TO OPEN LOOPER COVER 10
Principal Parts behind the Looper Cover 10
PREPARATION TO SEWING 10
Power Switch 10
Foot Controller 10
Cut-offs Bin 11
PREPARATION FOR THREADING 12
Setting up the Retractable thread stand 12
Spool net 12
Spool Cap 12
HOW TO DISENGAGE UPPER KNIFE 13
UPPER LOOPER CONVERTER (ULC) 14
Use the upper looper converter 14
Disengage To Upper Looper 14
STANDARD OVERLOCK AND ROLLED HEM
STITCHING 14
Sew Standard Overlock 14
Sew Rolled Hem 15
HOW TO REMOVE AND INSERT NEEDLES 15
Needle Position 15
To Remove Needle(s) 16
To Insert Needle(s) 16
SELECTION OF STITCHES 17
THREADING THE MACHINE 19
Threading Diagram 19
Tension Color Code 19
Threading the Upper Looper (Blue) 20
Threading the Lower Looper (Red) 21
Threading the Overlock Right Needle (Green) 23
Threading the Overlock Left Needle (Yellow) 24
HOW TO CHANGE THREADS 26
Tie on method 26
HOW TO ADJUST 27
Stitch lenght dial 27
Seam Width 27
The presser foot pressure 28
DIFFERENTIAL FEED 29
Gathered Overlock (1–2.0) 29
Stretch Overlock (1–0.6) 30
CHAINING OFF AND TEST SEWING 31
HOW TO SEW AN OVERLOCK STITCH 32
2–Thread Wrapped Overlock (#9/#10) 32
2–Thread Overlock (#14/#15) 33
3–Thread Overlock (#3/#4) 34
3–Thread Flatlock (#5/#6) 35
2–Thread Flatlock (#11/#12) 36
3–Thread Super Stretch (#2) 37
4–Thread Overlock with integrated safety
seam (#1) 38
HOW TO SEW A ROLLED HEM 39
Machine set up 39
Additional information about rolled hemming 40
3–Thread Narrow Seam (#7) 41
3–Thread Rolled Hem (#8) 41
2–Thread Rolled Hem (#13) 42
STITCH VARIATIONS AND SEWING TECHNIQUES
43
How To Sew a Flatlock Decorative Seam 43
Machine Set Up 43
Flatlocking a Seam 43