29
Sewing Test / Costura de prueba
Sewing Test
After threading make a sewing test on a dou-
ble layer of fabric to check the stitch formation
and the thread tension.
Cover stitch sewing test
・
Plug the machine in and switch it on (power
switch to “I”).
・
Set the tensions to 3-5.
・
Set the stitch length to 3.
・
Set the differential feed to N.
・
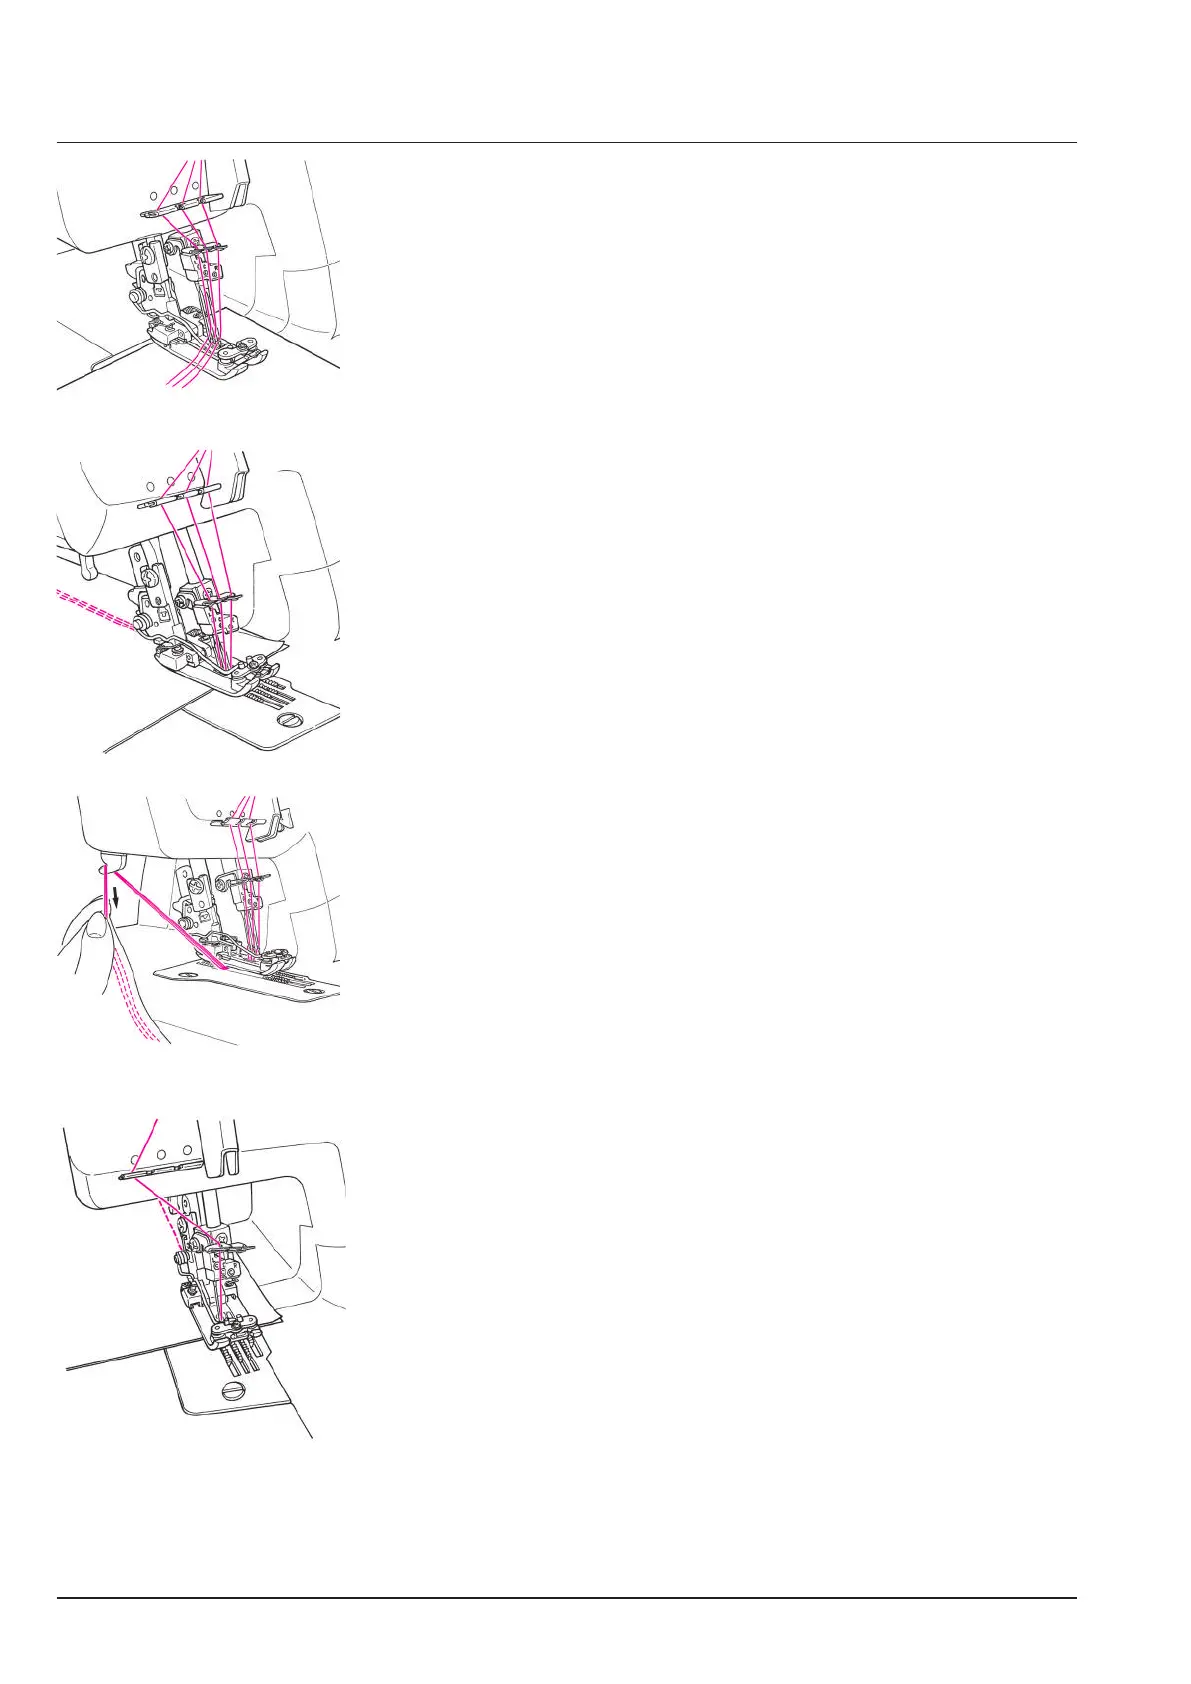
Raise the presser foot and place the fabric
under foot and needles (A).
・
Lower the presser foot.
・
Turn the handwheel counterclockwise for
the rst stitch.
・
Sew
・
When sewing is completed (still inside the
work), turn the handwheel counterclockwise
to bring the needles into their lowest posi-
tion (B).
Then turn the handwheel clockwise to raise
the needles to their highest position. This
releases the needle threads from the looper
and stitching can unravel easily.
・
Raise the presser foot.
・
Remove the work carefully towards the left.
・
Cut the threads over the thread cutter (C).
Chainstitch sewing test
・
Plug the machine in and switch it on (power
switch to “I”).
・
Set the tensions to 3-5.
・
Set the stitch length to 2.5.
・
Set the differential feed to N.
・
Raise the presser foot and place the fabric
under foot and needle (A).
・
Lower the presser foot.
・
Turn the handwheel counterclockwise for
the rst stitch.
・
Sew
If seam ends in the fabric:
When sewing is completed, turn the
handwheel counterclockwise to bring the nee-
dles into their lowest position (D).
Then turn the handwheel clockwise to raise
the needles to their highest position. This re-
leases the needle thread from the looper.
・
Raise the presser foot.
・
Remove the work carefully towards the left.
・
Cut the threads over the thread cutter (C).
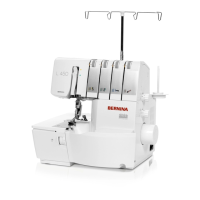
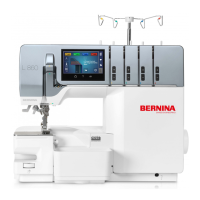
Another way of ending off
・
When sewing is completed, turn handwheel
counterclockwise to bring the needles into
their highest position.
・
Raise the presser foot.
・
Use a small tool (Tweezers, knitting needle)
and pull the needle threads about 14cm (6”)
forward.
・
Cut open the thread loops, remove the
work to the left and cut the looper thread.
・
The seam end is automatically secured.
A
B
C
D
Costura de prueba
Después del enhebrado, hacer una costura
de prueba sobre dos capas de tela para con-
trolar la formación y la tensión del punto.
Costura de prueba
・
Enchufar la máquina y conectarla (interrup-
tor principal a „I“).
・
Regular las tensiones de los hilos: entre 3 y 5.
・
Regular el largo del punto: 3.
・
Transporte diferencial: N.
・
Subir el prensatelas y colocar el tejido de-
bajo del prensatelas y de las agujas (A).
・
Bajar el prensatelas.
・
Girar el volante para clavar la aguja en el
tejido.
・
Coser.
・
Cuando se acaba el trabajo de costura
(siempre en la parte interior del trabajo),
girar el volante a mano en el sentido con-
trario a las agujas del reloj para bajar las
agujas en su posición más baja (B).
Seguidamente girar el volante a mano en
el sentido de las agujas del reloj para subir
las agujas en su posición más alta. Esto
aoja los hilos de la aguja de la lanzadera y
la costura puede abrirse fácilmente.
・
Subir el prensatelas.
・
Sacar cuidadosamente la labor por la parte
izquierda.
・
Cortar los hilos pasándolos por el corta-hi-
los (C).
Costura de prueba–punto de cadeneta
・
Enchufar la máquina y conectarla (interrup-
tor principal a „I“).
・
Regular las tensiones de los hilos: entre 3 y 5.
・
Regular el largo del punto: 2,5.
・
Transporte diferencial: N.
・
Subir el prensatelas y colocar el tejido de-
bajo del prensatelas y de las agujas (A).
・
Bajar el prensatelas.
・
Girar el volante para clavar la aguja en el
tejido.
・
Coser.
Si la costura acaba en el tejido:
Para coser una cadena fuera del tejido des-
pués de acabar el trabajo de costura (como en
el Ovelock), girar el volante a mano en el senti-
do contrario a las agujas del reloj para colocar
las agujas en su posición más baja (D).
Seguidamente girar el volante a mano en el
sentido de las agujas del reloj para subir las
agujas en su posición más alta. Esto afloja
los hilos de la aguja de la lanzadera.
・
Subir el prensatelas.
・
Sacar cuidadosamente la labor por la parte
izquierda.
・
Cortar los hilos pasándolos por el corta-hi-
los (C).
Otra manera de acabar la costura
・
Después de acabar el trabajo de costura
girar el volante a mano en el sentido con-
trario a las agujas del reloj para colocar las
agujas en su posición más alta.
・
Subir el pie prénsatelas.
・
Con una herramienta pequeña (pinzas,
aguja de labores de punto) sacar los hilos
de las agujas unos 14 cm (6”).
・
Cortar los lazos de los hilos, tirar el trabajo
hacia la izquierda y cortar el hilo de la lan-
zadera.
・
La costura está automáticamente jada.