Bertec Corporation Instrumented Treadmill Manual 17
During installation, all of the cables necessary to control the treadmill will be hooked up by the Bertec installation team. The
treadmill start-up procedure is outlined below.
First, make sure all personnel and equipment are clear of the treadmill belts and incline structure, then power on the computer
that is connected to the AM6500-TM unit and start the Bertec Treadmill Control Panel software. Next, verify that the E-Stop
button is not depressed by rotating it clockwise and allowing it to pop up. Turn on the treadmill control electronics by turning
the power switch to the on position. After turning the switch, the power light should blink rapidly. The auxiliary button on the
E-stop pendant will also blink rapidly. At this time the auxiliary button should be pressed and released. The software should
proceed through a start-up sequence that ends with the status of each motor showing "Enabled". The motor light on the control
electronics should display a solid green at this time.
The treadmill is now ready to control. The treadmill is entirely controlled using only two windows: the Control Panel window and
the Settings window.
Control Panel
The Control Panel is broken into two main sections: Belt Control and Incline Control (Incline Control is not displayed if the incline
feature is not available). Also available on the bottom of the Control Panel are the two stop buttons and the Settings button.
Belt Control
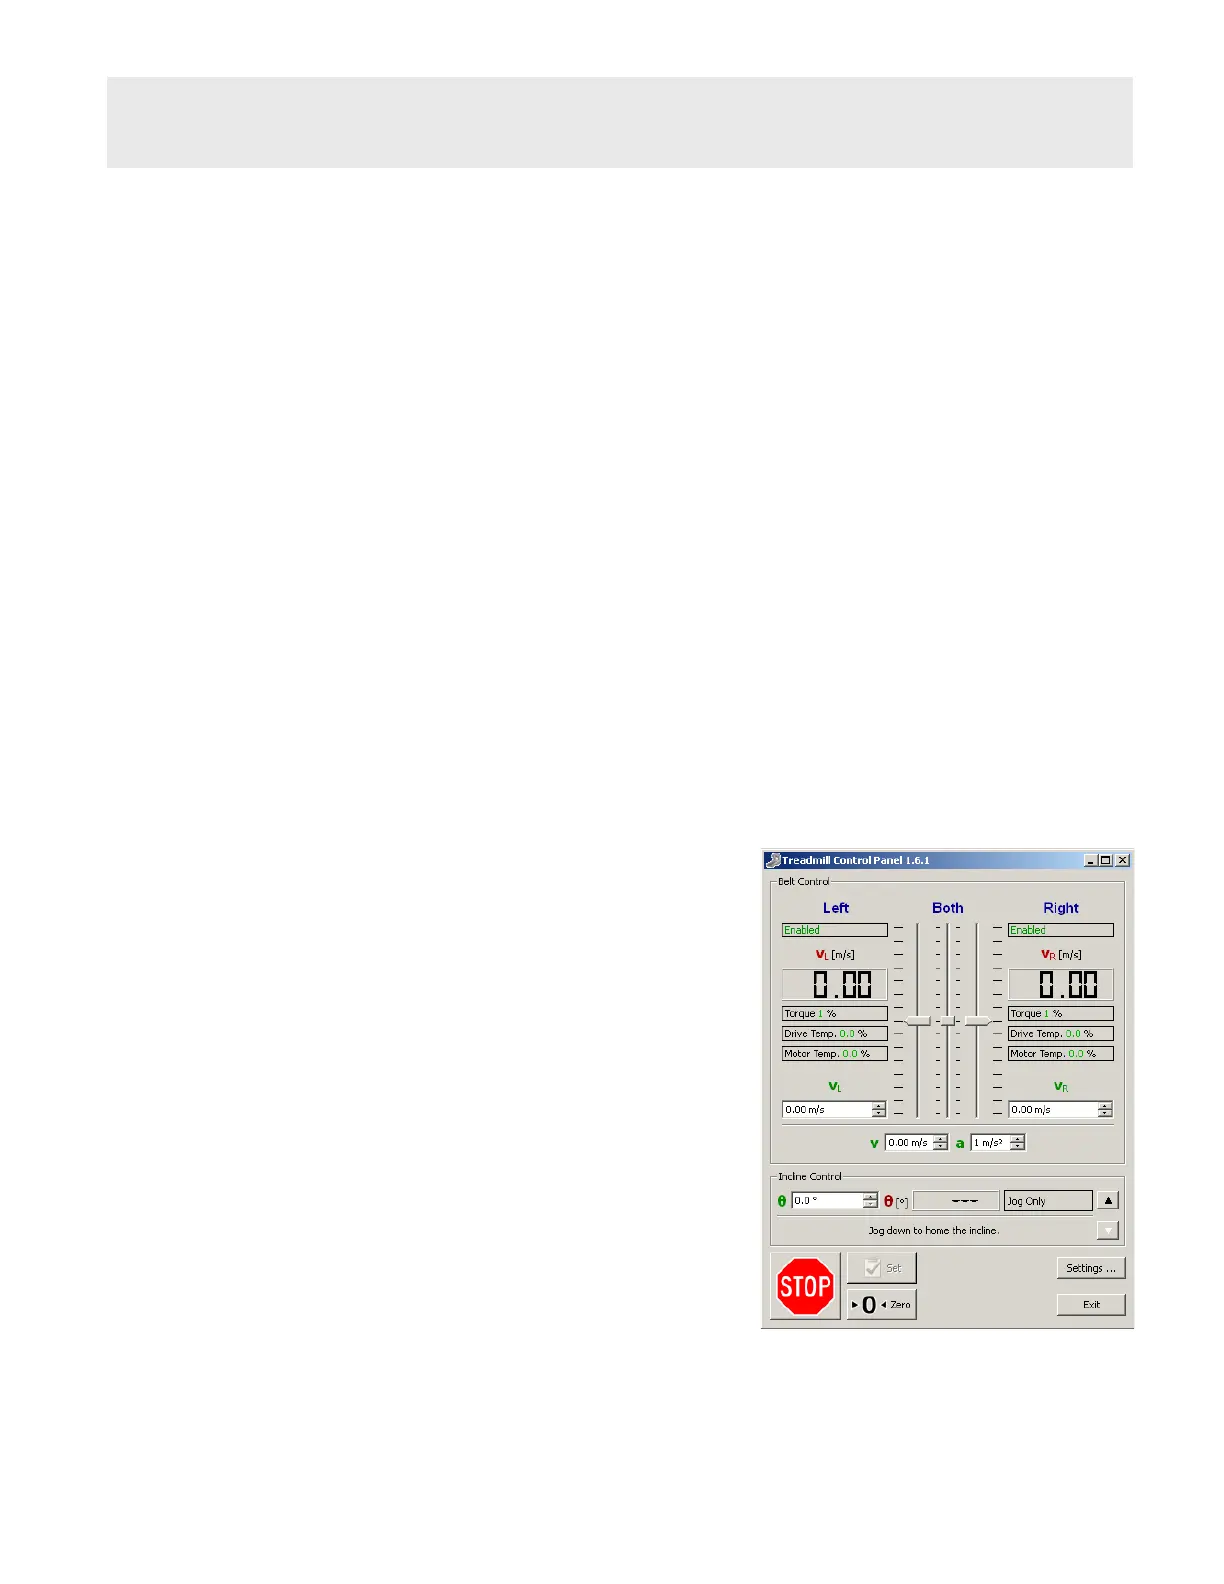
The Control Panel allows the user to direct the belt speed and acceleration.
The top left and right elds indicate if the treadmill is properly connected
and ready to operate by displaying "Enabled".
The middle display elds – VL, VR, Torque, Drive Temp., and Motor Temp.
– provide feedback from the treadmill. The user does not have access to
these elds as they are for reference and diagnostic purposes only. These
velocity elds (labeled in red) display the actual speed(s) the belts are
moving as reported back by the treadmill.
The left and right sides of the treadmill can be controlled independently or
jointly. The vertical slider bars allow for coarse control of the belt velocity.
The individual velocity elds (labeled in green) allow for independent ne
control. Below the independent velocity elds are the joint velocity and
acceleration elds. These elds are used for ne control when running the
treads together. For a description of the alternative control method see the
section on Settings.
Changes to belt velocity and acceleration, independently or jointly run,
can either take effect immediately, or be delayed depending on the option
checked in the Settings window.
Treadmill Start Up
Treadmill Control Panel window