EasyManua.ls Logo

Bestop Trektop NX User Manual

Bestop Trektop NX
31 pages
To Next Page IconTo Next Page
Page #1 background imageLoading...
Page #1 background image
Installation Instructions
Trektop NX
Vehicle Application:
Jeep Wrangler Unlimited (JK) 4 Door
2007 – Current
Part Number: 56823
Before you begin installing your new Trektop NX, please read
all the instructions thoroughly.
For a smooth fit:
For easier installation, the top should be installed at a temperature above
72º F. Below this temperature, the fabric may contract an inch or more,
making it difficult to fit the vehicle.
It is normal for the fabric to contract and wrinkle when stored in the ship-
ping carton. Within a few days after installation, the fabric will relax and the
wrinkles will disappear.
Installation Tips
Safety glasses should be worn at all
times when installing this product.
This product is designed primarily to enhance the appearance of the vehicle and to shield the occupants from ordinary weather conditions. Do not rely in
any way on the components of this product to contain the occupants within the vehicle, or to protect against injury or death in the event of an accident, This product will not protect
the occupants from falling objects. Never operate the vehicle in excess of manufacturer’s specications.
WEAR SEAT BELTS AT ALL TIMES
Read and follow, precisely, all installation instructions provided when installing this product. Failure to do so may result in a poor t and could place occupants of the vehicle in a
potentially dangerous situation.
Tools Installation Time
Skill Level
2 Hours
2 - Moderately Easy
Phillips
Screwdriver
13mm SocketUtility Knife Ratchet
Safety
Glasses
Question and Answer IconNeed help?

Do you have a question about the Bestop Trektop NX and is the answer not in the manual?

Bestop Trektop NX Specifications

General IconGeneral
TypeSoft Top
WarrantyLimited Lifetime Warranty
ColorBlack
CompatibilityJeep Wrangler JK (2007-2018)
FeaturesSunrider Feature
InstallationNo-Drill Installation
WindowsTinted Side and Rear Windows
HardwareIncludes All Necessary Hardware

Summary

Installation Tips

Safety Glasses Reminder

Emphasizes wearing safety glasses during installation.

Critical Safety Warnings

Product Usage Disclaimer

Clarifies product limitations regarding occupant safety and accident protection.

Seat Belt Admonition

Reinforces the importance of wearing seat belts at all times.

Parts List - Sections 1 & 2

Cable Brackets & Rear Bow Brackets

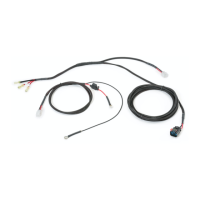
Details parts for installing cable and rear bow brackets.

Parts List - Section 3

Rear Door Surrounds

Lists parts for rear door surrounds.

Parts List - Sections 4 & 5

Knobs, Door Surrounds & Sunrider Brackets

Lists hardware for door surrounds and sunrider brackets.

Parts List - Sections 6, 7, 8 & 9

Top Arches, Tailgate Mounts & Side Bows

Details parts for top arches, tailgate mounts, and side bows.

Parts List - Sections 10, 12 & 13

Foam Seals, Middle Bow, Clip & Web Strap

Lists parts for seals, bows, clips, and straps.

Parts List - Sections 14 & 19

Rear Bow, Tailgate Bar, Fabric Top & Windows

Lists parts for rear bow, tailgate bar, and fabric components.

Section 1: Install Cable Brackets

Step 1: Remove Sport Bar Bolt

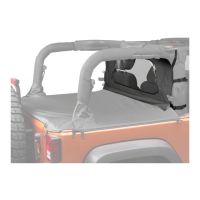
Unzip covers, locate, and remove upper sport bar bolt.

Step 2: Cut Slit in Sport Bar Cover

Cut a slit in the sport bar cover for bracket alignment.

Section 1: Install Cable Brackets (cont.)

Step 3: Mount Cable Bracket

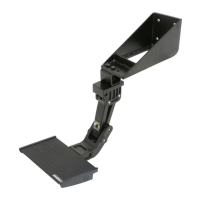
Mount the cable bracket using the removed bolt.

Section 2: Install Rear Bow Brackets

Step 1: Locate Rear Sport Bar Bolt

Locate and remove the rear sport bar bolt.

Step 2: Mark Bracket Position

Loosely install bracket, mark position, and remove.

Section 2: Install Rear Bow Brackets (cont.)

Step 3: Cut Slit for Bracket

Cut a slit for the rear bow bracket.

Step 4: Reinstall Bracket and Zip Covers

Reinstall bracket, tighten bolt, and zip covers.

Section 3: Install Rear Door Surrounds

Step 1: Insert Door Surround Pins

Insert bottom pin into belt rail and top channel around sport bar.
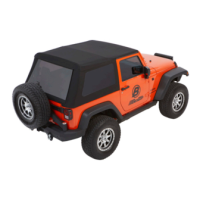
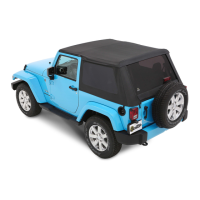
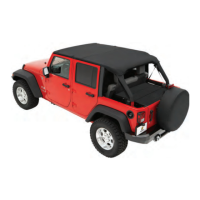
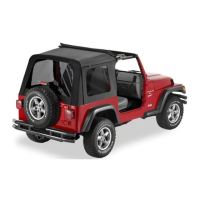
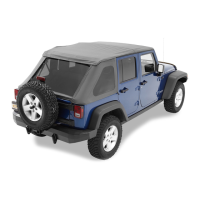
Section 4: Install Front Door Surrounds

Section 5: Install Sunrider Bracket

Section 6: Install Front Top Arch

Section 7: Install Rear Top Arch

Section 8: Install Tailgate Bar Mounts

Section 9: Attach Side Bows to Header/Fabric Assembly

Section 9: Attach Side Bows to Header/Fabric Assembly (cont.)

Section 10: Install Foam Tape Strips and Foam Seals

Section 11: Mount Header Assembly to Sunrider Bracket

Section 12: Install Middle Bow and Bow Clip

Section 13: Position and Secure Middle Bow

Section 14: Open Sunrider and Install Rear Bow

Section 15: Secure Cable Spring

Section 16: Close Sunrider and Secure Header Latch

Section 17: Install Rear Window

Section 18: Install Side Window

Section 18: Install Side Window (cont.)

Section 19: Install and Secure Tailgate Bar

Section 20: Secure Rear Window

Section 21: Secure Header Latches

Related product manuals