MP 030 EL NM GB Copyright BIO-UV - 29/01/2009
Marque, Modèles et Brevets déposés - Produits exclusifs
Page 22
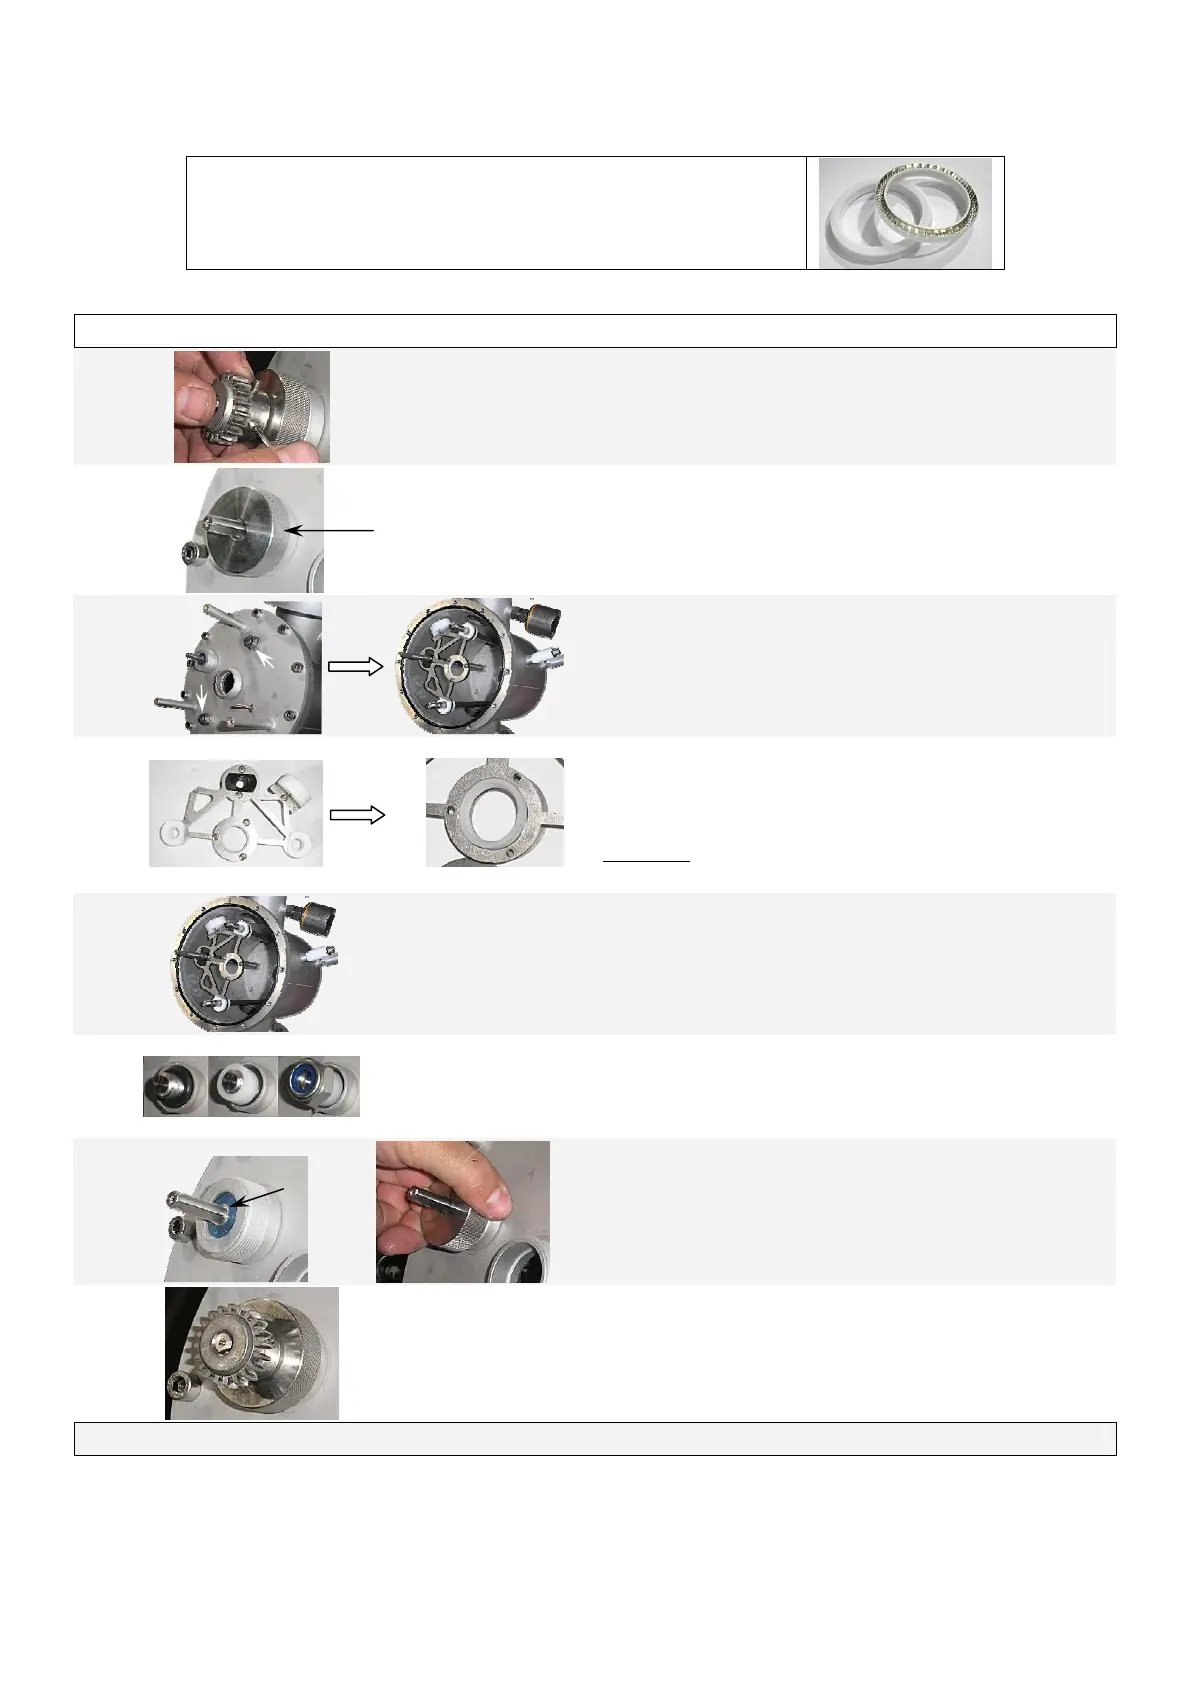
J. CHANGING THE WIPER SEALS
The wiper seal has two faces, which are easy to identify:
- one has a flat white surface,
-
the other has a metal reinforcement.
1
Carry out all the quartz sleeve disassembly operations.
2
Remove the toothed coupling.
3
Unscrew the cleaning shaft nut.
4
Unscrew the cleaning guides (arrows).
Remove the top of the reactor.
5
Remove the cleaning carriage.
Unscrew the wiper seal flange and change the wiper
seal.
Warning: fit the new wiper seal the same way up as
the old one.
6
Refit the cleaning carriage.
Check that the wiper seal is in good position: its metal reinforcement must
be turned towards the reactor bottom.
7
Reassemble the top of the reactor
.
On the cleaning guides, grease and replace the seals then the Teflon rings
and screw the nuts back on.
8
Replace proofing seals and re-tighten the cleaning
shaft nut by hand, tightening it normally.
9
Reassemble the toothed coupling.
10
Repeat the quartz sleeve replacement operations.