1
2
3
EN-17
ENGLISH
InstruCtIons for use
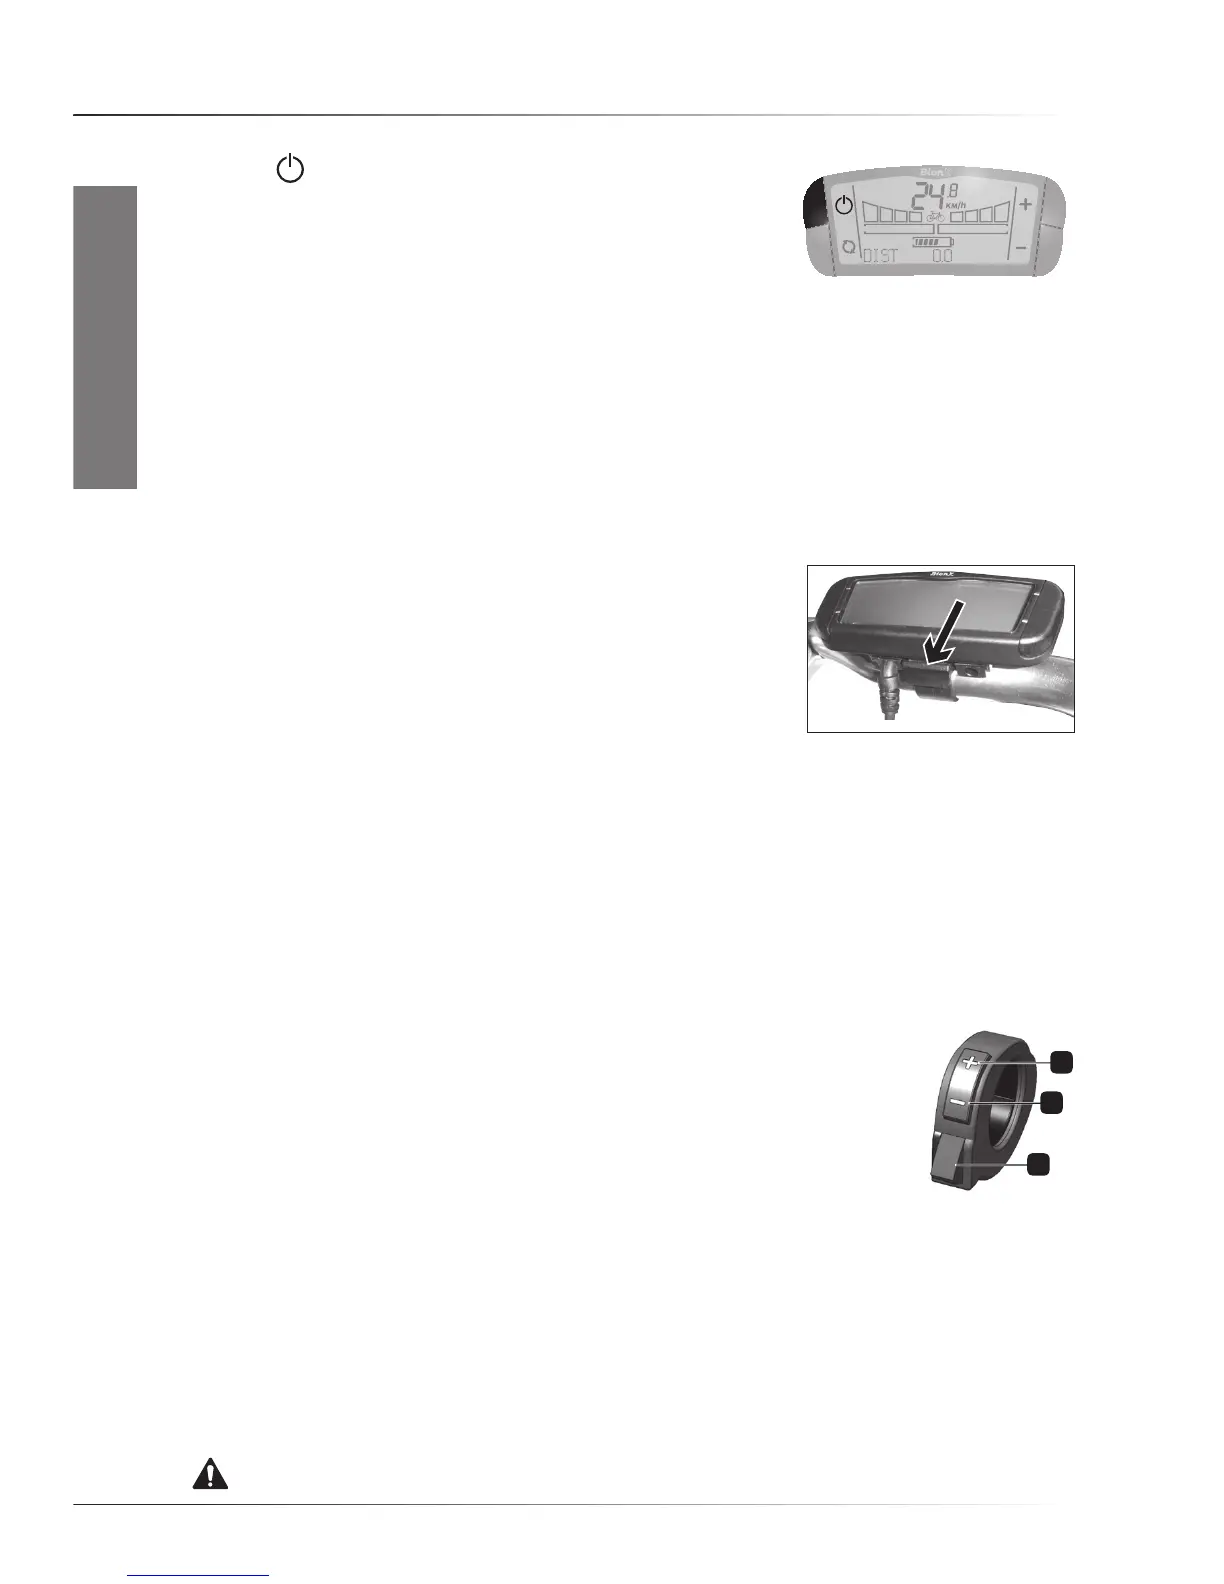
• Switching lights On/Off
Press the
buttonfor2secondstoswitchOn/Offthecontroller
display light, and, if present, the front and rear lights. This switches
on the front light, the rear light, and the backlight in the display.
The lights will stay On even when you stop. Even when the battery
gauge shows ‘empty’, there is enough energy to run the lights for
about two hours. If the battery pack is fully drained, the lights will be powered by the system as it
switchestogenerativemodeautomatically.ToswitchthelightsOff,holdthebuttonfor2seconds.
• Mountain mode
The“MountainMode”allowsforlongeruphillridingbeforethemotorshowspowerreductiondueto
so-called“temperature-derating”.As“MountainMode”limitsthemaximummotortorquethemotor
willstaycoolerforalongerperiodoftime.Selectthisoptionbygoingtoassistancelevel4andthen
press-and-holdthe‘+’buttonfor2seconds.Toreturntoassistancelevel4,pressthe‘-‘buttononce.
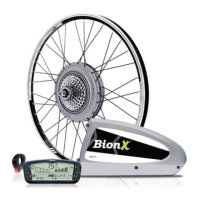
• Removing and installing the BionX G2 controller
ToremovetheBionXG2controllerfromthebike,pressthecatchat
the back of the holder and slide the controller off towards the rear.
ToinstalltheBionXG2controllerontothehandlebar,alignthe
controller with its clamp and slide the controller forward until it
clicks.
NOTICE. To prevent loss of riding information, please make sure that the system is switched Off
before the controller is removed from the bike.
• Unintended removal of controller out of its dock
Ifthecontrollerismovedoffitsclampwhilethesystemisactive(‘On’),thesystemwillnolonger
assist, even when the controller is replaced into its clamp. Please select the correct level of
assistance again to reactivate the system.
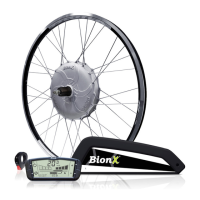
• Using the BionX remote
MostbikeswiththeBionXG2controllerpositionedonthemiddleclampare
equipped(orcanbeequipped)withtheBionXremote.Thisdeviceismounted
either the right or left side of the handlebar and can be used to regulate the
following functions without moving your hands off the handlebar:
1. ‘+’ button Increaseassistlevel(ordecreaseregenerationlevel)
2. ‘-‘ button Decreaseassistlevel(orincreaseregenerationlevel)
3. Throttle button For Pedelecs: walkassistupto3or6km/h(pedalingnot
needed)
For fast E-bikes:assistupto25km/h(pedalingnotneeded)
• Installation of the BionX remote for non-equipped bikes
To connect the BionX remote to the system, the remote connector can be plugged into the receiver
connectorofthecontrollerdocking.Afterthat,thebrakegeneratorconnectorcanbepluggedinto
the remote connector. The red throttle button on the BionX remote is a convenient help to move
thebikewithoutpedaling(upto4km/h)walkingnexttotheE-bike.
WARNING. Beware of unintended use of the throttle button when the system is switched On.