Blackmagic URSA Viewfinder48
Blackmagic URSA Viewfinder is a powerful electronic viewfinder designed for your Blackmagic URSA.
The 1080HD color OLED display and precision glass optics provides a bright, vivid, and lifelike image
so you can quickly find focus and see the finest detail in your images.
This viewfinder is perfect for handheld operation on the shoulder, or for environments where you
need absolute precision with zero reflection and light glare, for example in extremely bright shooting
conditions.
The viewfinder is connected and powered by the camera and uses the embedded SDI data from the
camera to generate the various display options. This means that your camera can output a clean SDI
feed to the viewfinder but still allows you to toggle various display options within the viewfinder for
quick access to camera status, plus accurate information.
For example, if you select the ‘2.40:1’ frame guide option in URSA’s menu, it will actually tell the
viewfinder which frame guide is selected in the camera so when you toggle the frame guide display
on the viewfinder, the same ‘2.40:1’ frame guide is also displayed.
Mounting and Connecting to Blackmagic URSA
To attach the Blackmagic URSA Viewfinder to the camera body, slide it along the handle ridges and
tighten the thumb screw to one of the 3/8" mounting points.
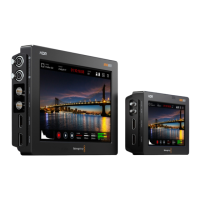
To connect your URSA Viewfinder to your URSA, simply connect the viewfinder's attached cables to
URSA's front 12V power and 3G-SDI outputs. Your URSA Viewfinder will turn on automatically when
your camera is powered.
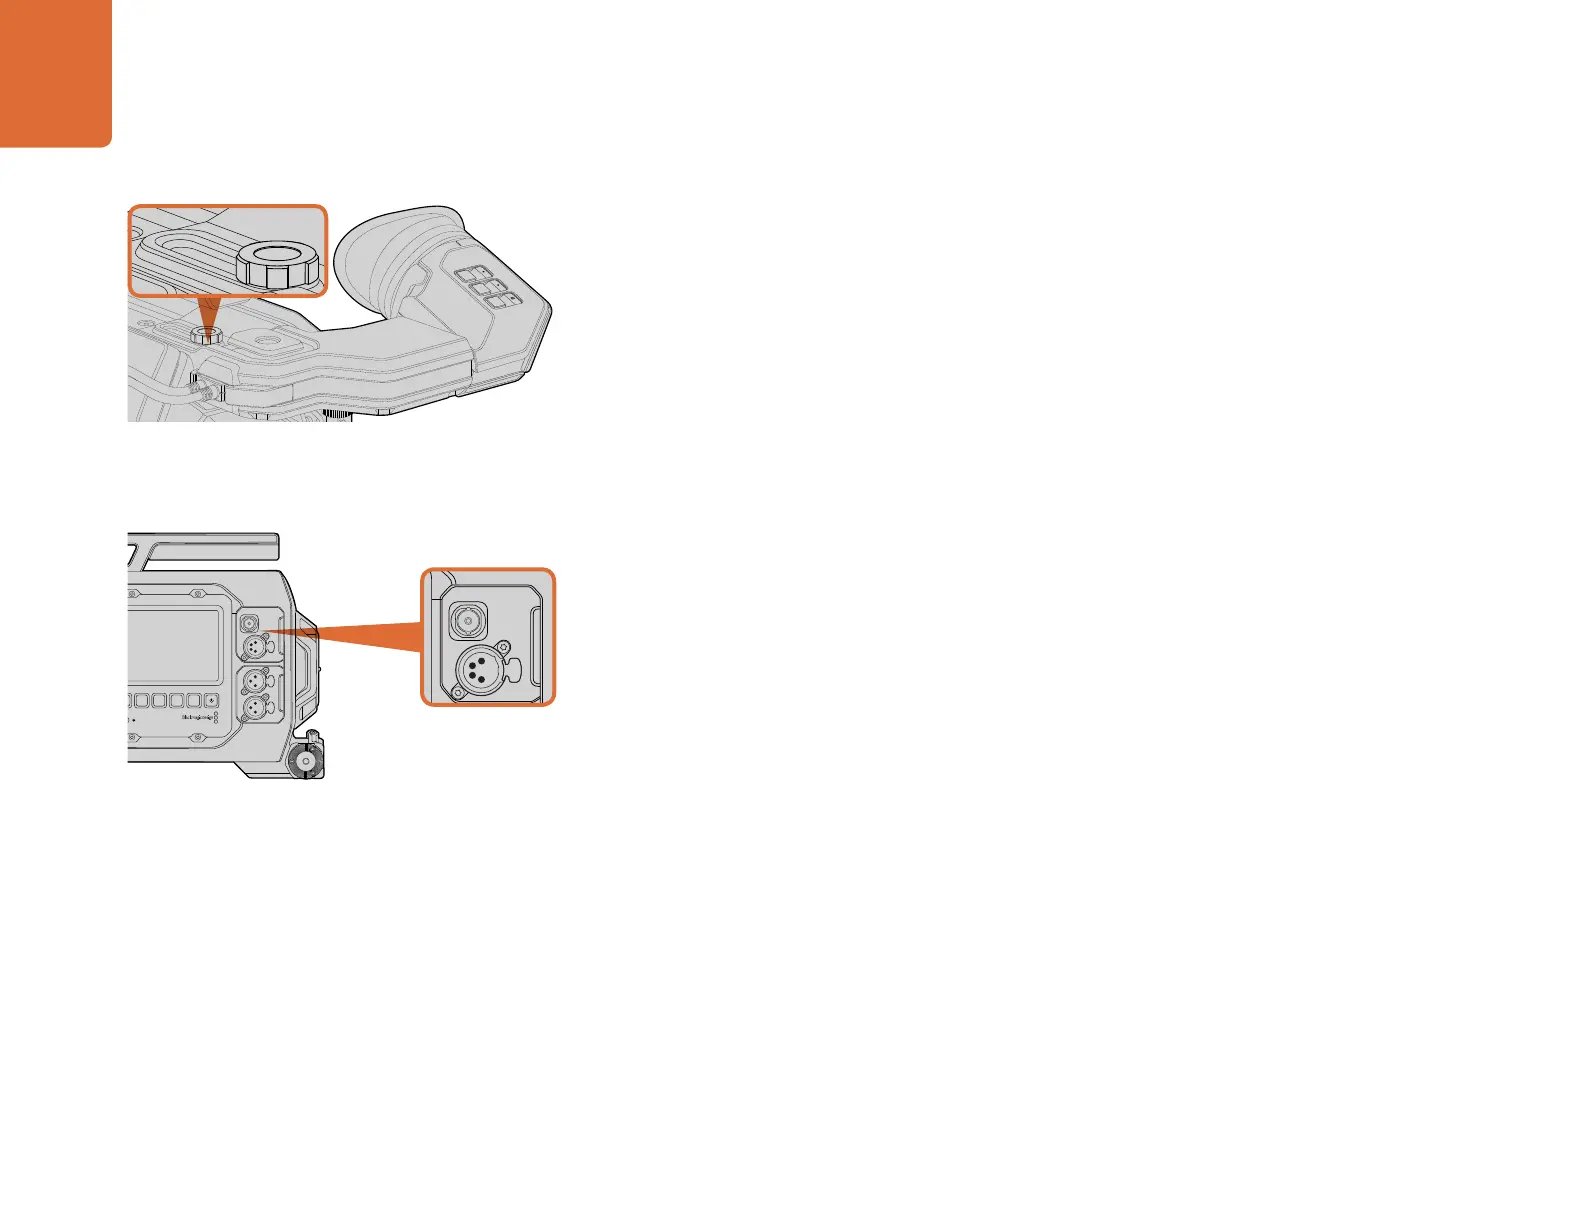
Adjusting the Eyepiece
The detachable rubber eyepiece can be adjusted to fit your left or right eye. Adjust the viewfinder arm
by loosening the knob on the bottom of the arm and sliding it left or right to comfortably fit your eye.
Button Features
On the top of the viewfinder you'll find the zoom, display and peak buttons. These buttons are used
for zooming into your image, and turning overlays and focus peaking on or off.
They are also used for additional features, such as opening the menu and navigating settings. Icons
printed on the side of the buttons show you which buttons are used to control the viewfinder menu
and navigation features. The buttons also have a customizable function feature so you can assign
shortcuts to quickly enable common features you may use frequently. For example you may wish to
assign the false color feature to the zoom button. Refer to the 'shortcuts' section for more information.
SDI OUT
12V OUT
IRIS
L R
REF IN
TIMECODE IN
TIMECODE OUT
12V
CH1
SOLO
CH1
MUTE
CH2
MUTE
CH2
SOLO
FOCUS
PEAK
DISP
MENU
SLATE
0
-6
-12
-18
-24
-30
-36
-42
-48
SDI OUT
SDI IN
AUDIO IN
2
ZOOM
F1
F2
F3
DISP
PEAK
To mount your Blackmagic URSA Viewfinder to your URSA,
slide the viewfinder mount along your camera's handle ridges
and tighten the thumbscrew to a 3/8" mounting point.
Connect your viewfinder's SDI and power cables to your
URSA's HD-SDI monitoring output and +12 volt output.
Blackmagic URSA Viewfinder
REC
ZOOM
DISP
PGM
1
CFAST
IRIS
FOCUS
REC
IRIS
FOCUS PEAK DISP MENU SLATE
2
IRIS
L R
REF IN
TIMECODE IN
TIMECODE OUT
12V
CH1
SOLO
CH1
MUTE
CH2
MUTE
CH2
SOLO
FOCUS
PEAK DISP MENU SLATE
PUSH PUSHPUSH
0
-6
-12
-18
-24
-30
-36
-42
-48
SDI OUT
SDI IN
REC
ZOOM
DISP
PGM
1
CFAST
IRIS
FOCUS
REC
IRIS
FOCUS PEAK DISP MENU SLATE
2
IRIS
L R
REF IN
TIMECODE IN
TIMECODE OUT
12V
CH1
SOLO
CH1
MUTE
CH2
MUTE
CH2
SOLO
FOCUS PEAK DISP MENU SLATE
PUSH PUSHPUSH
0
-6
-12
-18
-24
-30
-36
-42
-48
SDI OUT
SDI IN
SDI OUT
12V OUT
IRIS
L R
REF IN
TIMECODE IN
TIMECODE OUT
12V
CH1
SOLO
CH1
MUTE
CH2
MUTE
CH2
SOLO
FOCUS
PEAK
DISP
MENU
SLATE
0
-6
-12
-18
-24
-30
-36
-42
-48
SDI OUT
SDI IN
AUDIO IN
2
ZOOM
F1
F2
F3
DISP
PEAK