22
Adjusting Network Settings
22
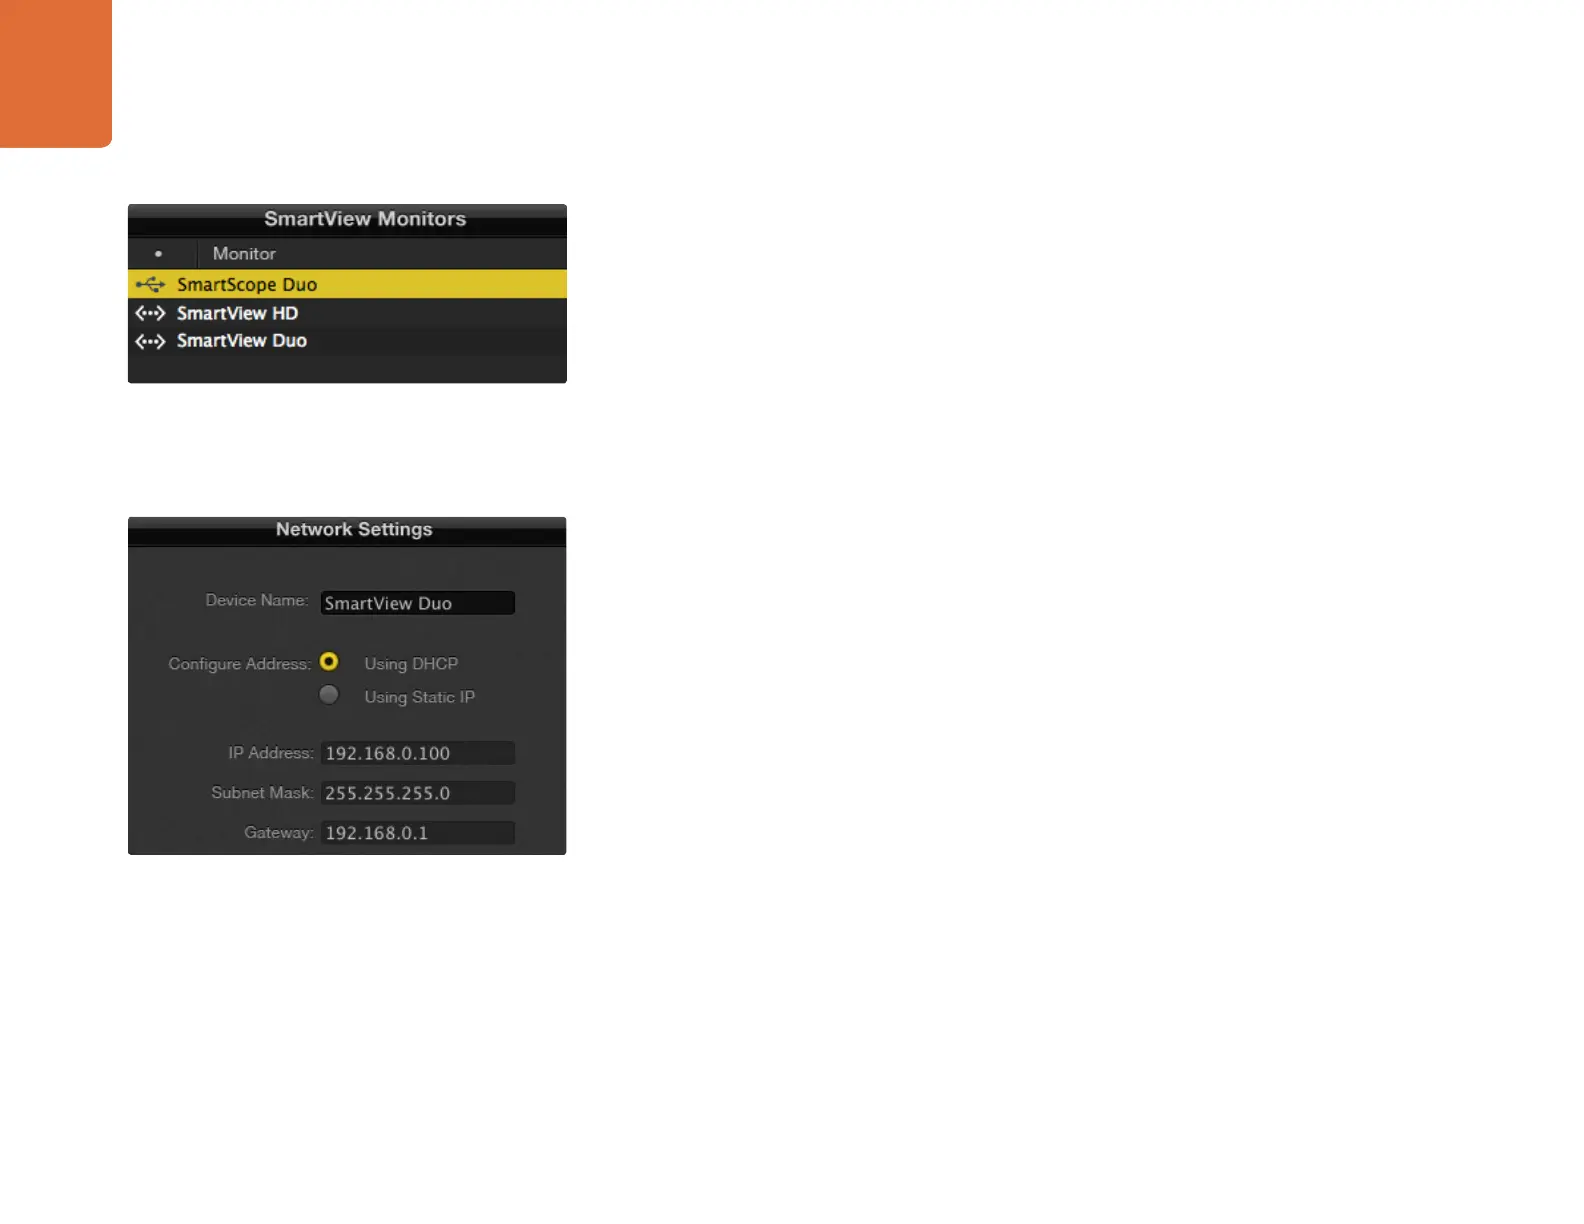
Network Settings Pane
Device Name
It is a good idea to change the default device name so each SmartView or SmartScope unit is easy to
identify on a network, e.g., "Field Cameras 1&2", "Multi-View Output", "2K feeds" etc.
To change the device name, select the desired SmartView or SmartScope unit from the SmartView Monitors
pane and edit its name in the Network Settings pane. You can use make changes to the device name when
connected to the unit via Ethernet or USB.
If the software detects an invalid device name, the text will turn red as you are typing.
Configure Address
To make changes to the network settings, you must be connected to the unit via USB. Network settings
cannot be changed via Ethernet.
By default, SmartView and SmartScope use DHCP to automatically obtain an IP address from your network.
In the absence of a DHCP server, you may wish to enable the "Internet Sharing" feature of Mac OS X, or the
"Internet Connection Sharing" (ICS) feature of Windows 7 or Windows 8, to provide DHCP addresses to any
directly attached units. This will avoid having to manually assign static IP addresses to each unit. You can use
this feature to provide DHCP addresses even though your computer might not have an Internet connection.
Internet sharing is detailed in the Mac OS X and Windows 7 Help documentation.
If DHCP cannot be used in your configuration, choose to configure the address "Using Static IP". Please ask
your system administrator for a spare IP address to avoid creating an IP conflict on your network. You will
need to specify a unique IP address for each SmartView and SmartScope unit as well as a common subnet
mask. It is unnecessary to change the default value in the "Gateway" field unless you intend to connect your
units to a network gateway such as an Internet router.
If no SmartView or SmartScope monitors are found on the network, the units might not have received
IP addresses via DHCP and it will be necessary to manually configure each unit with appropriate
network settings.
Step 1. Connect a SmartView or SmartScope to your computer with USB and launch the Blackmagic
SmartView Utility
Step 2. The attached unit will be automatically selected in the SmartView Monitors pane and will show a
USB icon next to its name.
Step 3. Change all device name, network settings and monitor settings for the USB attached unit.
Step 4. Repeat these steps for any other units that have not received an IP address via DCHP.
Network settings can be set to use DHCP or a Static IP address
and can only be changed via USB.
The selected SmartScope Duo is connected locally via USB. The
Ethernet icons next to SmartView HD and SmartView Duo units
show they are connected through a network.