25
Optimizing the Viewing Angle
25
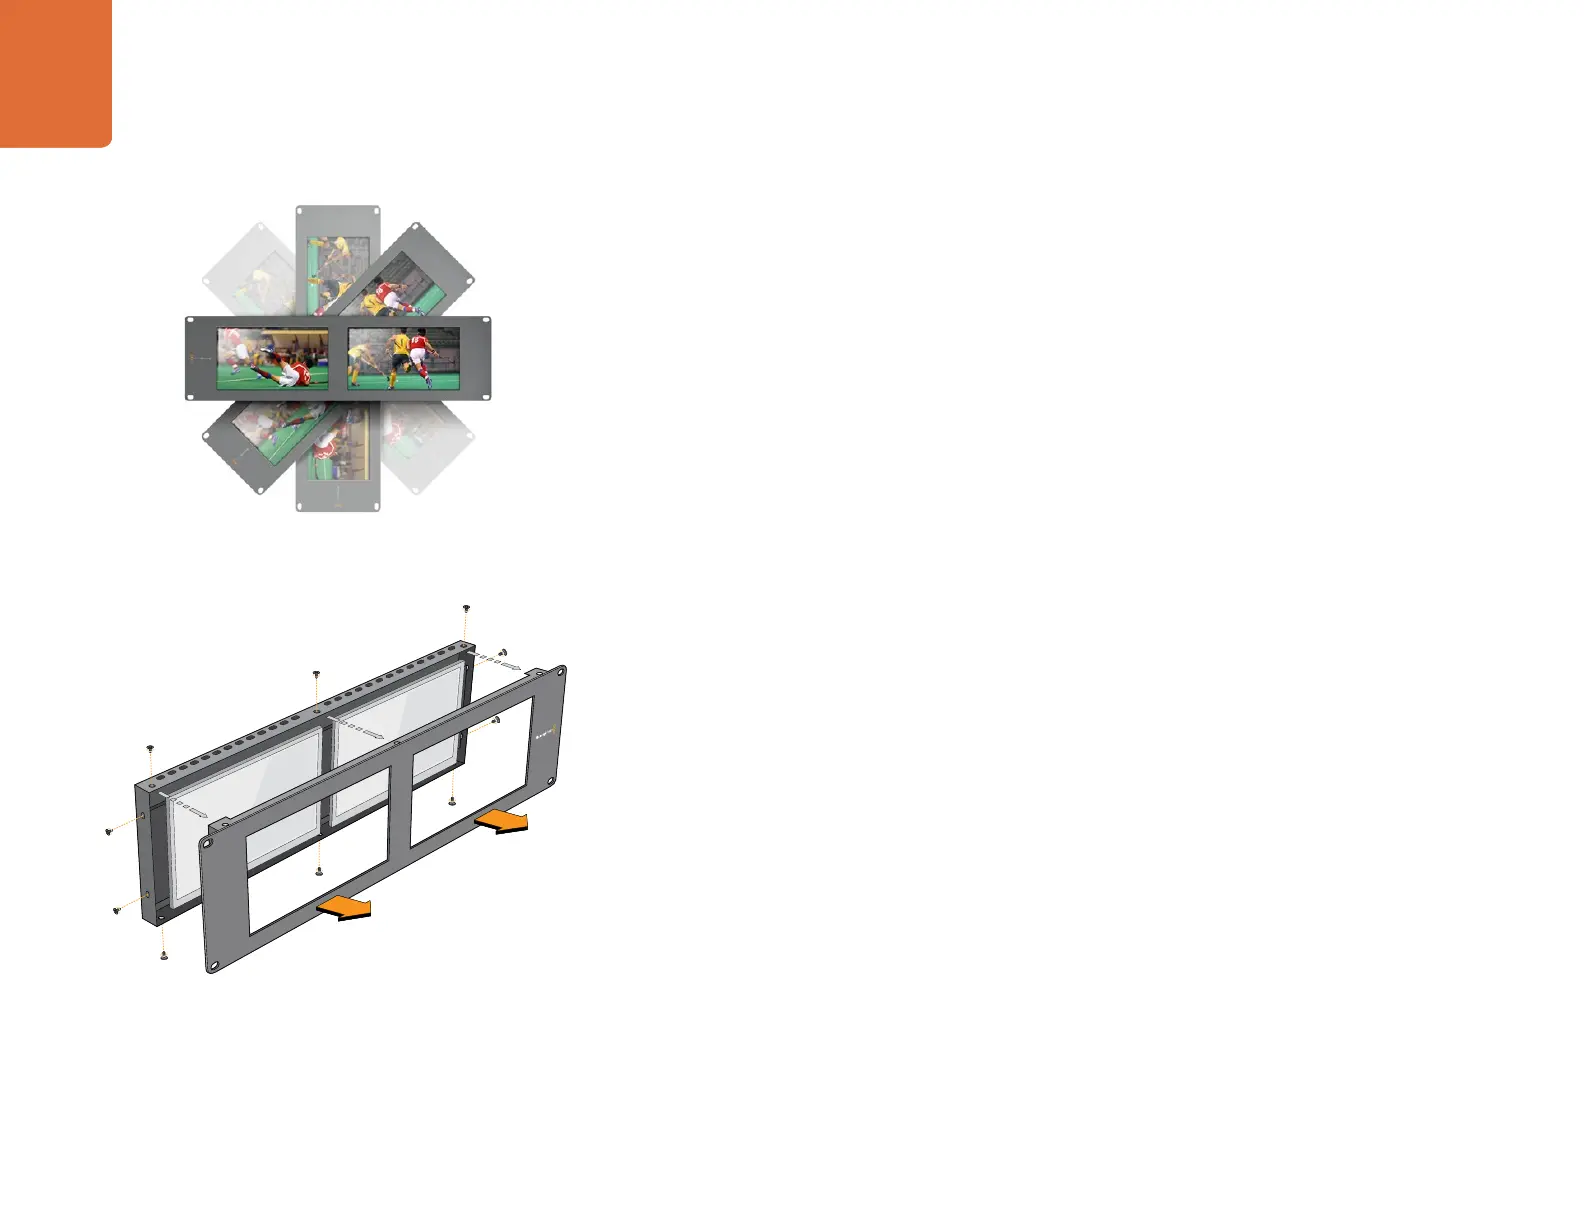
If SmartView or SmartScope is to be installed high up in an equipment rack, you may wish to physically
invert the LCDs for the optimum viewing angle. The images on the LCDs will automatically flip to the correct
orientation when they sense an inversion. A number 02 size Pozidriv screwdriver is required to disconnect and
reconnect the faceplate from its rear assembly. This is a simple procedure and does not involve opening the
rear assembly.
The following procedure describes how to invert the unit while keeping the Blackmagic Design logo in the
correct orientation on the faceplate. A number 02 size Pozidriv screwdriver is required.
Step 1. Remove the screws from the top, bottom, left and right sides of the faceplate. SmartView Duo
and SmartScope Duo have 10 screws and SmartView HD has 18 screws.
Step 2. Lift the front faceplate away from the rear assembly as illustrated.
Step 3. Invert the rear assembly.
Step 4. Reinstate the faceplate on the inverted rear assembly.
Step 5. Reinstate the screws in the chassis.
Your SmartView or SmartScope is now ready to be installed high up in a rack. Once bolted into a rack,
SmartView will continue to display the optimum viewing angle even if bumped, as there are no external
knobs or adjustments to mishandle or to come loose.
You may wish to perform a test inversion, to check the optimum
viewing angle, before bolting your unit high up in a rack.
Remove all the screws to lift the front faceplate away from the
rear assembly