Main Rotor Blade Tracking Adjustment
CAUTION: Be sure to maintain a safe distance from the helicopter (approximately 10–15 feet) and to wear
appropriate eye protection (such as safety goggles) when tracking the main rotor blades to avoid injury.
Blade tracking is a critical element to the flight performance of just about any helicopter, including the Blade SR. Main
rotor blades that are out of track may cause vibration, instability, and loss of power. Although each Blade SR model is test
flown and tracked at the factory, you may need to adjust blade tracking after blade changes, repairs, or pitch control link
adjustments.
To check main rotor blade tracking and make any required adjustments, please note the following tips:
Before proceeding with the test flight of a new model, or any model to which changes or repairs have been made, be •
certain that the main rotor blades have been properly installed and secured. The main blades should be tightened so
they can pivot in the blade grip when moderate pressure is applied. Never allow the main blades to swing freely in their
grips.
After powering the model on and allowing the 2-in-1 unit and gyro to arm and initialize properly, bring the main rotor •
blades of your Blade SR up to speed. You can check the blade tracking either on the ground or in the air at eye level. It
might be a good idea to have an assistant on hand to help sight the blades. Again, be certain to maintain a safe distance
of approximately 10–15 feet from the helicopter when checking the tracking of the main rotor blades.
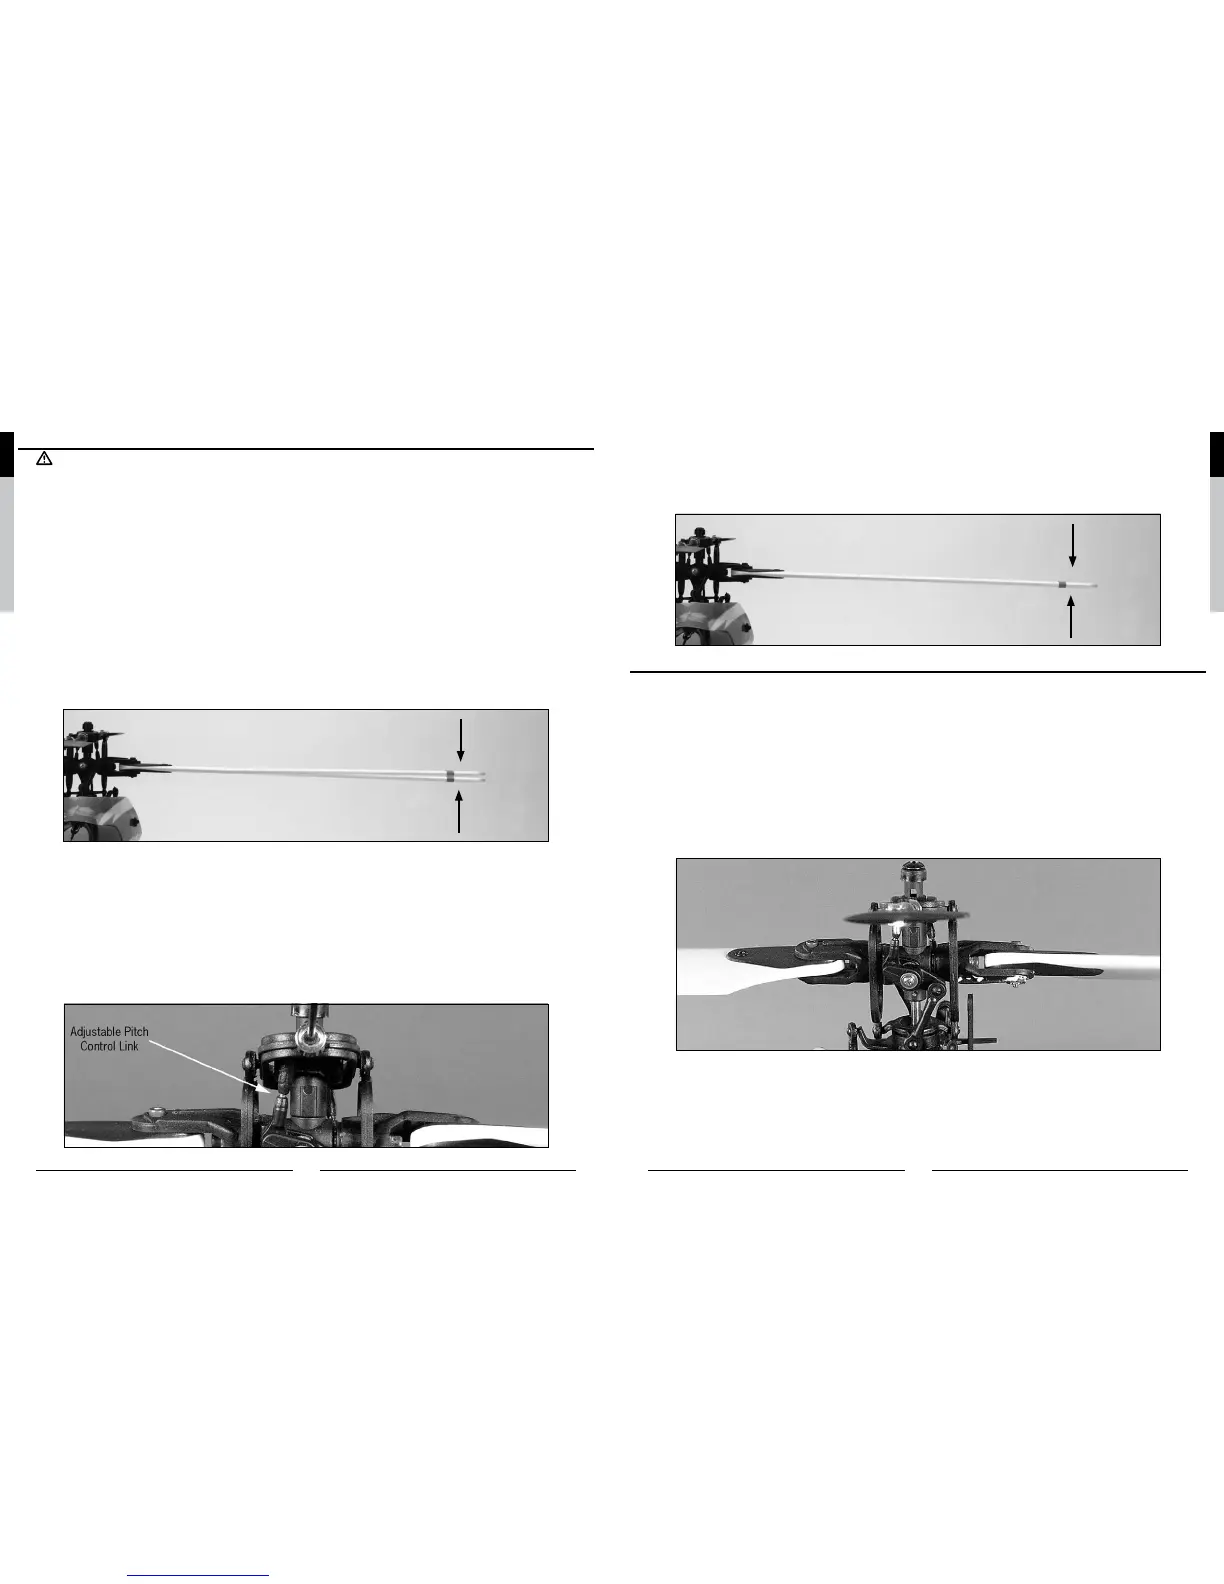
Once the main rotor blades have been brought up to speed, note which blade is running low and which blade is running •
high (by the colored tracking tape).
Blades Out of Track - Adjustment Necessary
After confirming which blade is running low and which is high, power down the helicopter in order to make any necessary •
adjustments to the linkages. You can increase the pitch of the low blade by lengthening its pitch control linkage. This is
accomplished by turning one of the Ball Link ends out by one-half to one full turn. Or, you can decrease the pitch of the
high blade by shortening the linkage.
Note: The blade you choose to raise or lower when making tracking adjustments will depend on the pitch of each blade.
Because both rotor blades should be as close to 0 degrees as possible when throttle hold is activated (DO NOT
attempt to check for 0 degrees pitch in the normal or stunt/idle up flight modes) and the throttle/collective stick is
in the middle position, you can easily identify which rotor blade to adjust.
If one blade is “lower” than 0 degrees, raise it to match the other blade. If one blade is “higher” than 0 degrees, lower it
to match the other blade.
Typically, not much adjustment should be necessary to properly track the main rotor blades. If significant adjustments are
required, be sure to double-check the length of both pitch control links (they should be close to the same length). You should
also check the blades for any warps or twists. In most cases, you should be able to get both blades tracking perfectly in
the same plane. However, due to slight variations in the ball links and threaded linkage rods/pushrods of the pitch control
linkages, it may not always be possible to achieve absolutely perfect blade tracking. Don’t worry, as the helicopter should
still perform well as long as the blade tracking is adjusted as closely as possible.
Blades In Track - No Adjustment Necessary
Flybar Paddle Tracking Adjustment
While main blade tracking is a critical element of flight performance, proper flybar paddle tracking and positioning is also
important in maintaining proper control response and vibration-free operation.
To check flybar paddle tracking, positioning and making adjustments, please note the following tips.
Confirm that both flybar paddles are equally spaced from the ends of the paddle control frame. If they are not equally •
spaced, adjust the position of the flybar by loosening the setscrews located in the paddle control frame, then sliding the
flybar from side to side until they are.
Be certain that both flybar paddles are parallel to the paddle control frame. If they are not, loosen the screws and nuts in •
the flybar paddles and twist the paddles until they are properly aligned and parallel with the paddle control frame.
If you have made certain that both flybar paddles are parallel to the paddle control frame arms, they should now be •
parallel to one another. If they are not, take your time making adjustments in order to ensure that both flybar paddles are
positioned parallel to one another and the paddle control frame.
Once you have properly positioned and aligned the flybar paddles following these tips, be certain they are firmly secured •
using the screws, washers and hex nuts.