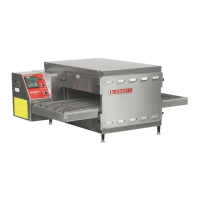
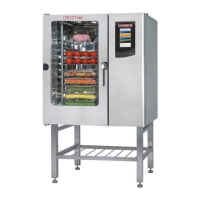
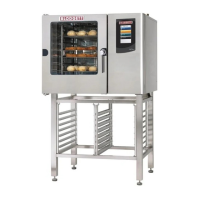
Operation
13
Solid State Digital Control
OPERATION
Cook Only:
1. Turn SELECTOR switch (1) to t he desired po-
sition.
2. Enter the cook time and temperature.
3. Load product into oven.
NOTE: The display reads LOAD with the oven
is near the set temperature.
4. Press the START/STOP key (7). The timer be-
gins to count down.
5. When the cook t imer reaches 00:00 the buzz-
er sounds and the display reads DONE.
6. Press the START/STOP key (7) to silence t he
buzzer.
7. Remove th e product.
Cook with Hold:
NOTE: HOLD light is on when hold mode is on
and off when hold mode is off.
1. Turn SELECTOR switch (1) to t he desired po-
sition.
2. Enter the cook time and temperature.
3. Press the HOLD key (10). Enter the h old t em-
perature.
4. Load product into oven.
NOTE: The display reads LOAD with the oven
is near the set temperature.
5. Push the START/STOP (7) key. Timer begins
to count down.
6. When the cook t imer reaches 00:00 the buzz-
er sounds and the display reads DONE. The
buzzer turns off after a few seconds. The dis-
play reads HOLD until the oven reaches the
hold temperature. Then the timer begins to
count up.
7. Push the START/STOP k ey (7) to s top t imer.
8. Remove th e product.
9. Push HOLD (10) key t o turn off hold mode.
Cook with Pulse:
NOTE: PULSE light is on when pulse mode i s on
andoffwhenpulsemodeisoff.
1. Turn the SELECTOR SWITCH (1) to the de -
sired position.
2. Enter cook time and cook temperature.
3. Press PULSE KEY (11). Enter t he pulse time.
NOTE: Pulse time is a portion of the cook time
and does not increase the previously
entered cook time.
4. Load product into oven.
NOTE: The display reads LOAD with the oven
is near the set temperature.
5. Push START/STOP KEY (7). The timer begins
to count down the cook time. The oven will be
inpulsemodeforthesetpulsetime.Oncethe
set time has expired, the unit will automatically
switch to cook mode and continue counting
down.
6. When the cook t imer reaches 00:00 the buzz-
er sounds and the display reads DONE.
7. Push the START/STOP KEY (7) to turn the
buzzer off.
8. Remove th e product.