33
AT6020
Setting the Implement for eld operation:
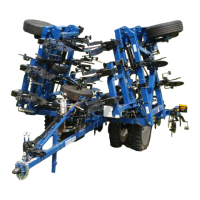
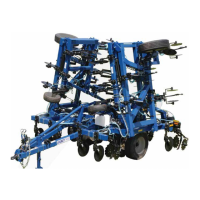
BLU-JET StripTill Implement
1. Run the implement in the eld for approximately 100 feet (making sure the tractor reaches the
speed at which you wish to operate the machine). Stop while leaving the shanks in the ground.
2. Check for your desired shank depth on a middle row and on each wing. Shank depth should
be at least 4” from ground level (6”-8” is optimum fertilizer placement depth for corn in most areas).
Adjust the mainframe and wing wheels accordingly and repeat steps 1&2 until desired depth
across the machine is achieved.
3. Ensure the frame is level from front to back when the shanks are in the ground at the depth you
have chosen.
4. Walk to the back of the machine
a. Check for uniformity on the strips from row to row. Below: are items to look for.
i. Fall Operation (In areas with a good freeze-thaw over the winter):
1. Top of the berm should be at a minimum height of 4” from ground level
(expect it to mellow 2”-3” over the winter)
2. Berm should be 8”-10” wide
3. There should be little to no residue within the strip (if using Residue Managers)
4. The top of the berm should be slightly attened and most dirt clods
should be no larger than your st (if using baskets on a light setting).
ii. Fall Operation (In areas with little to no freeze-thaw over the winter):
1. Top of the berm should be at a height of 2”-3” from ground level (expect
it to mellow 1”-2” with winter moisture)
2. Berm should be 8”-10” wide
3. There should be little to no residue within the strip (if using Residue Managers)
4. The top of the berm should be moderately at and most dirt clods should
be no larger than a golf ball (if using baskets on a medium setting)
iii. Spring Operation (all areas)
1. Top of the berm should be at a height of 1”-2” from ground level
2. The berm should be 8”-10” wide
3. There should be little to no residue within the strip (if using Residue Managers)
4. The top of the berm should be at and soil should have a nished look,
ready for planting.
b. If you see uniformity in the strips across each row, and they are as described above
based on the season and climate in which you are running, you are ready to proceed with
normal operation.
5. If you do not see uniformity in the strips from row to row, pick one of the strips that looks like
the description above and use it as an example row. Set the components on the other rows
similar to your example row. Below are some of the component settings to check.
a. Coulters
i. Look across the tops of the coulter shanks to see if they are set at equal depth.
1. Blades should be running 3”-4” in the ground
2. Be sure the coulter is not set so deep that the hub is running in the ground
ii. If the implement has been used before, check the coulter blades to make sure they
have similar wear.
b. Residue Managers
 Loading...