Retrofit/Installation kit No. 65 90 0 025 169 Issue date: 10.2001
Installation instructions No. 01 29 0 030 090
EN/16
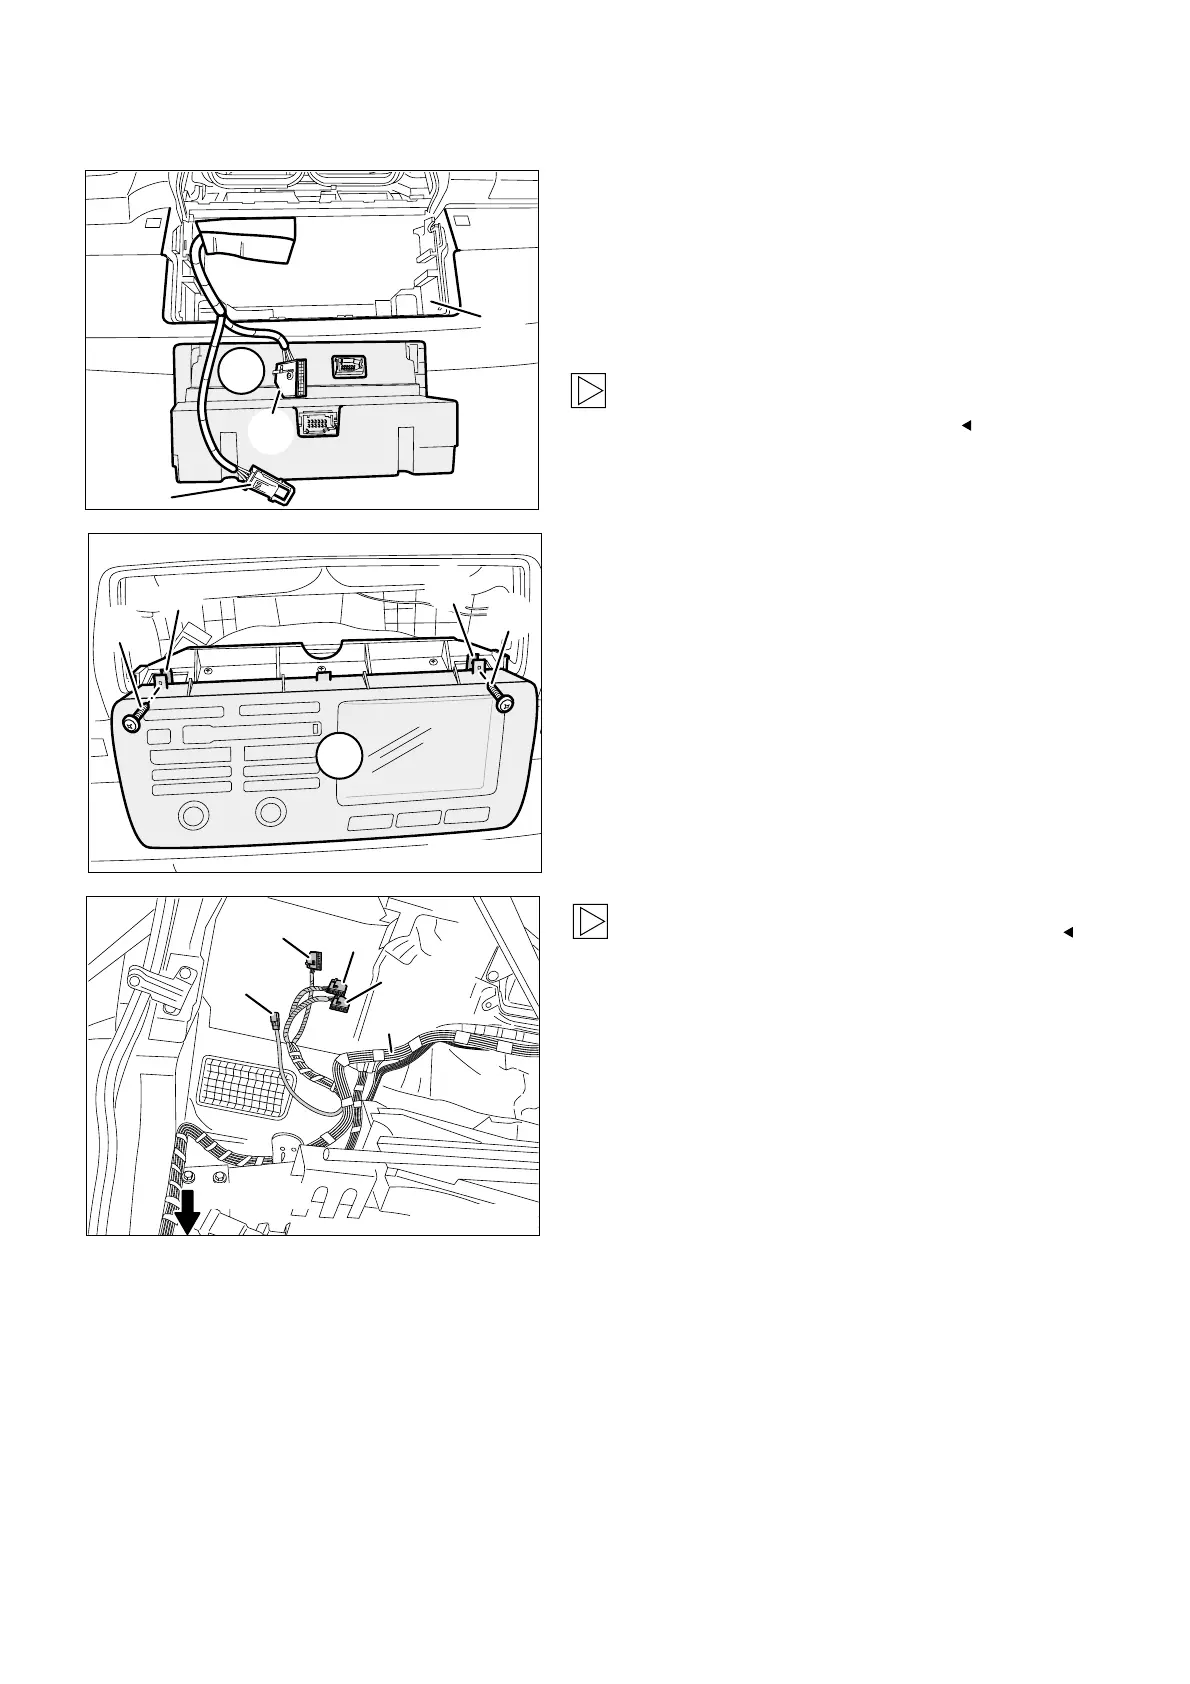
7. To install the on-board monitor wiring harness and on-board monitor
Connect branch A1, blue 12-pin socket casing
on the on-board monitor wiring harness A, to the
on-board monitor (9).
Connect branch A2, white 12-pin socket casing,
to the on-board monitor (9).
Then insert the cables into the radio module
holder (42) and carefully slide the on-board
monitor (9) into position until it engages.
As you slide in the on-board monitor, ensure
that you do not damage any cables.
F 53 0731 B
A2
A1
9
42
Secure the on-board monitor (9) to the speed
nuts 4.2 mm (11) on the top on-board monitor
holder with two fillister head self-tapping screws
and washers (12).
F 53 0733 B
A21
A22
A23
A
A24
A11-A20
The figure shows the rear left of the boot.
Lay branches A21 to A24 of the on-board wiring
harness A to the installation site of the
navigation computer.
If the car is fitted with a basic interface
telephone 2 (BIT2), connect branch A21,black
6-pin plug casing, to the black 6-pin socket
casing on the basic interface telephone 2 (BIT2).
If the car is not fitted with a basic interface
telephone 2 (BIT2), insulate and tie back
branch A21.
Lay branches A11 to A20 along the standard
wiring harness through the cable duct on the
closing plate to the right-hand side of the car
and secure them with cable ties.