22 / 52
300 301 303 304 305 306 307 309
310
310M
311
311M
313
313M
314
314M
315
315M
316
316M
317
317M
318
318M
319 321 323 325
M6 M6 M8 M8 M8 M10 M10 M16 M16 M16 M16 M20 M20 M20 M20 M20 M24 M27 M30 M30
8 10 12 12 12 9 12 8 8 10 10 15 15 15 16 20 18 16 21 24
10.9 10.9 10.9 10.9 10.9 10.9 10.9 10.9 10.9 10.9 10.9 10.9 10.9 12.9 12.9 12.9 10.9 10.9 10.9 10.9
12 12 30 30 30 58 58 250 250 250 250 490 490 570 570 570 840 1250 1640 1640
Bolt
Quantity
Class
Tightening
torque [Nm]
314M...318M
(2)
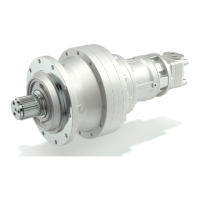
Clean and degrease both the internal coupling surface of the gear unit shaft and the external cou-
pling surface of the machine’s driven shaft.
Mount the shrink disk to the gear unit’s shaft after lightly lubricating its entire outer surface.
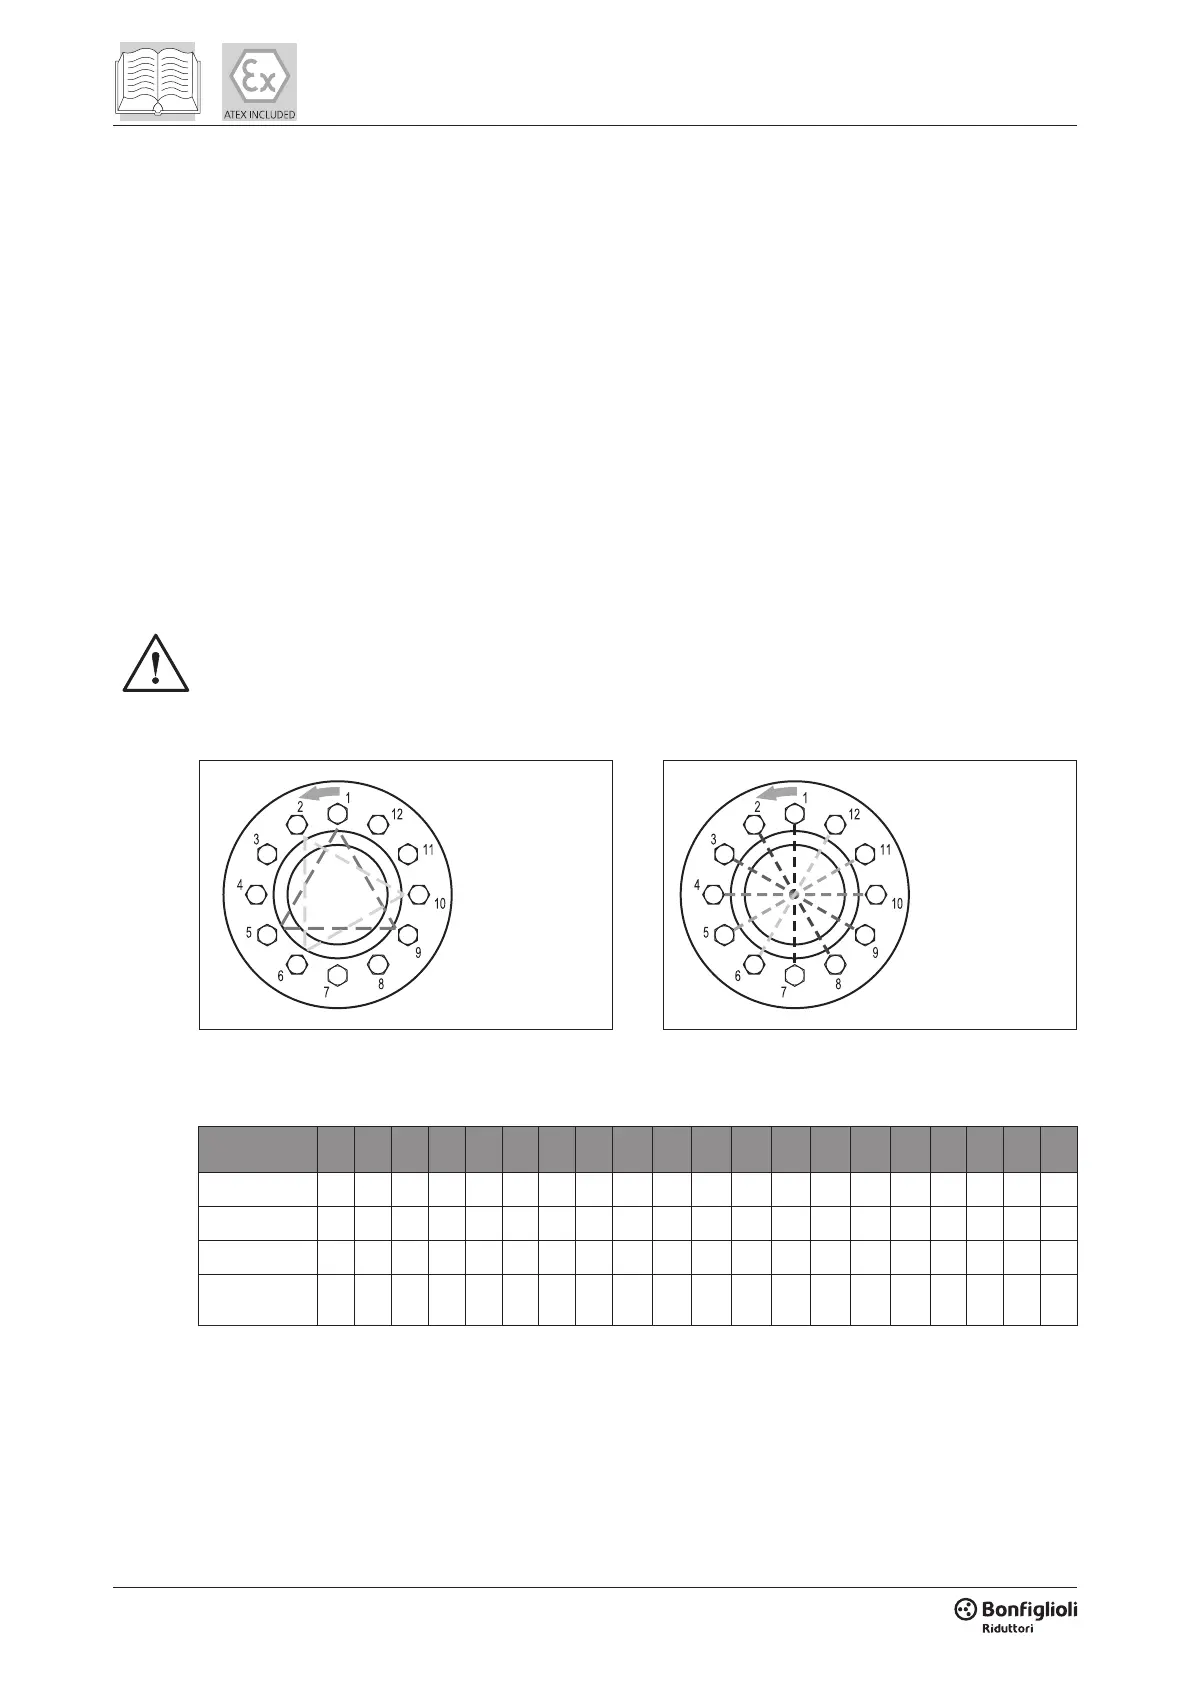
Mounting sequence for shrink discs with gear units sizes 300-313 , 310M-313M
• Snug down a rst set of 3 bolts located at the corners of an equilateral triangle (for example:
bolts in pos. 1-5-9 of the diagram below). Fit the gear unit to the driven shaft.
• Tighten down the bolts (following the triangular pattern) in a circular direction, repeating the op-
eration several times until all bolts are tightened to the torque specied in table 2, in accordance
with the type of disk/gear unit.
Mounting sequence for shrink discs with gear units sizes 314-325 , 314M-318M
• Tighten 4 screws equally spaced at 50% of the value of the tightening torque indicated in table 2,
crosswise. (example: screws 1-7-4-10)
• Tighten 4 screws equally spaced at 100% of the value of the tightening torque indicated in table
2, crosswise. (example: screws 2-8-5-11)
• Tighten all the screws continuously up to the point that, by applying the tightening torque indicat-
ed in table 2, these no longer have any movement.
• Check the effective alignment of the inner and outer ring of the coupling.
Do not use molybdenum bisulphide or any other grease, which could reduce the friction of
the mating surfaces and affect the performance of the shrink disk.
Proceed with the installation as follows:
1. Place the gear unit in the vicinity of the installation area.
2.
Mount the gear unit and secure it to the structure at the points provided. The gear unit should be
secured to the structure at all the mounting points (bores) on the mount provided (feet or ange).
3. Tighten down the mounting bolts and check that the service plugs are screwed down to the
torques given in the chart.
Shrink disk mounting bolts
 Loading...