EN
22
Installation
www.bora.com
1
2
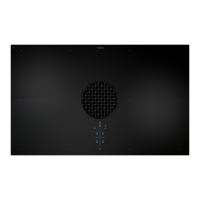
Fig. 4.18 Assembled cooktop extractor CKA2/CKA2AB
[1] Cooktop extractor CKA2/CKA2AB for airflow towards the
right
[2] Cooktop extractor CKA2/CKA2AB for airflow towards the left
i
If the adapter panel is fitted correctly, the duct
connection will always be at the front on both models
(facing the user).
i
You can check that the adapter panel has been fitted
correctly by looking at the arrow markings on the panel
and the base module. These must be correctly aligned.
Assembling the individual components
3
2
1
Fig. 4.19 Assembling the individual components on cooktop
extractor CKA2/CKA2AB
[1] Extractor base module
[2] Adapter panel with O-ring seal
[3] Connection module
Assemble the adapter panel:
XX
Position the connection module [3] facing the left or right
depending on the planned installation option.
XX
Check that the adapter panel [2] seal is positioned correctly.
XX
Position the adapter panel [2] in such a way that the duct
connection is facing left or right as required.
Fig. 4.16 Airow towards the rear (right or left)
Fig. 4.17 Straight airow towards the side (right or left)
4.8 Assembling the extraction
system
i
Cooktop extractor CKA2/CKA2AB is delivered as
individual parts which must be assembled prior to or
during installation.
i
The individual components must be assembled according
to the installation option.
i
All individual components are built in such a way that
they can be assembled without any difficulty. The parts
can only be assembled correctly and without applying
force if they are aligned correctly.
XX
Assemble the individual parts as required for the planned
installation option.
XX
Make sure that the parts are aligned correctly.
XX
Do not force the parts together.
XO
If not aligned correctly, the parts cannot be assembled easily
(solve this by turning or rotating the part).
XX
Make sure that all locks click into place.
4.8.1 Assembling cooktop extractor
CKA2/CKA2AB
There are two different models of cooktop extractor CKA2/
CKA2AB, depending on the planned airflow:

 Loading...