EN
29
Installation
www.bora.com
4.13.5 Positioning the control unit
i
The control unit must be placed inside the kitchen unit.
i
Position the control unit inside the kitchen unit in such a
way that it cannot be freely accessed by the user
(e.g. behind the plinth panel).
Permitted positions inside the kitchen unit:
XO
loose on a false floor
XO
loose on the shallow duct
XO
mounted on the kitchen unit
i
When positioning the control unit please observe the
length of the mains cable (1 m).
4.13.6 Connecting to the mains
XX
Observe all safety and warning information
(see the Safety chapter).
XX
Observe all national and regional laws and regulations as
well as the supplementary regulations of the local utility
companies.
i
The power connection may only be established by
certified specialists. The specialist also assumes
responsibility for the proper installation and
commissioning.
Special information for CKT:
i
The Classic Tepan stainless steel grill CKT is intended
to be operated on a supply network with an impedance
Zmax at the transfer point (mains connection) of 0.1247
ohms maximum. The user is to ensure that the appliance
is only operated on a mains supply network which meets
this requirement. If necessary, ask the local energy
supply company about the system impedance.
Cooktop power connection
The mains cable to be used (pre-assembled) must be at least
Type H05V2V2-F.
Connection Fuse protection Minimum cross-section
1-phase connection 1 x 16 A 1.5 mm²
Tab. 4.7 Fuse protection and minimum cross-section
i
A damaged mains cable must be replaced by another
suitable mains cable. This may only be done by an
authorised member of the After Sales Service team.
XX
Switch off the main switch/automatic circuit breaker before
connecting the cooktop.
XX
Secure the main switch/automatic circuit breaker against
being switched back on without permission.
XX
Make sure the power to the appliance is disconnected.
XX
Only connect the cooktop using a fixed mains connection.
4.13.3 Establishing contact between the
operating unit and control unit
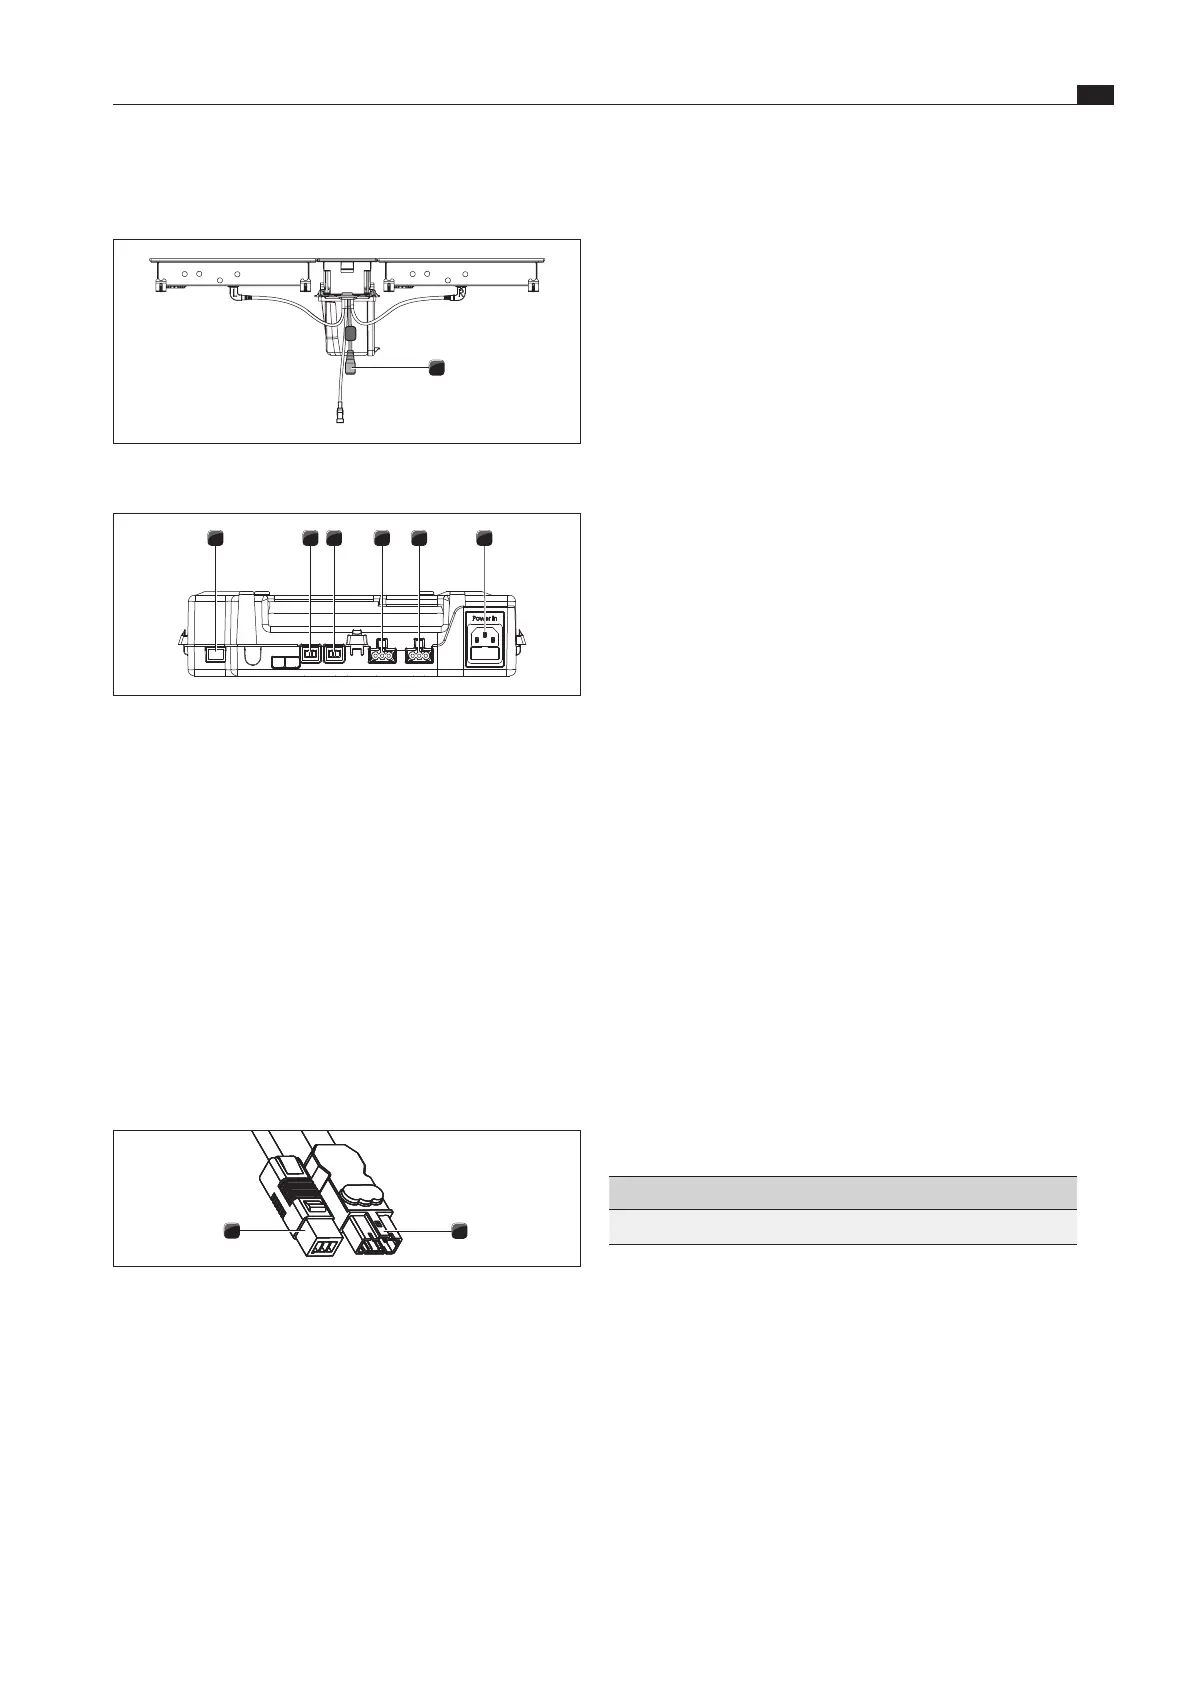
1
Fig. 4.37 Socket for the CAT 5e communication cable on the
operating unit
1 2 3 4 5 6
Fig. 4.38 Control unit connections
[1] CAT 5e communication cable socket
[2] Control unit socket for fan 2
[3] Control unit socket for fan 1
[4] Mains cable socket for fan 2
[5] Mains cable socket for fan 1
[6] Mains cable socket with micro fuse
XX
Using the CAT5e communication cable (included in the scope
of delivery) link the connections [1] on the operating unit to
the control unit.
i
The operating unit is controlled by and receives its power
supply via the CAT 5e communication cable.
4.13.4 Connecting fans to the control unit
2
1
Fig. 4.39 Fan connection plug
[1] Fan mains cable connection plug
[2] Fan control cable connection plug
XX
Connect the fan control cable [2] to the control unit.
XX
Connect the fan mains cable [1] to the control unit.
XO
When connecting the fan control cable and mains cable it
does not matter if you use socket 1 or 2 on the control unit.

 Loading...