35
MAKING A MITER CUT
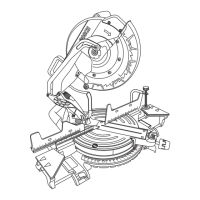
1. Loosen miter lock knob. Lift miter detent lever
and move the saw to the desired angle, using
either the detents or the miter scale. Tighten
miter lock knob (figure 40).
2. Extend the base extensions and fence on the side
on which the cut will be made. (See Sliding
Fence and Base Extension on pages 30 and 31).
3. Properly position workpiece. Make sure
workpiece is clamped firmly against the table or
the fence. Use clamping position that does not
interfere with operation. Before switching on,
lower head assembly to make sure clamp clears
guard and head assembly.
Be aware of the path of the
saw blade. Make a dry run
with the saw Off by conducting a simulated
cutting cycle, and observe the projected path of
the saw blade. Keep hands at least six (6) inches
away from the projected path of the saw blade.
4. Follow procedures for either chop cut or slide cut
(see page 33).
5. Wait until blade comes to a complete stop before
returning head assembly to the raised position
and/or removing workpiece.
FIG. 40
Miter Cuts
WHAT’S A MITER CUT
• A “miter cut” is a cross-cut made with the blade
p
erpendicular to the horizontal table. The blade
is not tilted and the bevel pointer is on the 0°
line.
• Miter cuts can be made at any angle across a
w
orkpiece within this saw’s range, from 52° left
to 60° right.
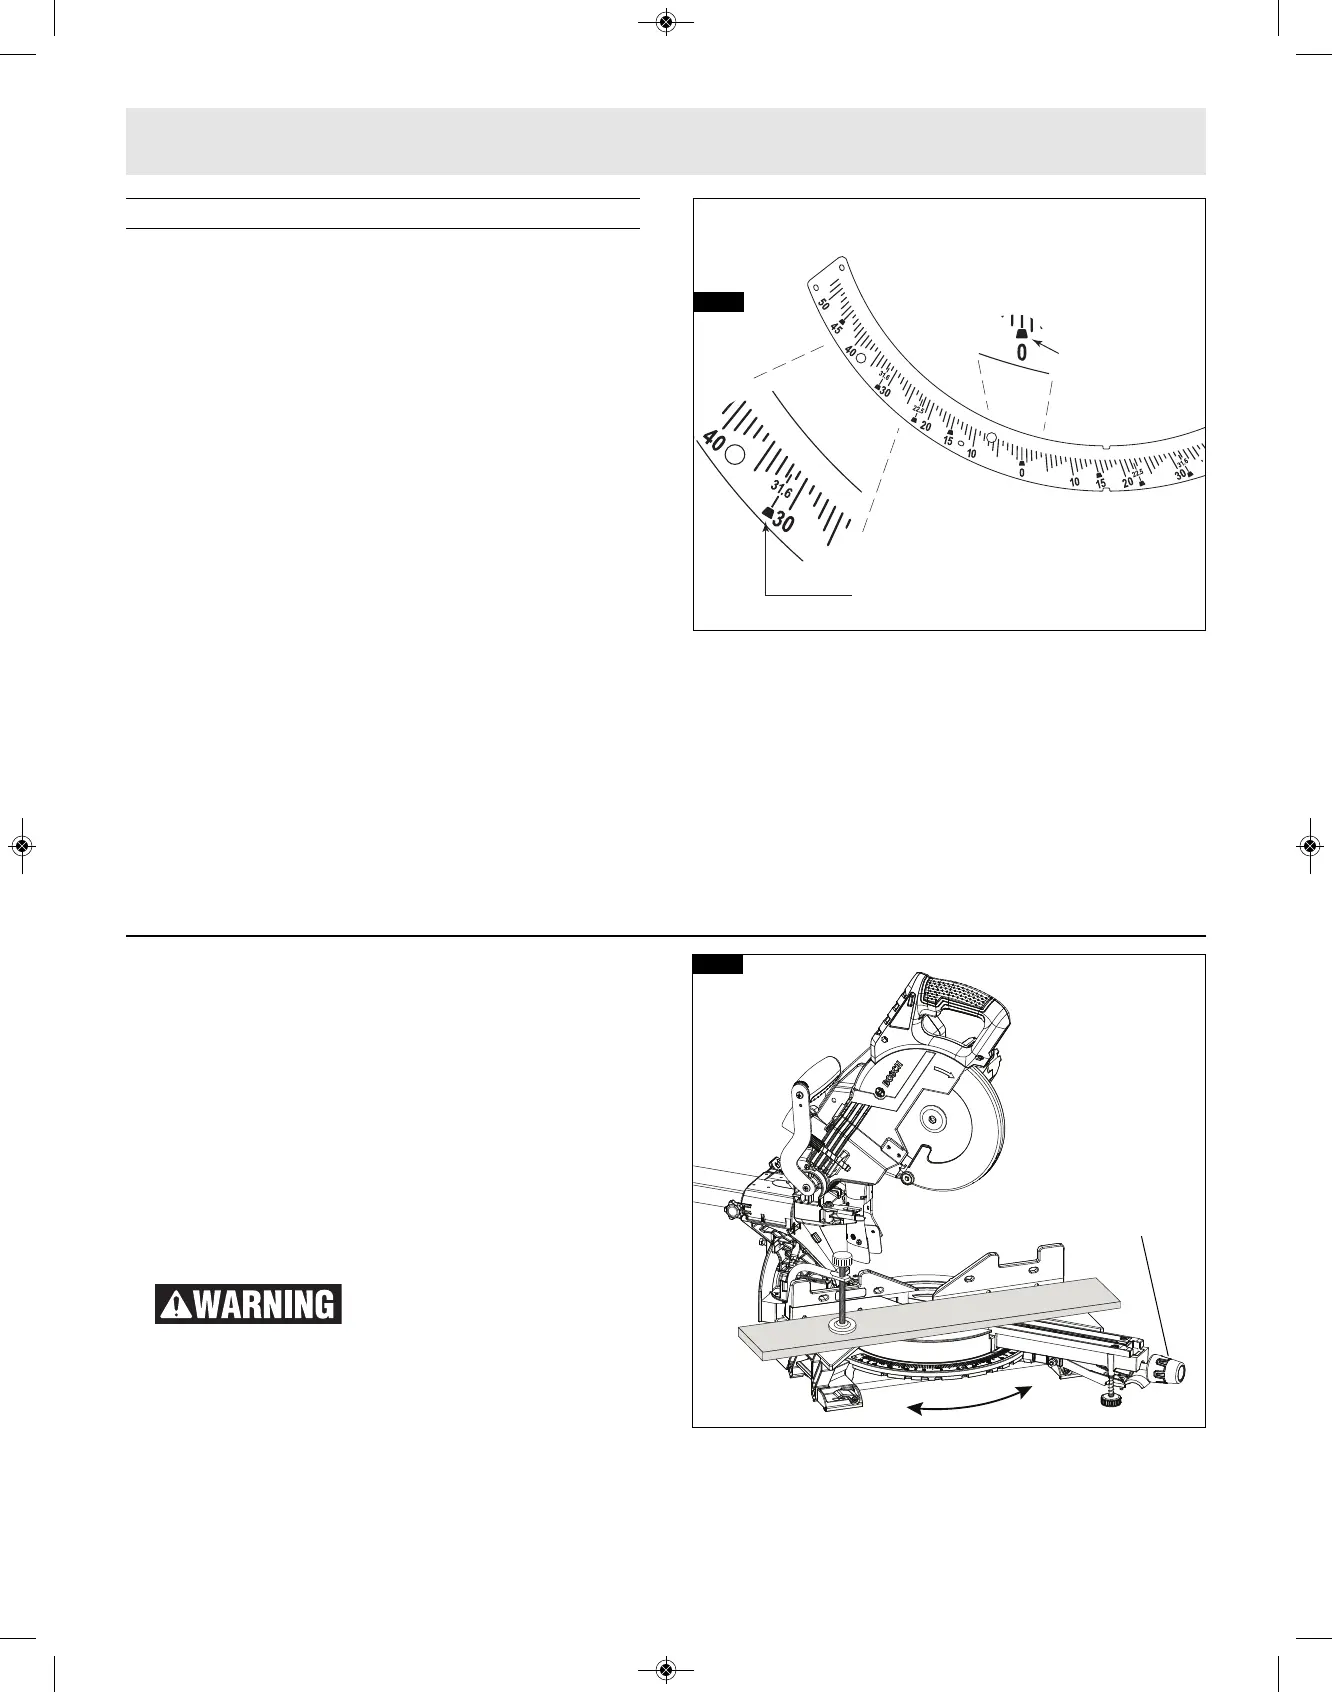
• The miter scale shows the angle of the blade
relative to the saw’s fence. The miter pointer is
attached to the table and indicates the saw’s
miter position before the cut is made.
• Ten positive miter detents are provided for fast
and accurate preset miter angles – locatios are at
45°, 31.6°, 22.5°, 15° left and right, and center at
0°. The right side has an additional miter detent
of 60°.
• The crown molding detents on the left and right
are at 31.6° for compound cutting 38° “spring
angle” crown molding lying flat on the table (see
Cutting Crown Molding on page 39).
• For precision settings at miter angles very close
to the miter detents, use the miter detent
override to prevent the detent from automatically
engaging the detent slot. See detent override
instructions on page 32.
• A miter cut can be made either as a chop cut or
slide cut, depending on the width of the
workpiece.
• The kerf inserts should be adjusted to be as close
to the blade as possible to reduce splintering
(see kerf insert adjustment instructions on page
22).
READING THE MITER SCALE
The miter scale used on this saw includes several
scales of information to help the user accurately
preset this saw before making the cuts (see figure
39).