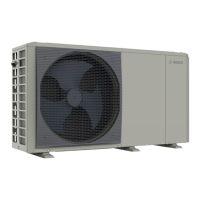
6 720 809 134 (2013/09) Compress 3000 DW FII
12 | Installation
5.3 Connecting the ducts
The air inlet can be located in the installation room, in a
different room or outside. In the latter two cases, air inlet ducts
must be installed.
When choosing a room for the air inlet, observe the average air
temperature and required air flow rate ( Tab. 3). In order to
minimise air resistance, lay the air inlet and outlet ducts
(Ø 160 mm) as straight as possible.
The length (L
eq
) of the air inlet and outlet ducts must not
exceed the following values:
• 30 m at fan speed SP1
To ensure that condensate forming in the air inlet and air outlet
ducts drains from the appliance:
▶ Install air ducts horizontally or at a slight angle to the air inlet
and air outlet apertures on the top side of the appliance.
Installation with ducts
▶Activate “Duct” function ( page 24, chapter 8.6.4).
5.3.1 Open flue operation
If the heat pump is operated with air from the installation
location, the volume of the room must be at least 20 m
3
.
5.3.2 Outdoor air operation
If the pump is operated with outdoor air, the ducts must be
protected against the weather using the correct end pieces.
Fig. 9 Equivalent duct length (L)
[1] Air inlet
[2] Air outlet
5.4 Connecting the water pipes
NOTICE: Possible damage to external
casing!
▶ Do not tilt the appliance on his feet more
than 20°.
To ensure maximum appliance performance
and to prevent condensation forming on the
external duct walls, use thermally and
acoustically insulated ducts.
Air inlet
(IN)
Air outlet
(OUT)
L
eq
0.5 m duct 0.5 m
1m duct 1.0m
2 m duct 2.0 m
10 m hose 19.0 m
45° elbow 0.9 m
90° elbow 2.0 m
90° flexible curve 2.3 m
Weather grille 8 m 4m
Roof output 7 m 4m
Table 4
L Fan speed
1)
1) chapter 8.6.4
Up to 30 m SP1
Table 5
Never close the water shut-off valve during
operation (Fig. 6, [4]).
L
2T
L
T1
L1
C1 C2
L2
L4
L3
L = L1+C1+L2
T1
L = L3+C2+L4
L=L +L
SP1: L 30m
T2
T1 T2
≤
2
1
 Loading...