Pack201 | Operator Instructions | Section 3
EN | 2
© Bosch Packaging Technology, Inc.
All rights reserved 2012
3 Operator Instructions
3.1 Start of Production
Preparation
1� Check that there is enough sealing material and
double-sided tape (for the splicer option) on hand
for the day’s production�
2� Have scissors on hand to prepare the sealing
material�
3. Check that all protective covers are in place.
Close all moving covers and doors.
4. Put all guides in place and adjust them to suit the
packaging format.
5. Follow the settings list to set the correct format/
change parts, such as former, side guides, crimp-
er unit and so on, for the product being packaged.
6. Switch on the compressed air.
7. Release the emergency stop(s).
Install Sealing Material
1� Turn ON the main disconnect to apply power to
the control circuits�
2� Push the Emergency Stop button�
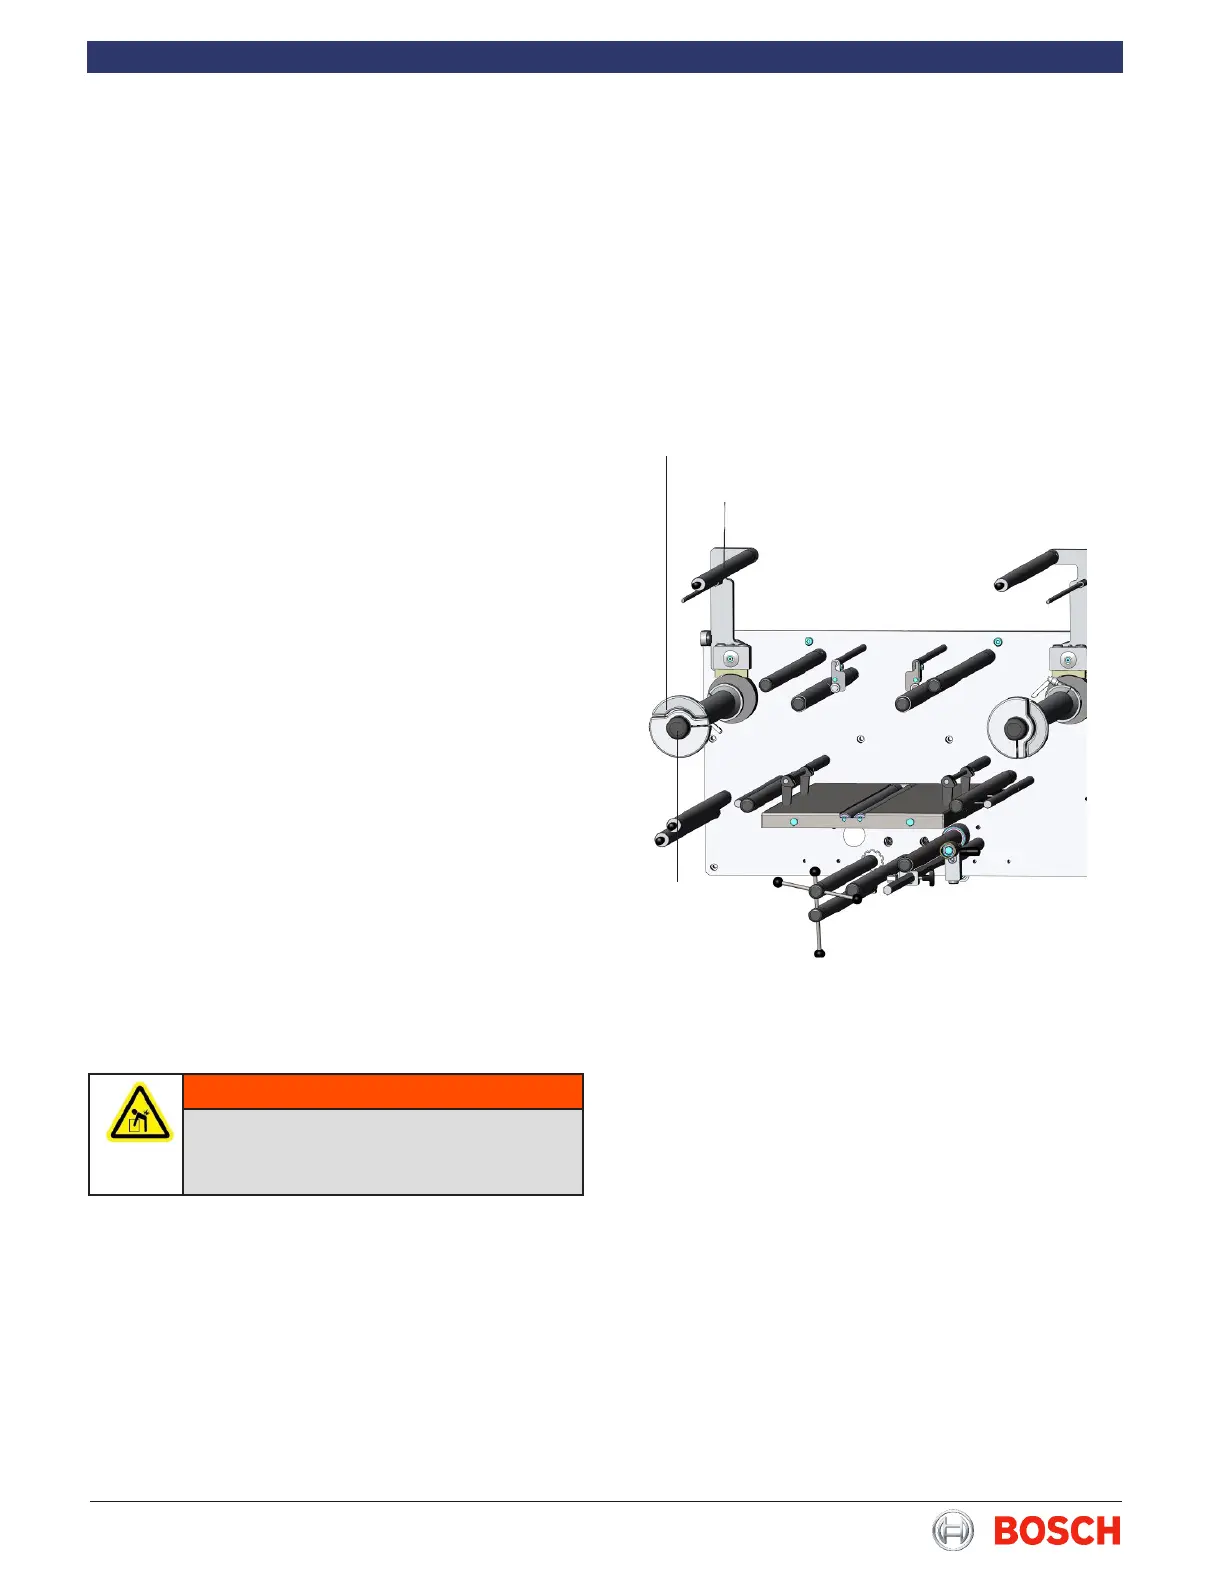
3� Remove the outside chuck from the lm spindle.
4� Place a roll of lm on the spindle and replace the
outside chuck� Turn to secure the chuck against
the lm roll.
5� Adjust the centering cone on the lm spindle as
needed�
6� Use the centering knob to nd tune the lm roll
position�
7� If necessary, reposition the inclination arm and/or
roller for proper lm ow.
WARNING
The rolls of sealing material can be heavy
and awkward to handle� Use some type of
lifting device to prevent a possible injury�
8� Move the balance arm until it locks in the down
position�
9� Thread the lm through the backstand rollers as
shown on the threading diagram�
10� Pull out the release rod to release the balance
arm�
11� Pull the lm through the former/folding box; bring
the two bottom edges together and draw them
through the rst set of nwheels.
12� Use the Finwheel Open/Close switch to close the
nwheels with the material between them.
Chuck
Centering Knob
Balance Arm