ctrlX SAFETY | Installation, removal, replacement and electrical installation 21/83
DOK-XSAFE*-SAFEX-C.1XC-IT03-EN-P, Edition 03, Bosch Rexroth AG
If a multiple-row structure is used, the supply air temperature must be measured under each
row and the corresponding limit values must be observed. For ambient temperatures, see
the “Technical data - Ambient conditions/Ambient data” section.
In addition, provide a sufficient distance for installation, removal, plugs and cables.
6.2 Installation of the ctrlX SAFETY controller
6.3 Removal of the ctrlX SAFETY controller
To remove the controller, you will need commercially available tools: for example, a slotted
screwdriver with a blade width of 2.5 mm.
NOT
Installation or removal of components
Destruction of the ctrlX SAFETY controller through the mounting of plugs under voltage!
Before installing or removing components, de-energize the controller and its parts!
Only switch on the voltage after the controller including its components have been set
up!
NOT
Potential property damage due to improper mounting of the DIN rail!
Ensure that the DIN rail is sufficiently fastened!
Connect the DIN rail to a functional ground!
Mount the controller on the DIN rail, because the DIN rail also provides for heat
dissipation and grounding!
Mount the controller in a control cabinet or in a corresponding housing!
NOTE
Missing stability of the controller with locked DIN rail bracket!
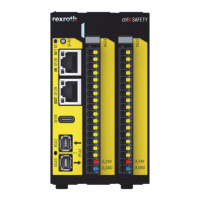
Before mounting, make sure that the DIN rail bracket of the controller
is not in the open position.
If necessary, release the opening lock using the locking lever, see “Fig. 4: Locking
lever for releasing the opening lock on
page 21.
Fig. 4: Locking lever for releasing the opening lock
 Loading...

