44/72 Installation
Bosch Rexroth AB, RE 15300-WA, Version 06.2021
Tightening of shrink disc
1. Keep tension in your lifting straps to avoid a skew setting of the coupling
adapter or coupling motor during the tightening of the screws. Wobbling caused
by a skew setting gives extra forces on the main bearings.
2. In order to avoid misalignment of the two clamping rings during the tightening
of the screws, the gap between the rings must be measured in several places
during the process, see Fig. 44. The difference between the measured gaps
must never vary more than 1 mm (0,04“) during any stage of the tightening
process.
3. Pre-set the coupling screws in opposite pairs (12-6-9-3 o’clock) to max 1/3 of
the of the torque specied for the screws, see Table 16. It is very important
that when you reach this stage the misalignment is kept within the tolerance as
described above
4. Mark the screw head at 12 o‘clock with a pen or paint so that you can follow
the turning sequence of the screws.
5. Set the torque wrench to max 1/3 of the specied maximum torque for the
coupling screws, tighten all bolts in sequence, shown in Fig. 45, for 2 or 3
passes. Increase the torque to max 2/3’ of maximum torque and tighten the
bolts another 2 or 3 of passes
6. Set the torque wrench for the specied maximum torque. Tightening torque of
the coupling screws; see the sign on the coupling, or Table 16.
7. Start tightening the screws in sequence shown in Fig. 45.
8. Keep on doing this until you have reached the stated torque. Several passes are
required before the screws are tightened to specied torque. Keep checking the
alignment of the coupling. (15-20 passes may be necessary).
9. When the specied torque is reached it is important that all screws are
tightened with specied torque and that no further movement can be observed.
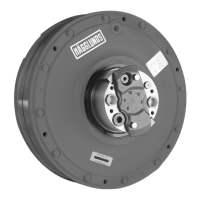
Fig. 44: Gap between the clamping rings
DD00079284
Keep the coupling
adapter or coupling
motor in level with
driven shaft!
 Loading...