Assembly 31/70
RE 79022-01-B/04.2020, General Operating Instructions HYDROTRAC GFT 8000 series 40, Bosch Rexroth AG
12 Put down the axial piston motor. Observe the information in the axial piston
motor operating instructions in appendix C “Mounting parts” of the material
number-specific operating instructions.
13 Remove all means of attachment, transport and lifting equipment.
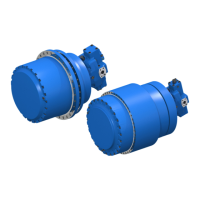
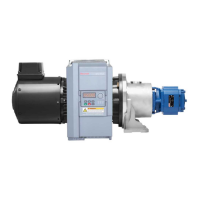
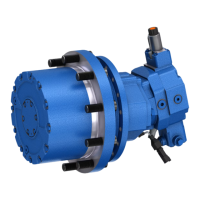
Installing the planetary gearbox at/in the machine or chassis frame:
1 For installation, strictly observe the corresponding data in the dimensioned
drawing of the planetary gearbox in appendix D “Technical data / Drawings” of
the material number-specific operating instructions.
2 Also observe the primary operating instructions of the machine or vehicle and
the manufacturer’s frame drawing.
3 For the planetary gearbox weight, refer to appendix D “Technical data /
Drawings” of the material number-specific operating instructions.
4 Transport the planetary gearbox to the application machine.
5 Make sure that the surface is stable.
6 Place the planetary gearbox with the cover plate down on two suitable squared
timbers. Secure the planetary gearbox against tipping over.
7 Attach the planetary gearbox carefully using appropriate means of attachment
e.g. eye bolts, swivel hooks, shackles or suitable equipment on an appropriate
lifting equipment such as a crane hook. Observe chapter 6.1 “Transporting the
HYDROTRAC GFT 8000”.
8 Tighten the means of attachment without lifting the planetary gearbox.
9 Make sure that the part of the machine or chassis frame to which the planetary
gearbox is to be mounted is free of dirt and foreign objects.
10 Lift the planetary gearbox into the machine or chassis frame.
11 Attach the planetary gearbox to the machine or chassis frame. For the required
strength class of the mounting screws as well as the necessary tightening
torques is the machine or vehicle manufacturer liable. The required mounting
screws are not included within the scope of supply.
12 Remove all means of attachment, transport and lifting equipment.
Re-installing the axial piston motor to the planetary gearbox:
1 Check the control dimension and whether the carrier and the disks are in the
position where they should be according to the spare parts drawing, view “A”
(refer to appendix D “Technical data/Drawings” of the material number-specific
operating instructions). Correct the position of the carrier or the disks if
required.
2 Attach the axial piston motor carefully to a suitable means of attachment on a
suitable lifting equipment, e.g. a crane hook.
3 Tighten the means of attachment without lifting the axial-piston motor.
4 Lift the axial piston motor to the planetary gearbox in the machine or chassis
frame.
5 Assemble the axial-piston motor to the planetary gearbox. Proceed as
described in chapter “Assembly” of the supplied axial-piston motor operating
instructions. You can find the axial-piston motor operating instructions in
chapter C “Mounting parts” of the material number-specific operating
instructions.
Procedure
Procedure
 Loading...