Inspection and maintenance
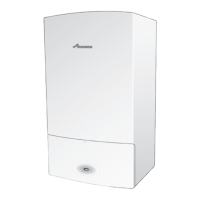
Greenstar Utility
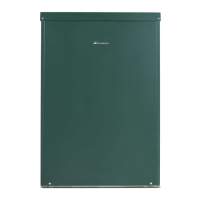
ErP -
6 720 821 751 (2018/04)34
7 Inspection and maintenance
7.1 Inspection and maintenance considerations
See the following instructions for detail of some of the service
requirements:
▶ Check that the safety and regulation devices (3 bar pressure release
valve, air bleed, etc.) are operating properly.
▶ Check that neither the installation nor the appliance present with any
water or fuel leaks, (leaks may result in a safety risk and shorten the
life of the appliance).
▶ When it is frequently necessary to add water, in a sealed system, to
maintain pressure in the installation, even though no leaks have been
discovered, perform an expansion vessel check.
▶ Clean or replace all oil filters.
▶ Check that the condensate system is not obstructed, clean and refill
the condensate trap.
▶ Check the condition of the various seals (burner flange, burner door,
flue outlet, etc.).
▶ Check the flexible oil pipe/s and replace if necessary.
▶ Check and clean the burner.
▶ Replace the burner oil nozzle.
▶ Check the secondary heat exchanger baffle retainer.
▶ Check and clean the baffles.
▶ Check and clean the heat exchanger and secondary heat exchanger
surfaces.
▶ Check the combustion chamber access door insulation board.
▶ Check that the flue system is unobstructed and undamaged, clean/
replace as necessary.
7.2 Preparing for inspection and maintenance
Pre-service checks
1. Lift the front of the top panel up to disengage the ball stud
connections [1] and pull the panel towards you to remove.
2. Pull the upper front panel squarely forwards to disengage ball stud
connections [2], lift from the bottom edge of the appliance and
remove.
Operate the appliance and system and note any faults which may need to
be corrected during the service.
▶ Switch off and electrically isolate the appliance.
▶ Loosen the hose clip [3] to detach the air duct [4] from the burner air
intake [5].
▶ Unplug the burner lead from control box.
▶ Disconnect the oil line(s) to the pump.
▶ Remove the burner retainer nut [6].
▶ Pull the burner towards you to release the blast tube from the heat
exchange and store safely away from the appliance.
Fig. 49
DANGER: Risk of electric shock!
▶ Before carrying out any work on electrical
components, isolate them from the power supply
(230 V AC) (fuse, circuit breaker) and secure against
unintentional re-connection.
▶ Check for zero potential before proceeding with
work.
WARNING: Hot surfaces!
If the appliance has been operating components may be
hot.
▶ Ensure precautions are taken when working on the
appliance.
NOTICE: Damage to property!
Water/oil discharge during servicing or maintenance.
▶ Isolate the water and the oil supply to the appliance
before carrying out work.
NOTICE: Personnel and equipment!
▶ Any service work must carried out by competent
registered engineers.
▶ Service work must not be attempted if a calibrated
CO/CO
2
analyser, manometer, vacuum gauge,
pressure gauge and means of reading combustion
gas temperature are not available.
6720821751-35.1Wo
1
1
2
2
1
2
5
4
3
6

 Loading...