20
© 2020 Brivo Systems LLC. All rights reserved. P-MAN-PUB-Panel Networking Guide
Panel Networking Guide
WiFi (ACS6000 and ACS300 only)
NOTE: For the ACS6000, to allow Wi-Fi functionality, Switch 7-8 MUST be in the Enabled position on the ACS6000
control panel. Please refer to the ACS6000 (A/E) Installation Manual (available at www.brivo.com) for instructions on
conguration of the Wi-Fi hardware.
NOTE: For the ACS300, to allow Wi-Fi functionality, Switch 2-4 MUST be in the Enabled position on the ACS300
control panel. Please refer to the ACS300 Installation Manual (available at www.brivo.com) for instructions on
conguration of the Wi-Fi hardware.
The ACS6000 and ACS300 have an internal Wi-Fi interface for communicating with either the Brivo Onair Cloud
Server or Brivo Onsite Server depending upon the panel type. Wi-Fi works in parallel with, or in replacement of,
Ethernet functionality on the ACS6000 and ACS300 control panels. Wi-Fi can also function as a failover for Ethernet.
If both Wi-Fi and Ethernet are enabled, the ACS6000 and ACS300 control panels will default to using the Ethernet
connection.
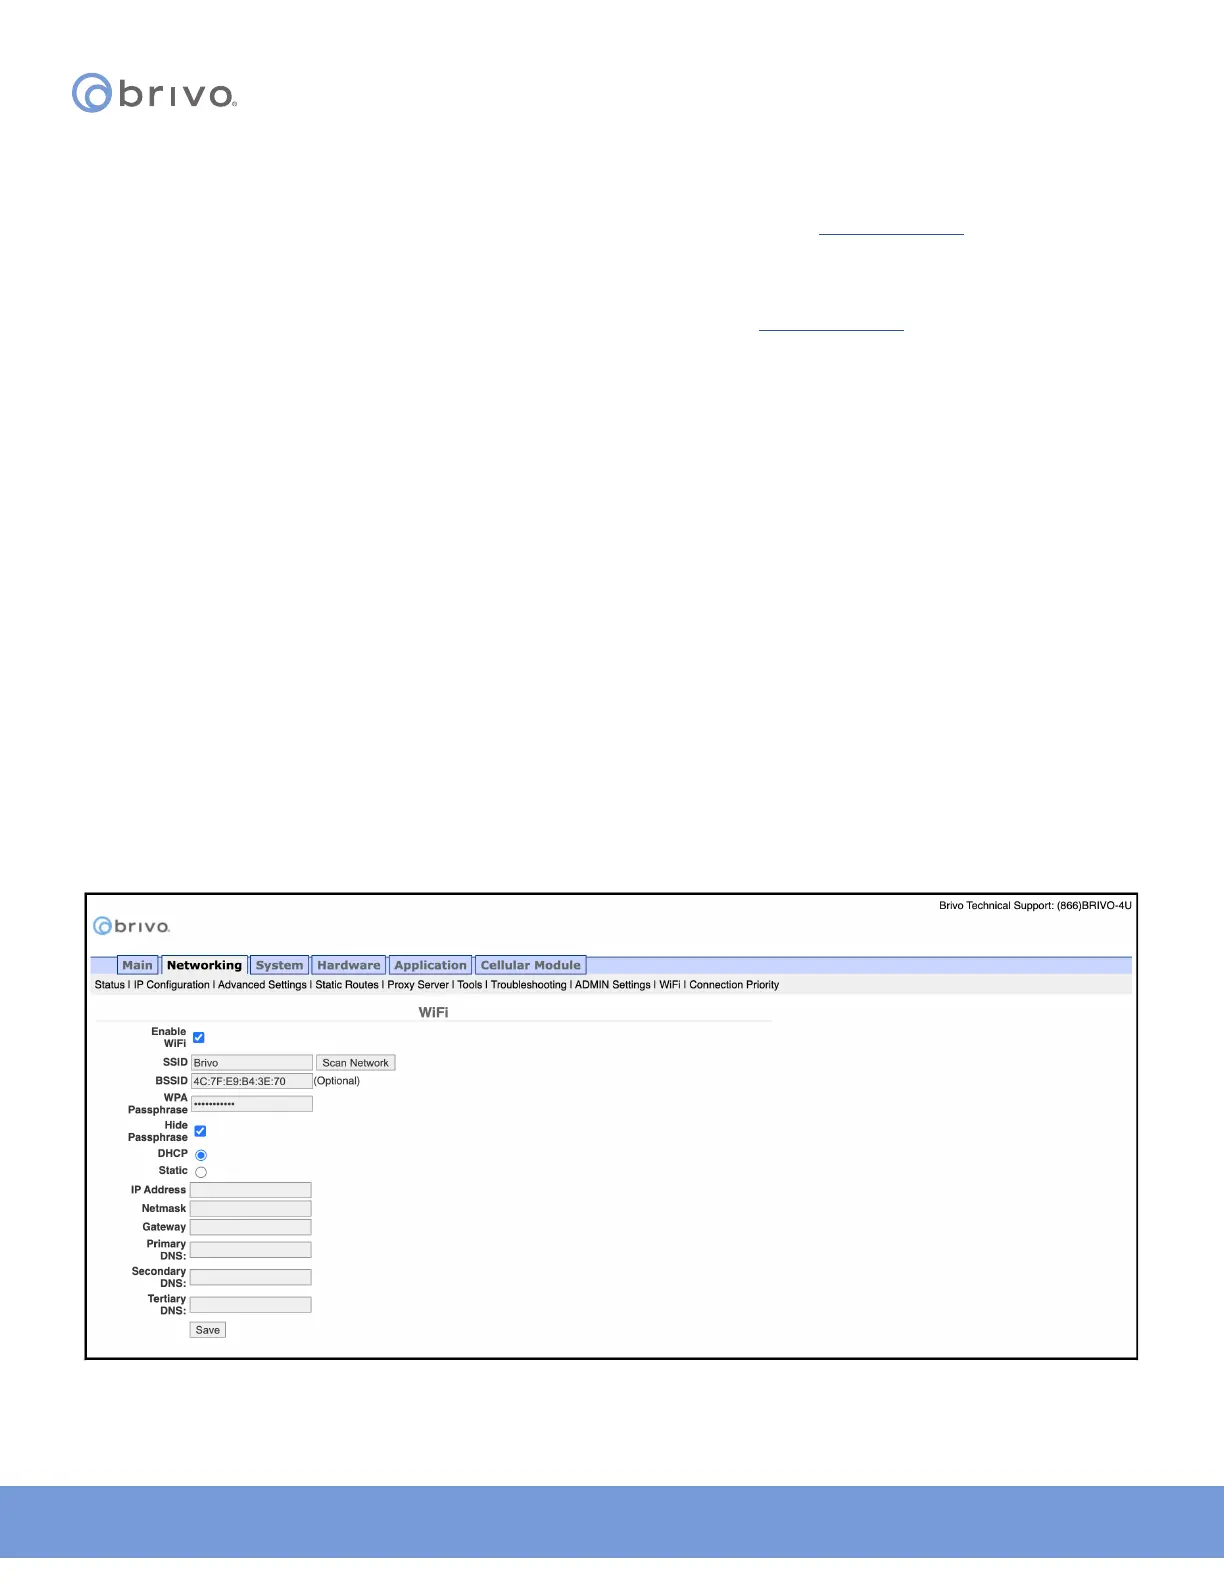
The Administrative Interface includes a tab for conguring Wi-Fi network settings. To access this tool:
1. Click Networking to access the Networking menu bar.
2. Click WiFi to access the Wi-Fi settings page.
3. To congure WiFi, check the Enable WiFi checkbox.
4. Enter the SSID name of the wireless network to which the control panel will be connected.
5. Optionally, click the Scan Network button to scan for all available SSIDs which will provide a pop-up window
with the available wireless networks. Click the SSID to which the control panel will be connected. You are
returned to the WiFi page.
6. Optionally, enter the BSSID for the wireless network.
7. Enter the WPA Passphrase (Hide Passphrase is enabled by default).
8. Select DHCP or Static IP address. Please refer to the corresponding sections of this guide for instructions on
conguration. If using Static IP selection, enter IP address, Netmask, Gateway, and DNS information.
9. Click Save.
Figure 19: WiFi