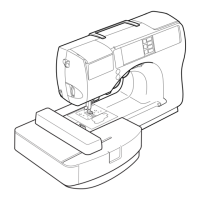
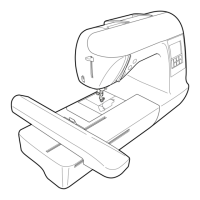
GETTING READY — — — — — — — — — — — — — — — — — — — — — — — — — — — — — — — — — — — — — — — — — — — —
14
Embroidery Step by Step
The basic steps for embroidery are as follows.
↓
↓
↓
↓
↓
↓
↓
1
Attaching the embroidery
unit
Attach the embroidery unit. (If the embroidery unit is not attached, the
machine does not operate.)
For details, refer to “Attaching the embroidery unit” (page 15).
2 Checking the needle
Use a needle matched to the fabric.
For details on replacing the needle, refer to “Replacing the needle” (page
36).
3
Setting up the bobbin
thread
For the bobbin thread, wind embroidery bobbin thread and set it in
place.
For details, refer to “Winding/Installing the Bobbin” (page 24).
4 Preparing the fabric
Attach a stabilizer material to the fabric, and hoop it in an embroidery
frame.
For details, refer to “Preparing the Fabric” (page 42).
5
Attaching the embroidery
frame
Attach the embroidery frame to the embroidery unit.
For details, refer to “Attaching the Embroidery Frame” (page 47).
6 Selecting a pattern
Select an embroidery pattern.
For details, refer to “Selecting Embroidery Patterns” (page 49).
7 Checking the layout
Check and adjust the size and position of the embroidery pattern.
For details on adjusting the layout, refer to “Adjusting the layout” (page
61).
8
Setting up the embroidery
thread
Set up the embroidery thread according to the pattern.
For details, refer to “Upper Threading” (page 30).
F-combo-BrotherE_sgml.book Page 14 Thursday, November 17, 2005 3:39 PM