BASIC EMBROIDERY
77
2
b
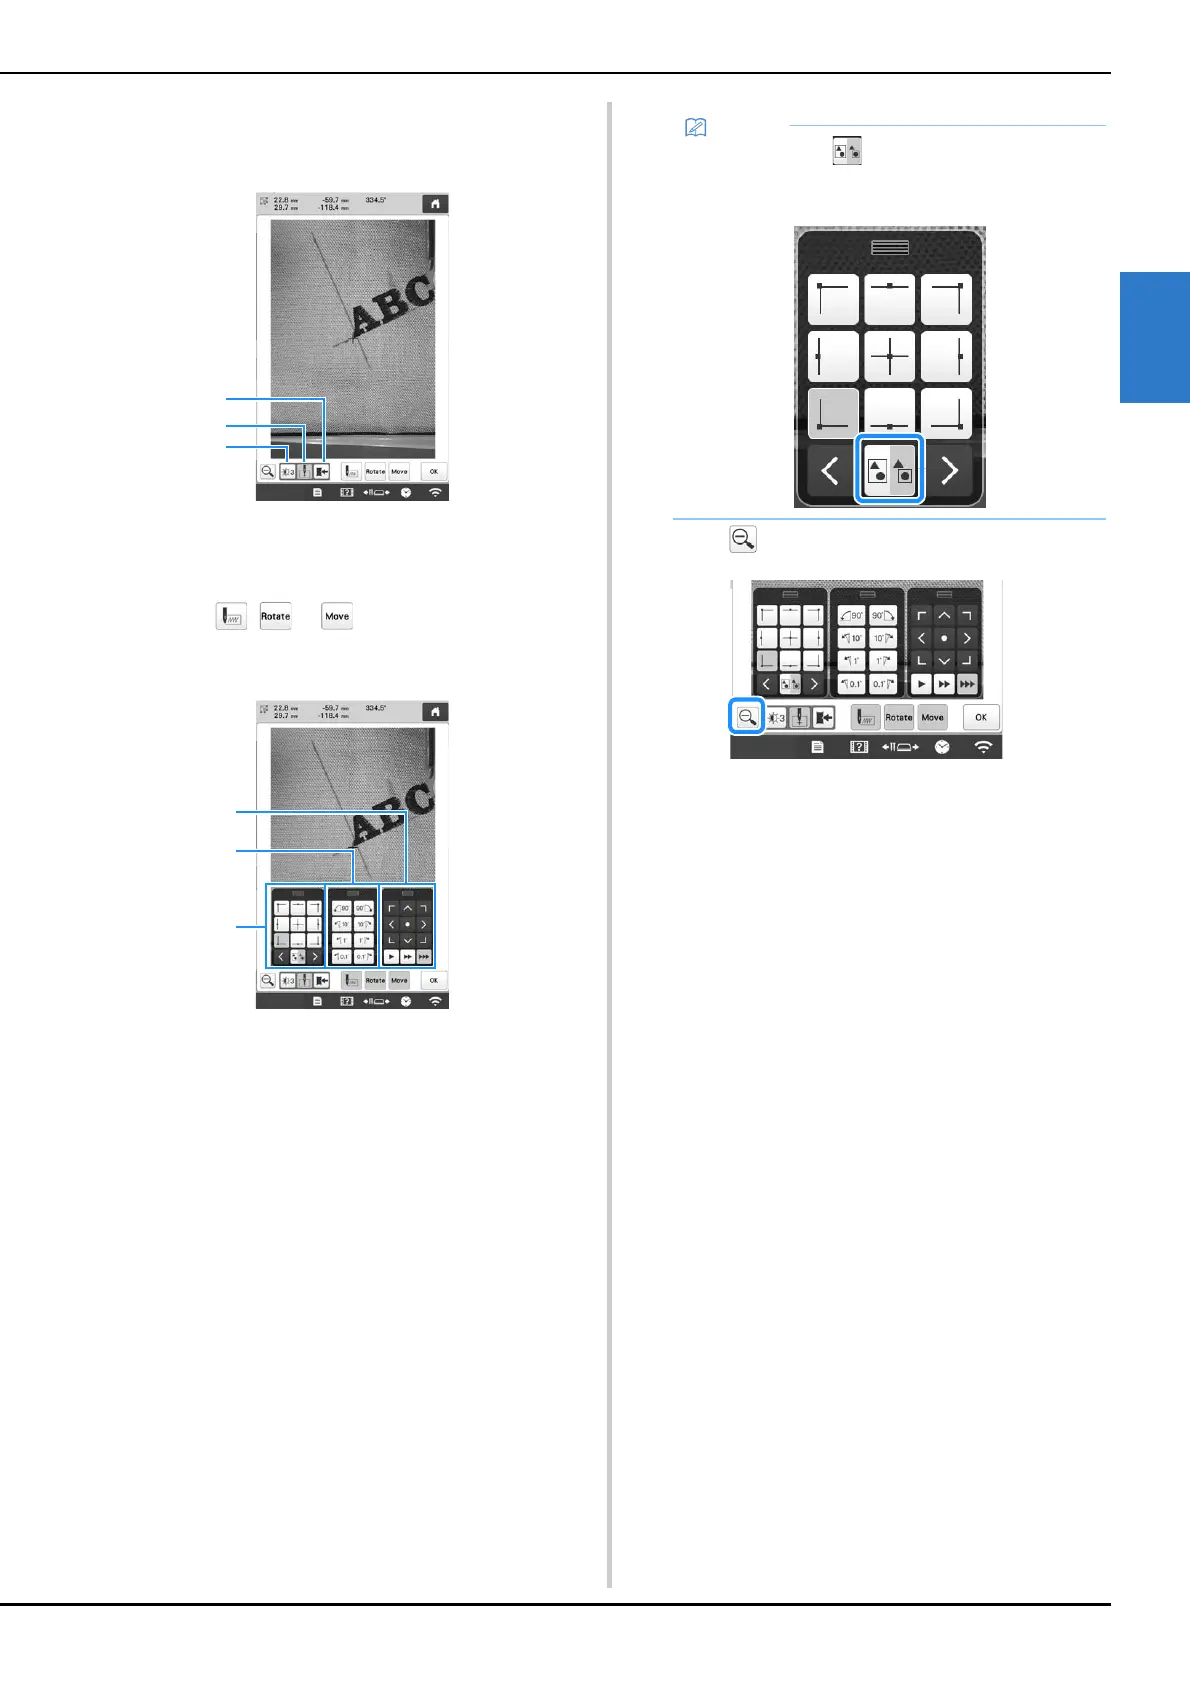
The camera image is displayed enlarged.
• You can change the display settings that are specified
in the normal camera image display.
1 Save the camera image on the external device.
2 Specify the needle drop point mark on or off.
3 Each touch of this key changes the brightness of the
camera image.
c
Touch , or to display the keys for
specifying the starting position, rotating the pattern or
moving the embroidery frame.
1 Adjust the embroidering position by moving the
embroidery frame.
2 Rotate the pattern. If there are multiple patterns, all
patterns are rotated, not just the pattern used as the
reference for the embroidering starting position.
3 Specify the starting position of embroidering.
• While using these key panels in the enlarged camera
image, panels will be invisible to show the pattern
and the camera image clearly.
d
Touch to return to the normal camera image.
• When you touch , you can change the camera
mode. For details, refer to “Memo” in step
f of
“Using the built-in camera” on page 75.