My Custom Stitch 7-3
7
1 —
2 —
3 —
4 —
5 —
6 —
7 —
8 —
?
!
9 —
CONTENTS
Index
1
2
4
5
6
7
8
1
9
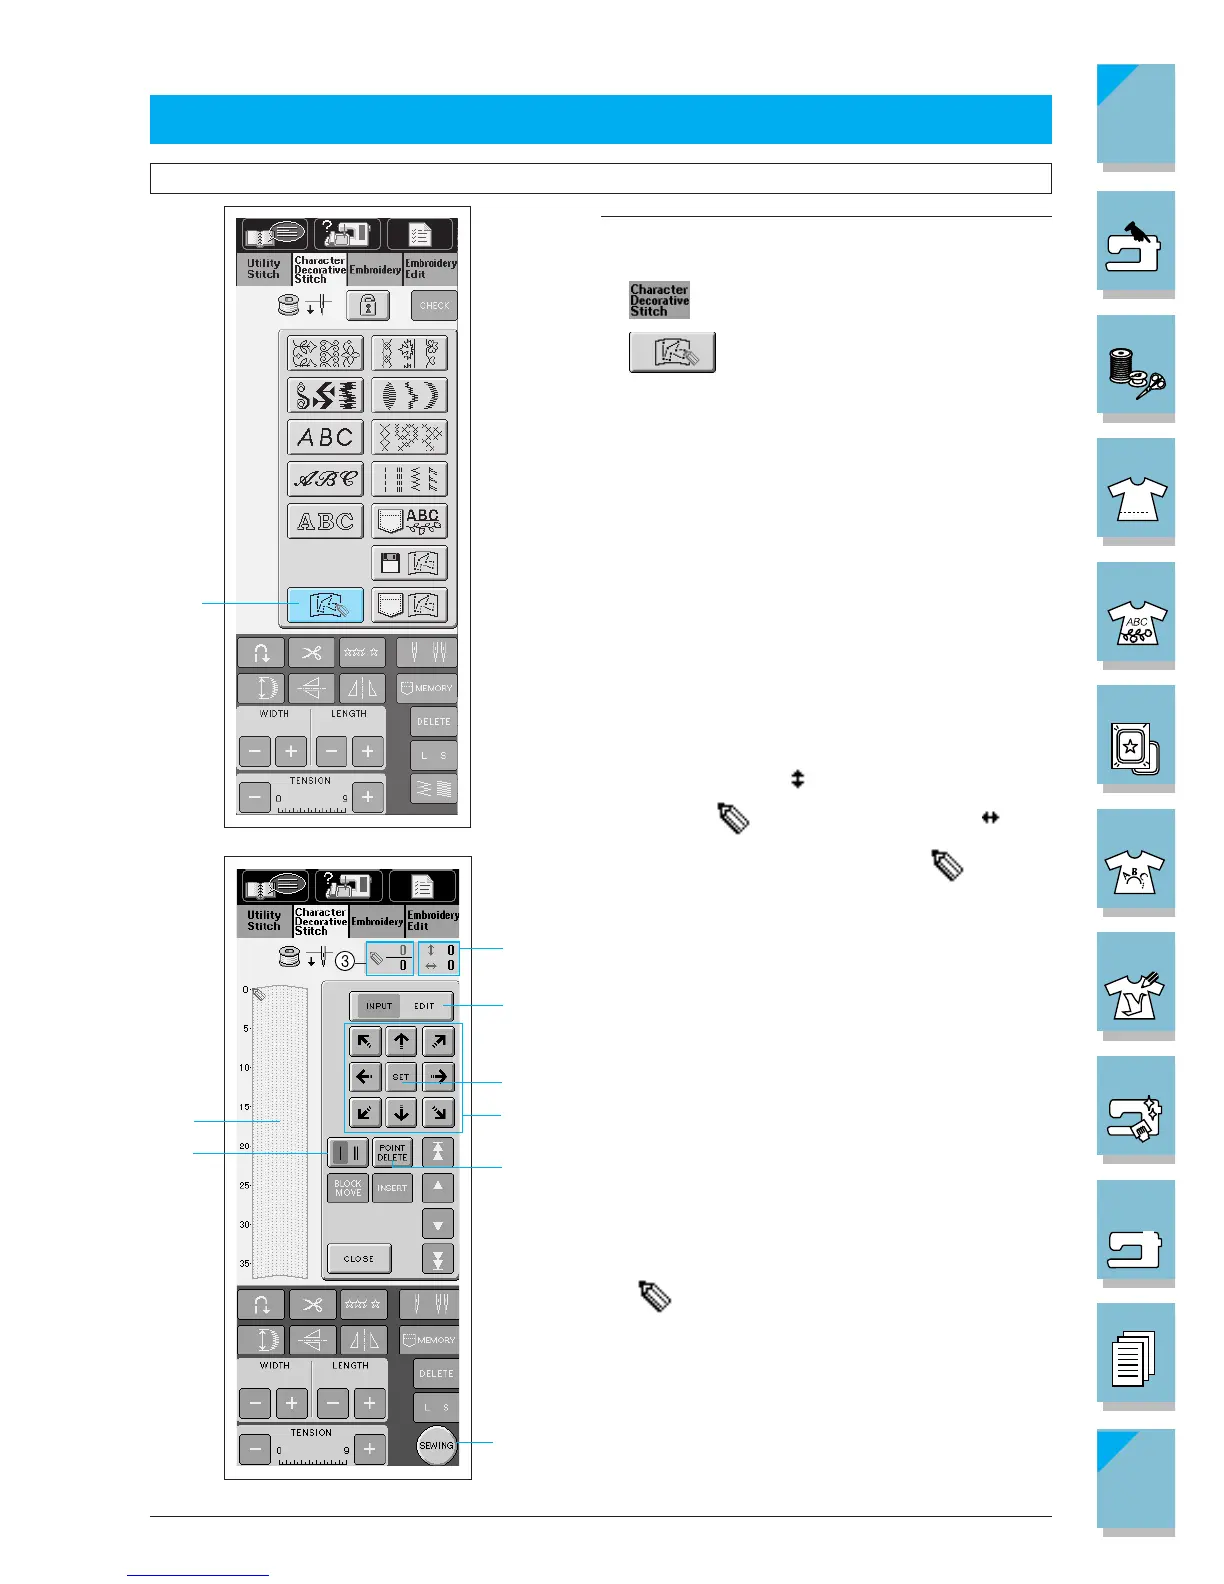
ENTERING STITCH DATA
Creating Stitch Data
Note
Make sure that the embroidery unit is not attached.
1. Press to display the screen at left.
2. Press
.
1 MY CUSTOM STITCHTM key
1 This area displays the stitch that is being created.
2
The number beside indicates the y coordinate
of the tip of , and the number beside indi-
cates the x coordinate of the tip of
.
3 This number indicates the present set point in
relation to the entire number of set points in the
design.
4 Press this key to display a screen that allows you
to change a set point. (Refer to page 7-6 for more
details).
5 Press this key to select whether one stitch or three
stitches are sewn between two points.
6 Press this key to erase the last point that has been
set.
7 Press this key to add the point indicated
by
.
8 Press this key to finish creating the stitch and dis-
play the screen that allows you to see the en-
tered stitch. (Refer to page 7-4.)
9 Press these keys to move.