CANOPY FRAME ASSEMBLY
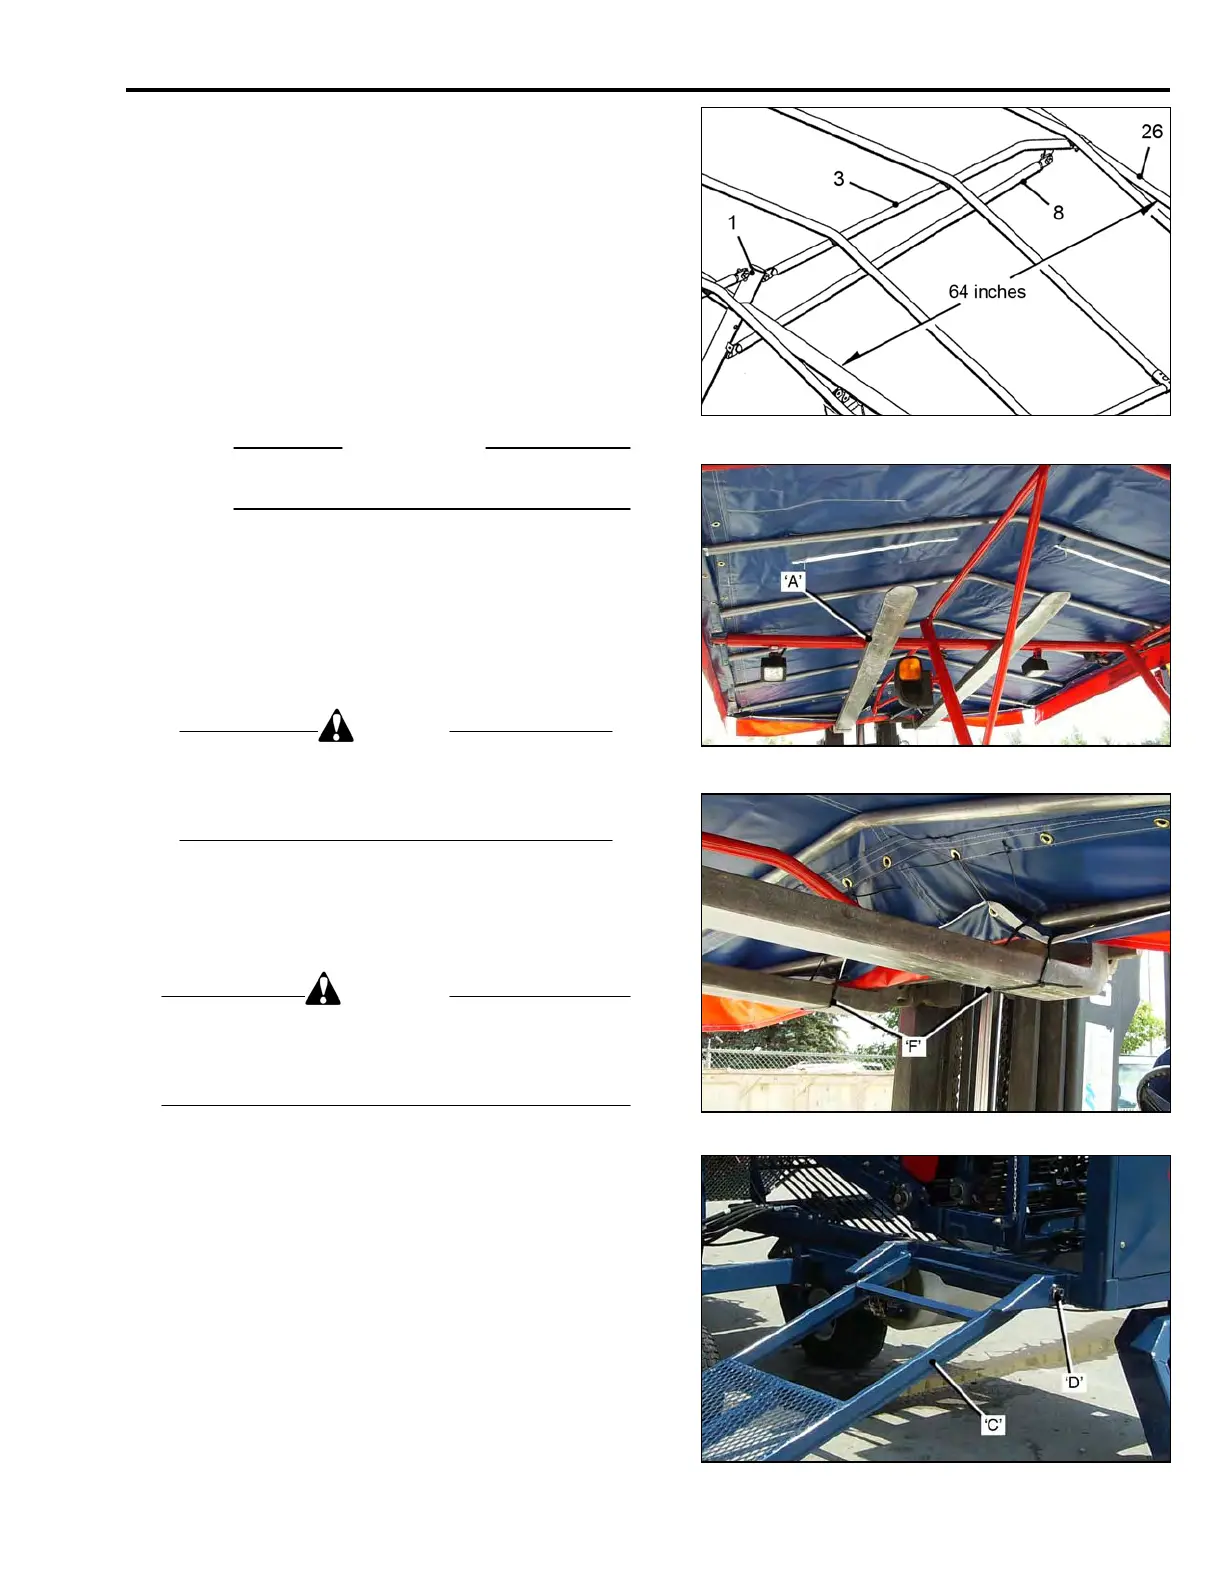
Fitting Rear Spreader and Support Tube.
• With 7/16 x 1 ½ in. Bolts, Washers and Locknuts,
attach the end of the Rear Spreader (3), marked
Black, to the Canopy Support (1).
The other end has a half Brace Clamp welded
to it. Use a half Brace Clamp to attach it to the
Rear Tube (26), of the Perimeter Frame.
• With 7/16 x 1 ½ in. Bolts, Washers and Locknuts,
attach the end of the Rear Support Tube (8),
marked Black, to the tab on the Canopy Support,
marked Black. The other end, attach to the tab on
the Rear Support Tube (3).
IMPORTANT
Double check that all clamp fasteners are tight.
Fitting Canopy to Frame.
Refer to page 4-1 for the recommended procedure when
fitting the Canopy onto the Frame.
Installing the assembled Frame and Canopy
onto the tractor.
CAUTION
Two persons must install the Canopy Assembly.
One to person to operate the Forklift, the other to
guide the assembly into position and bolt the
Canopy Support to the frame.
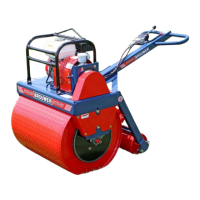
• Insert the Forklift Forks (with extended forks),
under the cross tube of the Canopy Support ‘A’.
CAUTION
To prevent the Canopy Assembly from tipping, while
being lifted into position, resulting in possible personal
injury, the rear tube of the Perimeter Frame must be
firmly secured to the forks ‘B’.
• To allow the Forklift access, with the Canopy on
the forks, the Unload Ramp ‘C’, must be removed.
• Remove the Transport Chain and Ramp Spring.
Remove the Hitch Clips, slide the Pivot Tube ‘D’
out and lift the Ramp clear.
2-09