RAIL ASSEMBLY
BRUNSWICK INSTALLATION MANUALPAGE 11
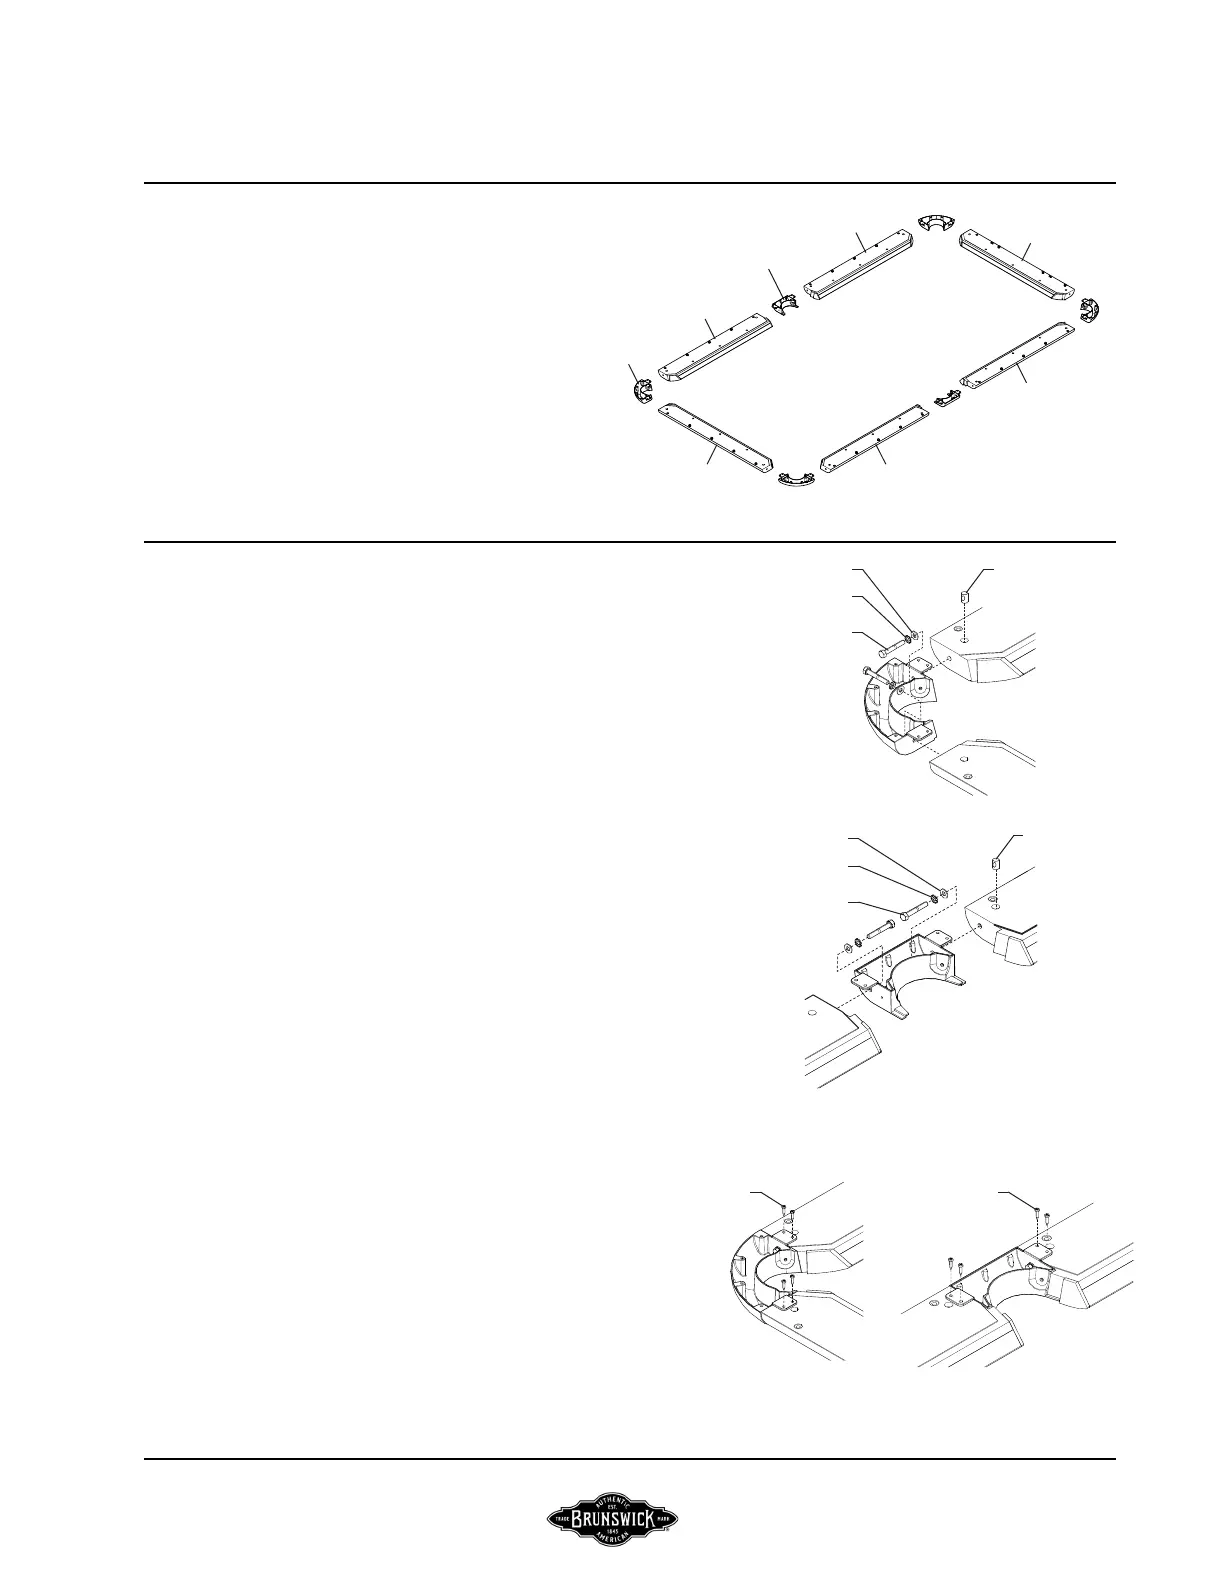
FIGURE ONE
Step #1: Position six rails, four corner pocket castings, and
two side pocket castings upside down in their respective
locations on a protective surface as shown.
FIGURES TWO & THREE
Step #2: Attach four corner pocket castings and two side pocket
castings as showing in Figures 2 and 3. Align the castings with
the holes in the rails. Place a 5/16” joint connector nut, slotted
end up, in the holes provided. Align the threaded hole in the
connector nut (rotate with screwdriver) with casting bolt holes.
Then thread a 5/16” external tooth lock washer and 5/16” at
washer into the joint connector nut. Align each casting ush
with bottom surface of the rail and extending past back edge
of the rail, approximately 1/16”. Tighten each hex cap screw
once properly aligned.
Step #4: With hex cap screws tightened, drive #8 x 3/4” pan
head screws through the holes provided in each casting tab,
into bottom surface of wood rail. Two screws per tab, two tabs
per casting.
Step #3: Place a straight edge against both rails, across the
side pocket casting and check the alignment. If the two rails
are not aligned, loosen the hex cap screw on one side of the
pocket casting and bring the rails into alignment. Re-tighten
the hex cap screws and re-check; repeat as needed to align
rails on both sides.
FIGURE ONE
FIGURE TWO
FIGURE THREE
END RAIL
END RAIL
LEFT HAND
RAIL
LEFT HAND
RAIL
RIGHT HAND
RAIL
RIGHT HAND
RAIL
CORNER POCKET
CASTING (QTY. 4)
SIDE POCKET
CASTING (QTY. 2)
CENTENNIAL
5/16-18 x 2
HEX HEAD SCREW
5/16 WASHER
5/16 LOCK
WASHER
5/16-18 x 2
HEX HEAD SCREW
5/16 WASHER
5/16 LOCK
WASHER
#8 x 3/4” PAN
HEAD SCREW
#8 x 3/4” PAN
HEAD SCREW
CONNECTOR NUT
CONNECTOR NUT