SLATE ASSEMBLY AND LEVELING
BRUNSWICK INSTALLATION MANUALPAGE 5
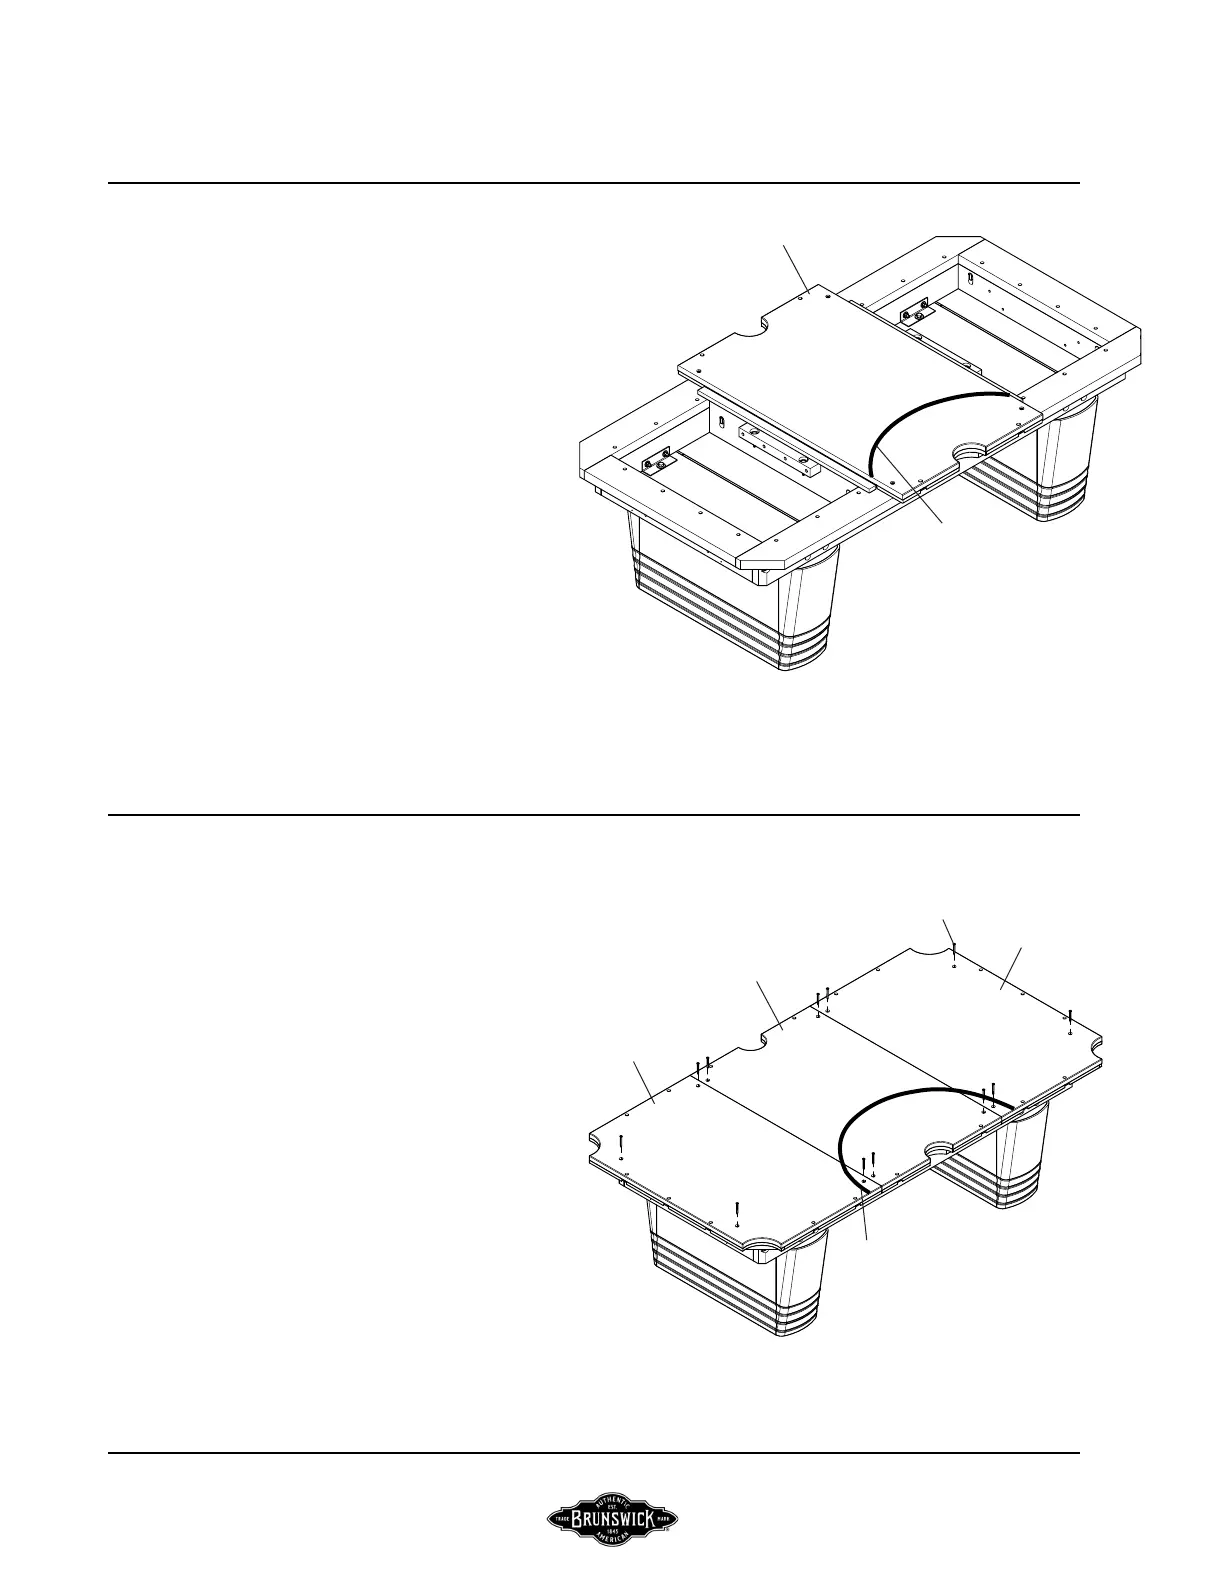
FIGURE ONE
Step #1: With baseframe level and placed in its permanent
location, position the center slate section evenly between the
two cross supports as shown, with an equal amount of overhang
at each side of the base frame.
FIGURE TWO
Step #2: Position the two end slate sections on the base
frame as shown. Be sure that the penciled arc forms a
radius as shown.
Step #3: Recheck to be sure the slate has an equal
amount of overhang around the base frame.
Step #4: Using the 12 countersink holes in the slate as
a template, pilot drill 5/32” diameter holes into the
mounting cleats.
Step #5: Loosely fasten all sections with 1/4 x 2-1/2
at head screws. Proceed to gure three before
tightening screws securely.
FIGURE ONE
FIGURE TWO
CENTENNIAL
CENTER SLATE
SECTION
PENCIL
ARC
END SLATE
SECTION
PENCIL
ARC
1/4 x 2-1/2
FLAT HEAD
SCREW
CENTER SLATE
SECTION
END SLATE
SECTION