BRUNSWICK INSTALLATION MANUALPAGE 13
FIGURE FOUR
APRONS, APRON CORNERS
AND BALL STORAGE RACK ASSEMBLY
Step #6: At this time, tighten all apron ange attach fasteners that
have been left loose.
Step #7: Thread all eighteen 3/8-16 x 2 3/4 machine studs into
each location on the bottom surface of the six rails. Thread machine
studs in until contact with wood is made and then loosen 1/4 turn.
This will allow for free movement of the stud and internal nut plate.
FIGURE FIVE
Step #8: Carefully turn the rail and apron assembly over and lower over
the table. Finger clearance between bottom edge of aprons and slate is
limited, therefore, shift toward one end and lower that end over the
slate rst, then shift in the opposite direction and lower the other end
over the slate. All eighteen machine studs must be aligned with the
clearance holes in the slate during this process.
CAUTION: Do not allow excessive weight to be applied to wood
components when turning the assembly over, the strain may
cause damage.
FIGURE FOUR
FIGURE FIVE
FIGURE SIX
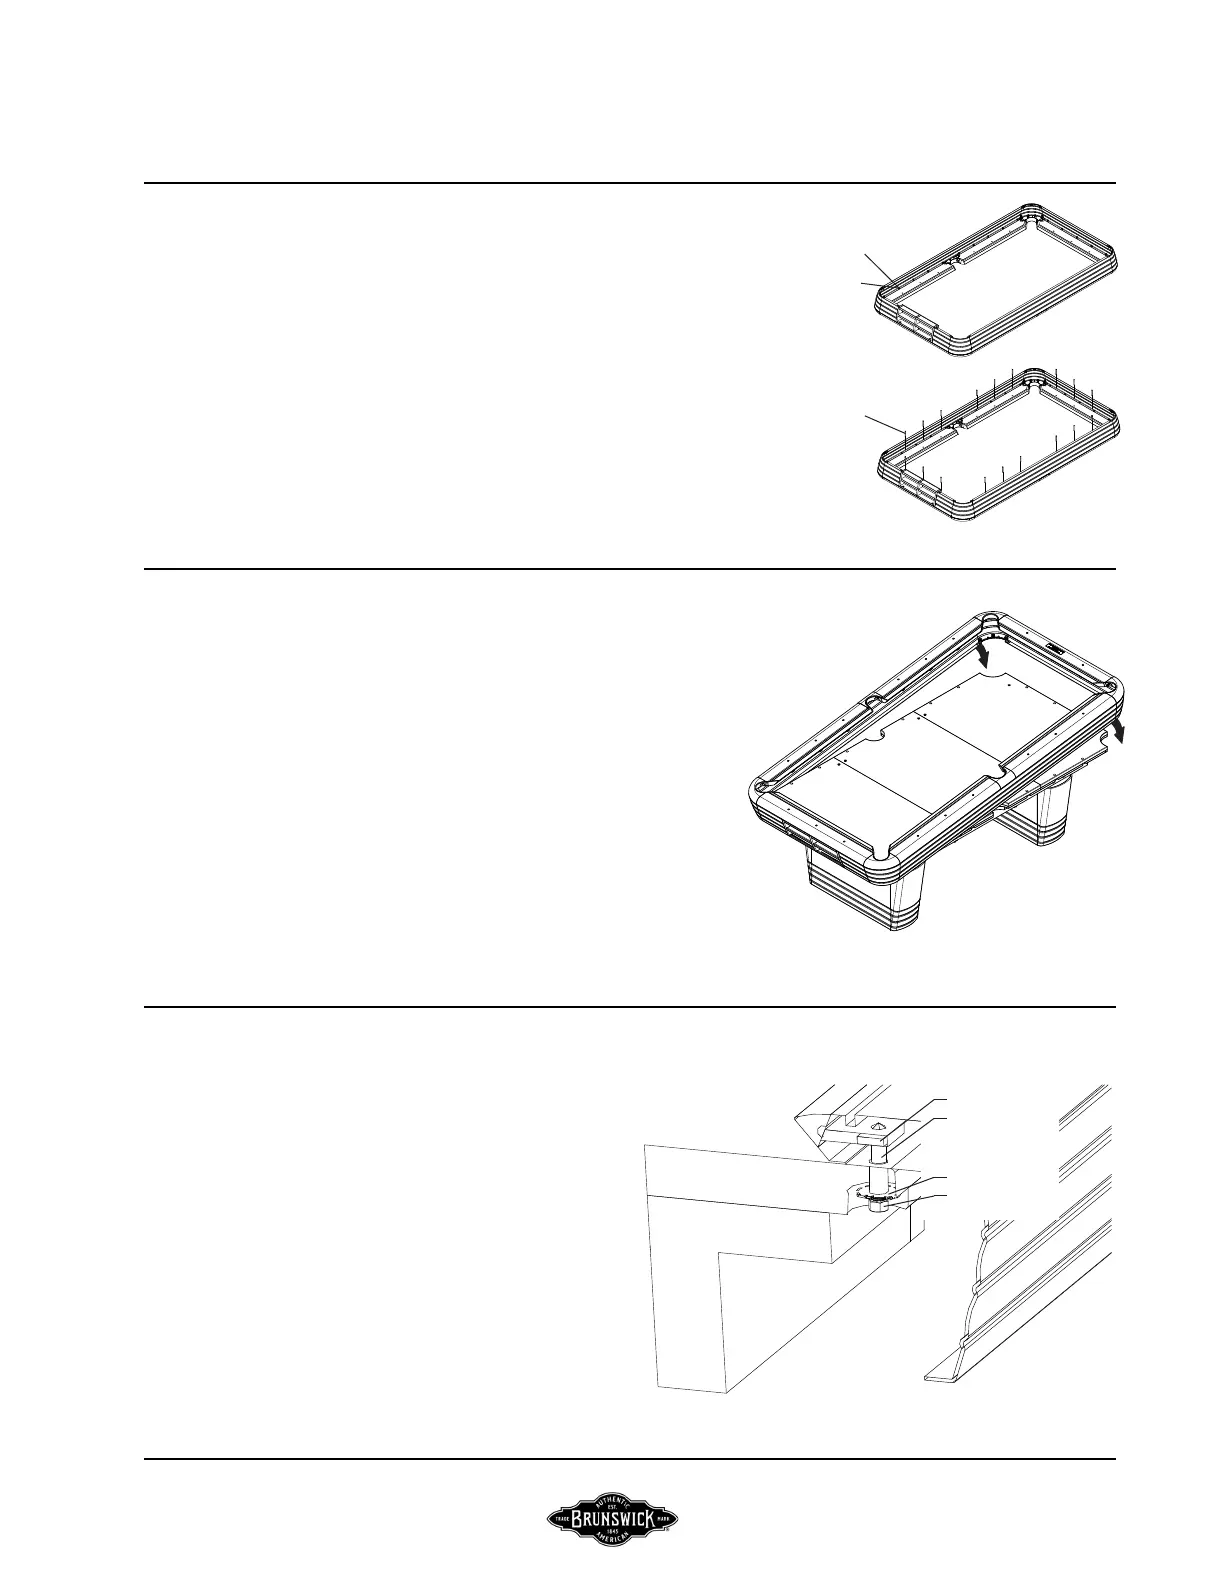
FIGURE SIX
Step #9: Thread the hex nut and dome washer onto all eighteen
machine studs. Center entire rail and apron assembly across width
and length of the slate and tighten to a recommended torque of
15 ft/lbs.
3/8-16 x 2-3/4
MACHINE STUD
CENTENNIAL
5/16-18 x 2 HEX
HEAD SCREW
5/16 WASHER
SLAT
E
F
R
AM
E
MACHINE STUD
NUT PLATE
3/8-16 NUT
DOMED WASHER