Do you have a question about the Butler LIBRAK380.3DTEC and is the answer not in the manual?
A welcome message and overview of the manual's importance for safe and effective operation.
Emphasizes the need for trained personnel to operate the machine safely and efficiently.
Specifies installation requirements for space, lighting, floor type, and load capacity.
States the machine needs an adequately lit environment; no internal lighting is required.
Details how to secure the machine to the ground using anchor blocks and screws.
Lists the essential parts included in the packing for assembling the machine.
Outlines the steps for fitting the mandrel and related components onto the machine's flange.
Step-by-step guide for fitting wheels of specific models onto the machine's mandrel.
Step-by-step guide for fitting wheels of specific models onto the machine's mandrel.
Instructs on the procedure for powering the wheel balancing machine on and off.
Details using the automatic system for rapid wheel balancing program detection.
Explains manual program selection and adjustment via the acquired measurement screen.
Shows how the machine displays points for applying weights, including special 12 o'clock positions.
Describes using a laser pointer to indicate exact points for adhesive weight application.
Details the Static program for balancing wheels using weights on outer and inner rim sides.
Explains the Static-1 procedure for single-plane balancing with a clip weight at 12 o'clock.
Describes the Static-2 procedure using a single adhesive weight at 12 o'clock.
Details the Dynamic program for balancing with two clip weights on the outer and inner rim.
Explains the ALU-S program for balancing using two adhesive weights on the outer and inner rim sides.
Describes ALU-S1 for light alloy rims, using adhesive weight outside and clip weight inside at 12 o'clock.
Details ALU-S2 for light alloy rims, using two adhesive weights, inner one at 12 o'clock.
Explains ALU-1 for light alloy rims, using adhesive weights on outer and inner sides at 12 o'clock.
Describes ALU-2 for light alloy rims, using adhesive weights on outer and inside, outer weight not visible.
Details ALU-3 for mixed weights: clip inside, adhesive outside (not visible).
Explains ALU-4 for mixed weights: clip inside, adhesive outside.
Introduces ECO-WEIGHT for reduced weight consumption via a single weight.
Describes SPLIT mode for dividing large weights into two smaller ones for better accuracy.
Explains how to hide weights behind spokes for aesthetic reasons on certain rims.
Introduces Matching mode to offset tyre unbalance with rim unbalance for weight reduction.
Details the PAX mode for balancing using two adhesive weights on different planes on the inner rim.
Describes how to enable/disable machine functions and settings via the options menu.
Explains setting the minimum weight limit for correction display and resolution.
Details setting adhesive weight dimensions and static threshold for accurate calculations.
Explains the user management function for tracking operations by different users.
Guides through the procedure to calibrate the mandrel to its zero position.
Details the calibration process for the machine's weight measurement sensors.
Explains how to calibrate the touch screen monitor for accurate input.
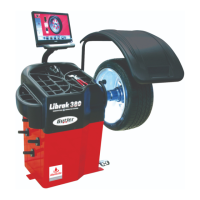
Presents the physical dimensions of the machine for installation and space planning.
| Brand | Butler |
|---|---|
| Model | LIBRAK380.3DTEC |
| Category | Wheel Balancers |
| Language | English |