GB
Page 20 of 62
INSTRUCTION, USE AND
MAINTENANCE MANUAL
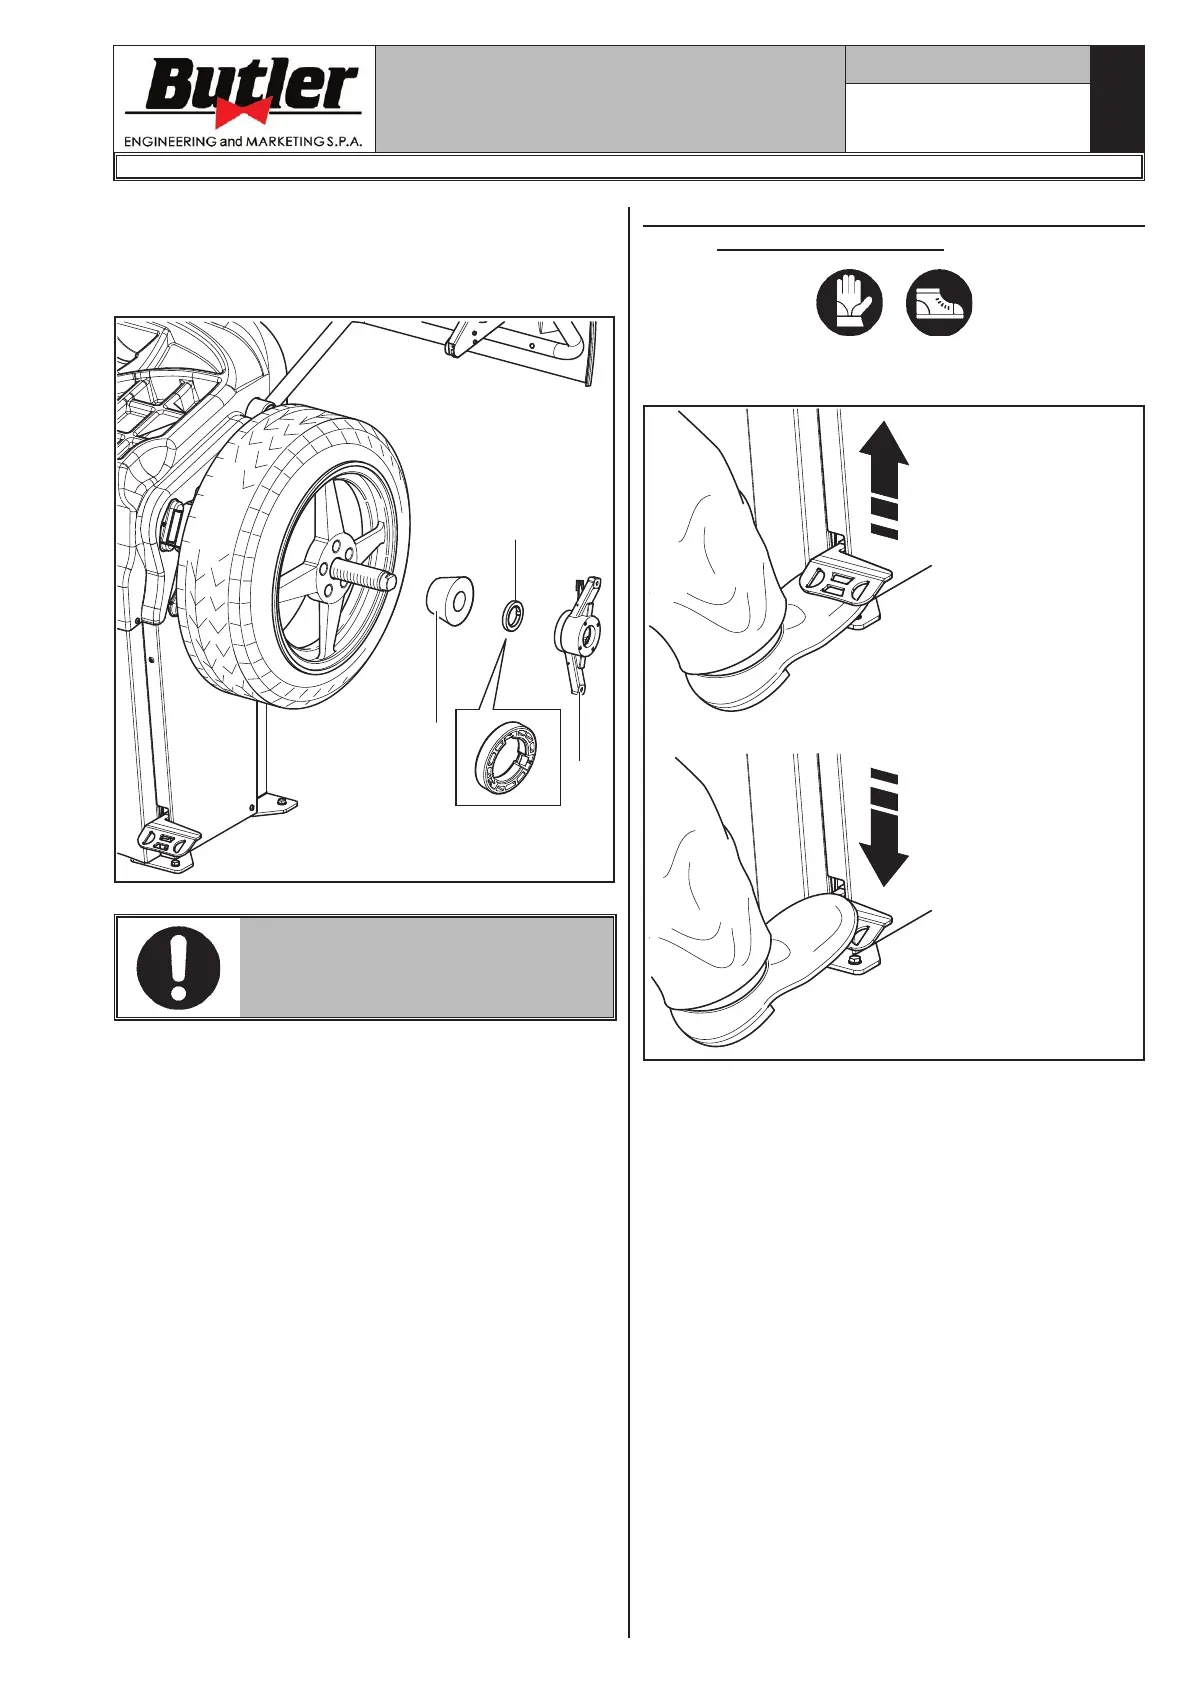
7. Fit the cone (Fig. 22 ref. 3) with the narrowest part
turned towards the wheel.
8. Fit the grip-ring (Fig. 22 ref. 1) in the nut (Fig. 22
ref. 2) and fasten the cone (Fig. 22 ref. 3).
Fig. 22
1
2
3
THE GRIP-RING (FIG. 22 REF. 1)
MUST BE MOUNTED WITH THE
TEETH SIDE TOWARDS THE RING-
NUT (FIG. 22 REF. 2).
LIBRAK380.3DTEC - LIBRAK380P.3DTEC - LIBRAK430.3DTEC - LIBRAK430P.3DTEC
1297-M021-1_B
12.2 Fitting of the wheel (LIBRAK380P.3DTEC
- LIBRAK430P.3DTEC)
Open the pneumatic mandrel by means of the special
pedal, see Fig. 23.
Fig. 23
Open/close the pneu-
matic mandrel
Brake the wheel
1. Remove any type of foreign body from the wheel
(Fig. 24 ref. 3): pre-existing weights, stones and
mud, and make sure the mandrel (Fig. 24 ref. 1)
and the rim centring area are clean before fitting
the wheel on the mandrel.
2. Carefully choose the cone (Fig. 24 ref. 2) most suit-
able for the wheel to be balanced. These accessories
must be selected according to the shape of the rim.
Position the wheel (Fig. 24 ref. 3), fitting the cone
(Fig. 24 ref. 2) on the mandrel (Fig. 24 ref. 1): be
careful (otherwise this could seize) until this rests
against the support flange (Fig. 24 ref. 4).
3. Fit the wheel with the inner side of the rim towards
the wheel balancer and against the cone.


 To Next Page