GB
Page 16 of 62
INSTRUCTION, USE AND
MAINTENANCE MANUAL
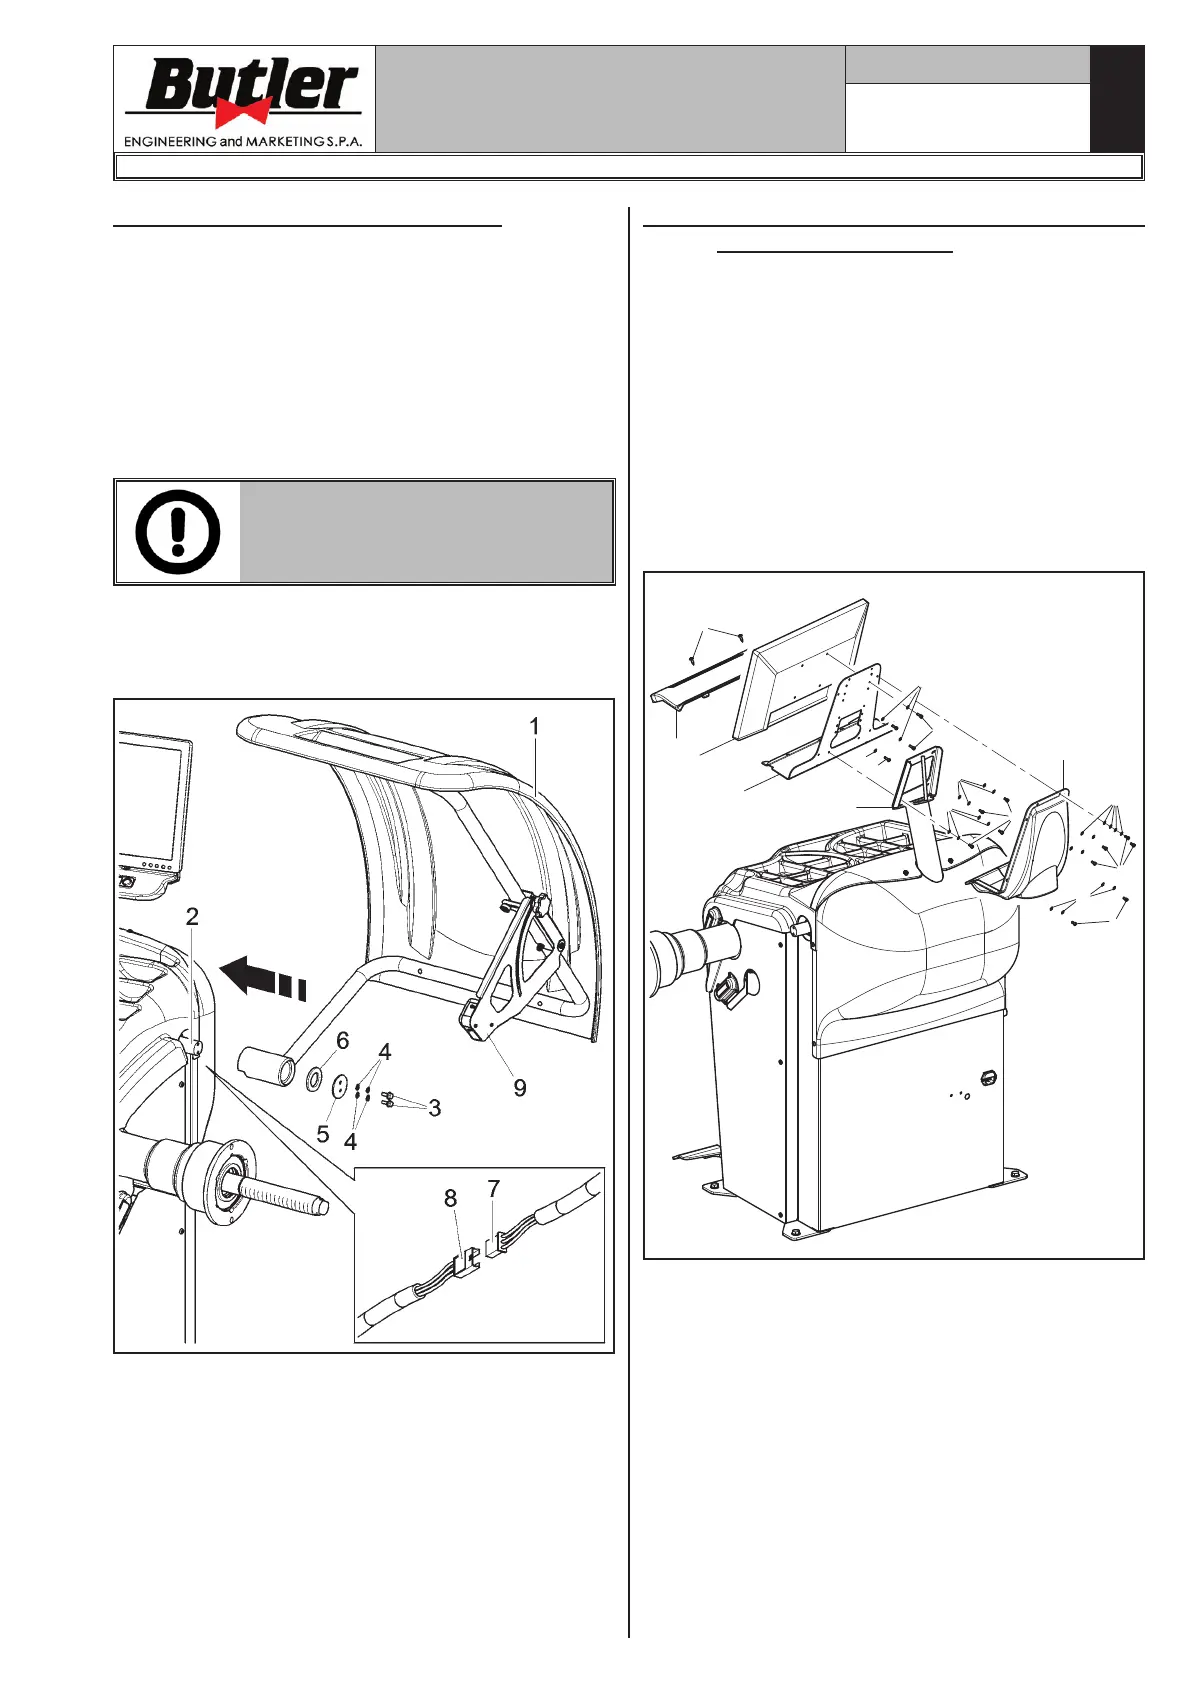
9.3.3 Fitting the protection guard
1. Mount the protection guard (Fig. 14 ref. 1) to the
support (Fig. 14 ref. 2) using the screws (Fig. 14
ref. 3), interposing the Belleville washers (Fig. 14
ref. 4) and the tab washers (Fig. 14 ref. 5 - 6).
2. Tighten the screws (Fig. 14 ref. 3) in order to make
the guard (Fig. 14 ref. 1) lift or lower without
bumping against the limit switch. Carry out the
adjustment so that it's possible to manually guide
the guard both during closing and opening.
DURING GUARD'S ASSEMBLY,
PAY ATTENTION TO THE MICRO
PLACED INSIDE THE MACHINE.
3. Connect the ultrasound sensor cable (Fig. 14 ref. 7)
of the automatic width measuring device (Fig. 14
ref. 9) to the pre-arranged connector (Fig. 14
ref. 8).
Fig. 14
LIBRAK380.3DTEC - LIBRAK380P.3DTEC - LIBRAK430.3DTEC - LIBRAK430P.3DTEC
1297-M021-1_B
9.3.4 Monitor fitting (LIBRAK380.3DTEC -
LIBRAK380P.3DTEC)
1. Fit the monitor support plate (Fig. 15 ref. 1) to
the monitor support (Fig. 15 ref. 2) using the
washers (Fig. 15 ref. 3) and the issued screws
(Fig. 15 ref. 4).
Fit the monitor (Fig. 15 ref. 5) and the keyboard
guard (Fig. 15 ref. 6) to the plate (Fig. 15 ref. 1)
using the washers (Fig. 15 ref. 7), the screws
(Fig. 15 ref. 8) and (Fig. 15 ref. 9) on issue.
Mount the guard (Fig. 15 ref. 10) to the monitor
support plate (Fig. 15 ref. 1) with the washers
(Fig. 15 ref. 11) and the screws (Fig. 15 ref. 12)
supplied.
4
3
1
2
3
5
6
7
7
8
8
9
10
11
11
12
12
Fig. 15


 To Next Page