17
4 Loading Material
8
7
10
9
11
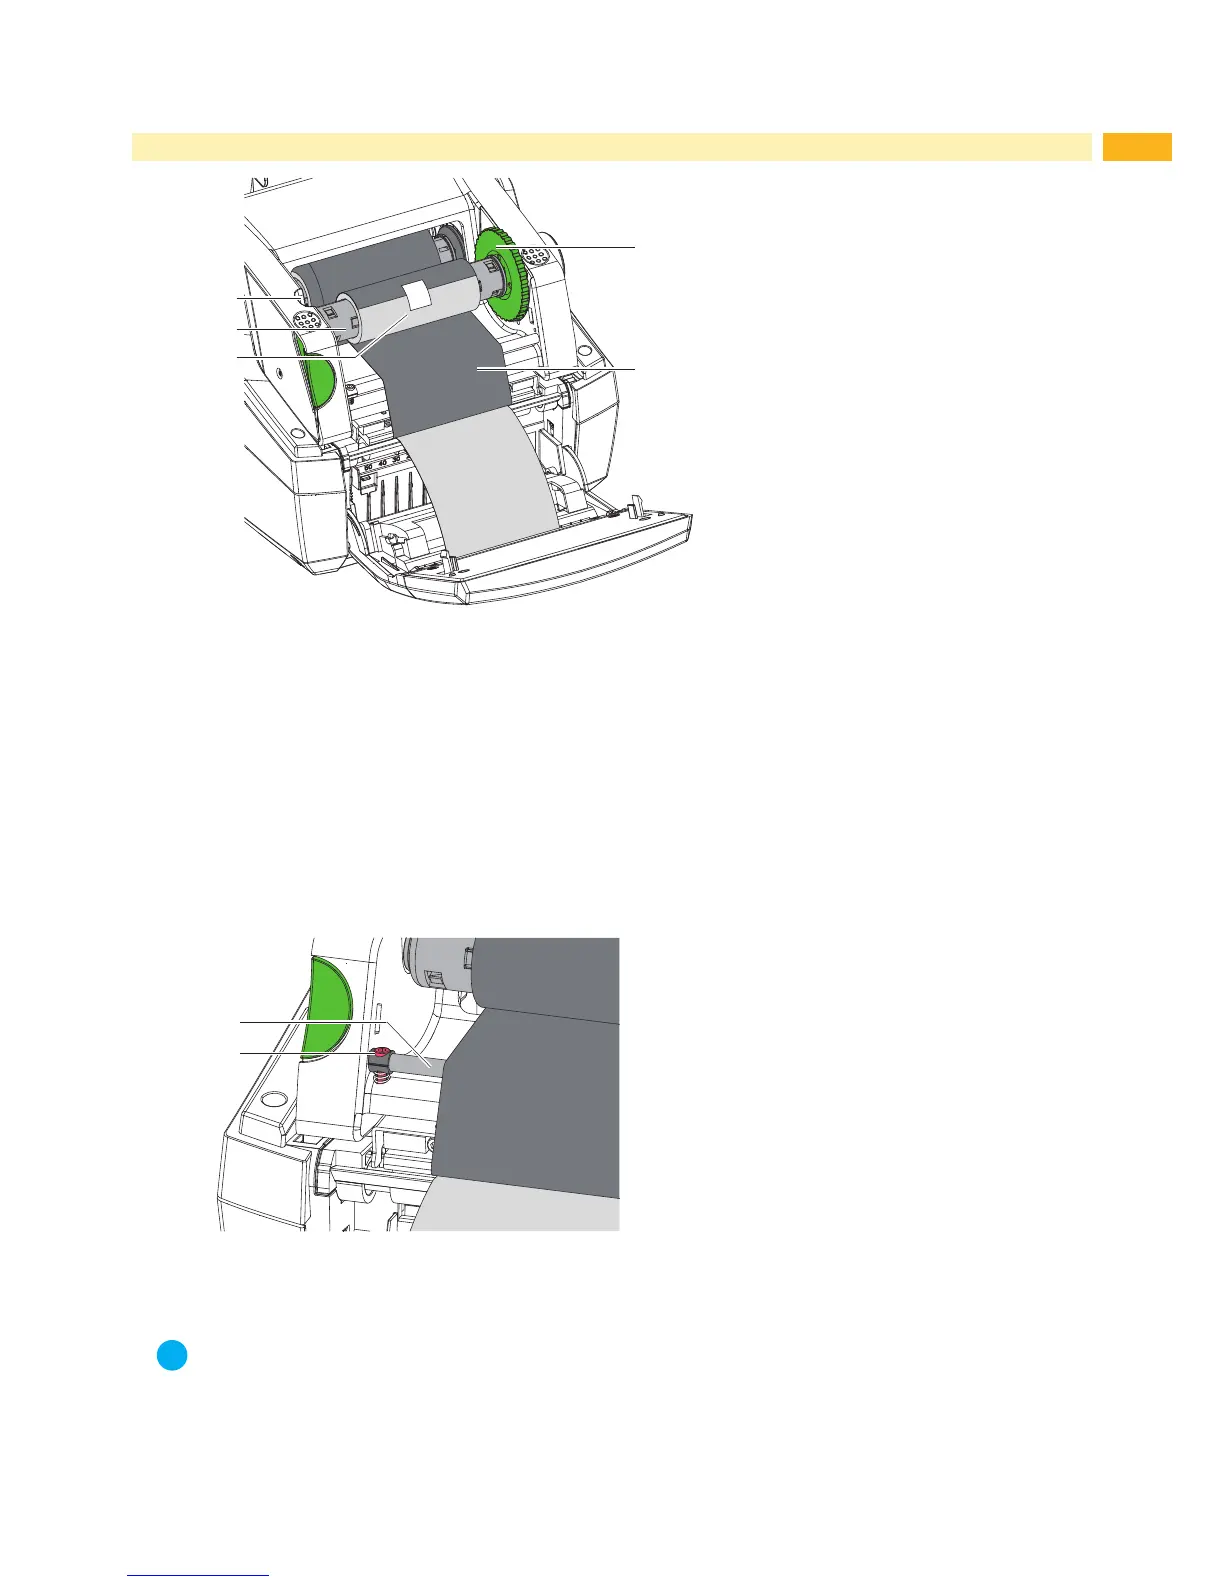
Figure 19 Loading transfer ribbon
Remove and adjust the ribbon rewinder core (8) in the same manner.
Slide an empty cardboard roll (9) onto the core (8) against the lever.
Press the rectangular end of the core against the spring of the tensioning wheel (10) and slide the left end into the
slot (7) until it snaps in.
Feed the transfer ribbon (11) over the printhead to the ribbon rewinder, and attach the ribbon to the empty roll (9)
with adhesive tape.
Ensurethatitiswoundasshowninthegureandensurethattheribbonisnottwisted.
Turn the tensioning wheel (10) in the winding direction until the ribbon is tightly wound on the roll.
Lower and lock the print module, lift the control panel and close the cover.
4.6 Setting the Feed Path of the Transfer Ribbon
1
2
Figure 20 Setting the feed path of the transfer ribbon
Transferribbonwrinklingcanleadtoprintimageerrors.Thetransferribbondeection(1)canbeadjustedtoprevent
wrinkles.
Note!
The adjustment is best carried out during printing.
Turn screw (2) with Allen key and observe the behavior of the ribbon.
Turning the screw clockwise tightens the right edge of the ribbon and turning the screw counterclockwise will
tighten the left edge.

 Loading...