Note!
Soiling of the label sensor can also cause malfunctions.
Before replacing the label sensor, check whether it is soiled and clean it if necessary.
Danger!
Risk of death via electric shock!
Before opening the housing cover, disconnect the device from the mains supply and wait at least one
minute until the power supply unit has discharged.
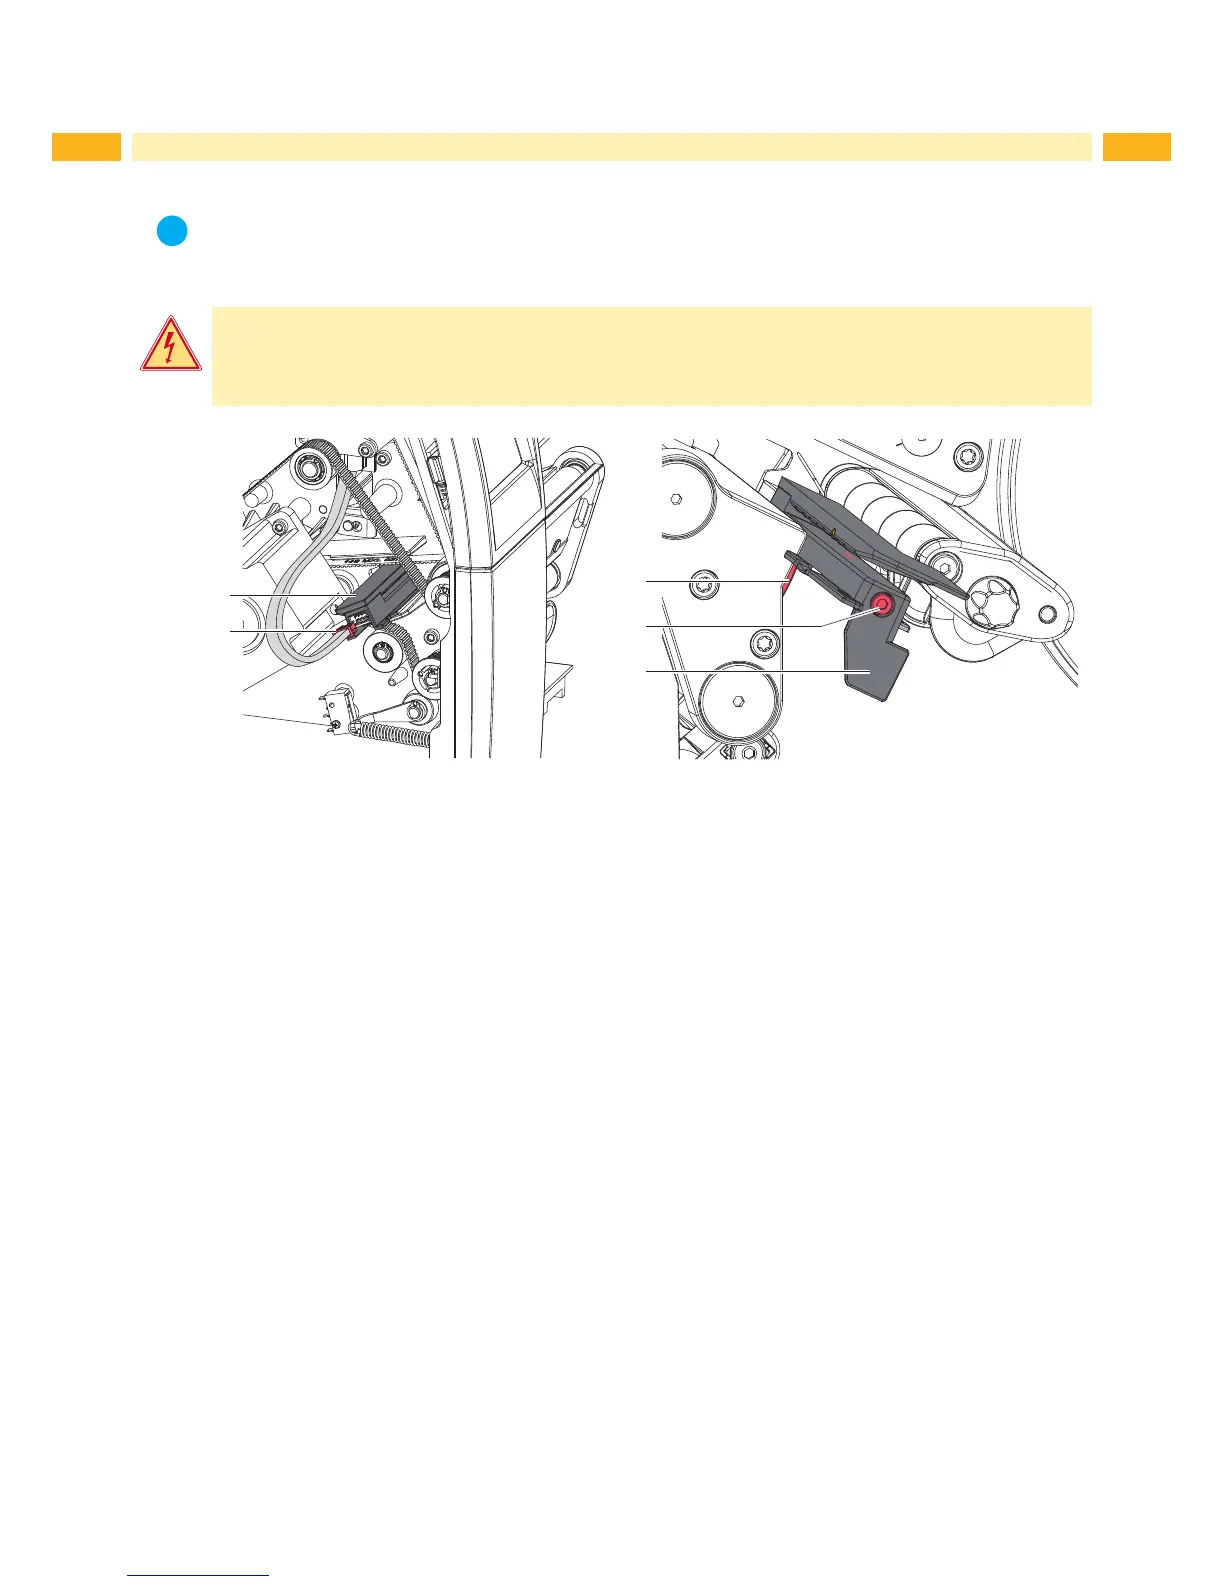
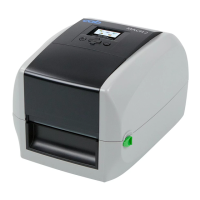
1
2
3
4
5
Fig. 7 Replacing the label sensor
1. Remove the rear cover.
2. Remove the material from the printer.
3. Disconnect the plug (2) from the label sensor (1).
4. Loosen the screw (4).
5. Hold pressed the knob (3) and pull the label sensor with the handle (5) out of the prole.
6. Mount the new label sensor in the opposite order.
7. Mount the rear cover and restore all connections.
8. Adjust label sensor mechanically and tighten the screw (4) Operator's Manual.
9. Adjust label sensor electrically Conguration Manual > Calibrate label sensor.