7
2 Replacing Assembly Units
2.1 Tools
Do not use any worn of damaged tools.
Only use tools and testing devices that are suitable for the task at hand.
cab special tools:
• Test collar for transfer ribbon winder (cab item number: 5534199)
Standard tools:
• Phillips-head screwdriver, size 1
• Allen key 1,5 mm
• Screw driver Torx, size TX 20
• Snap ring pliers ZGG 0
• Cylindrical dynamometer (spring scale), 0 - 10 N
• Cylindrical dynamometer (spring scale), 0 - 25 N
• Jaw wrench 8 mm
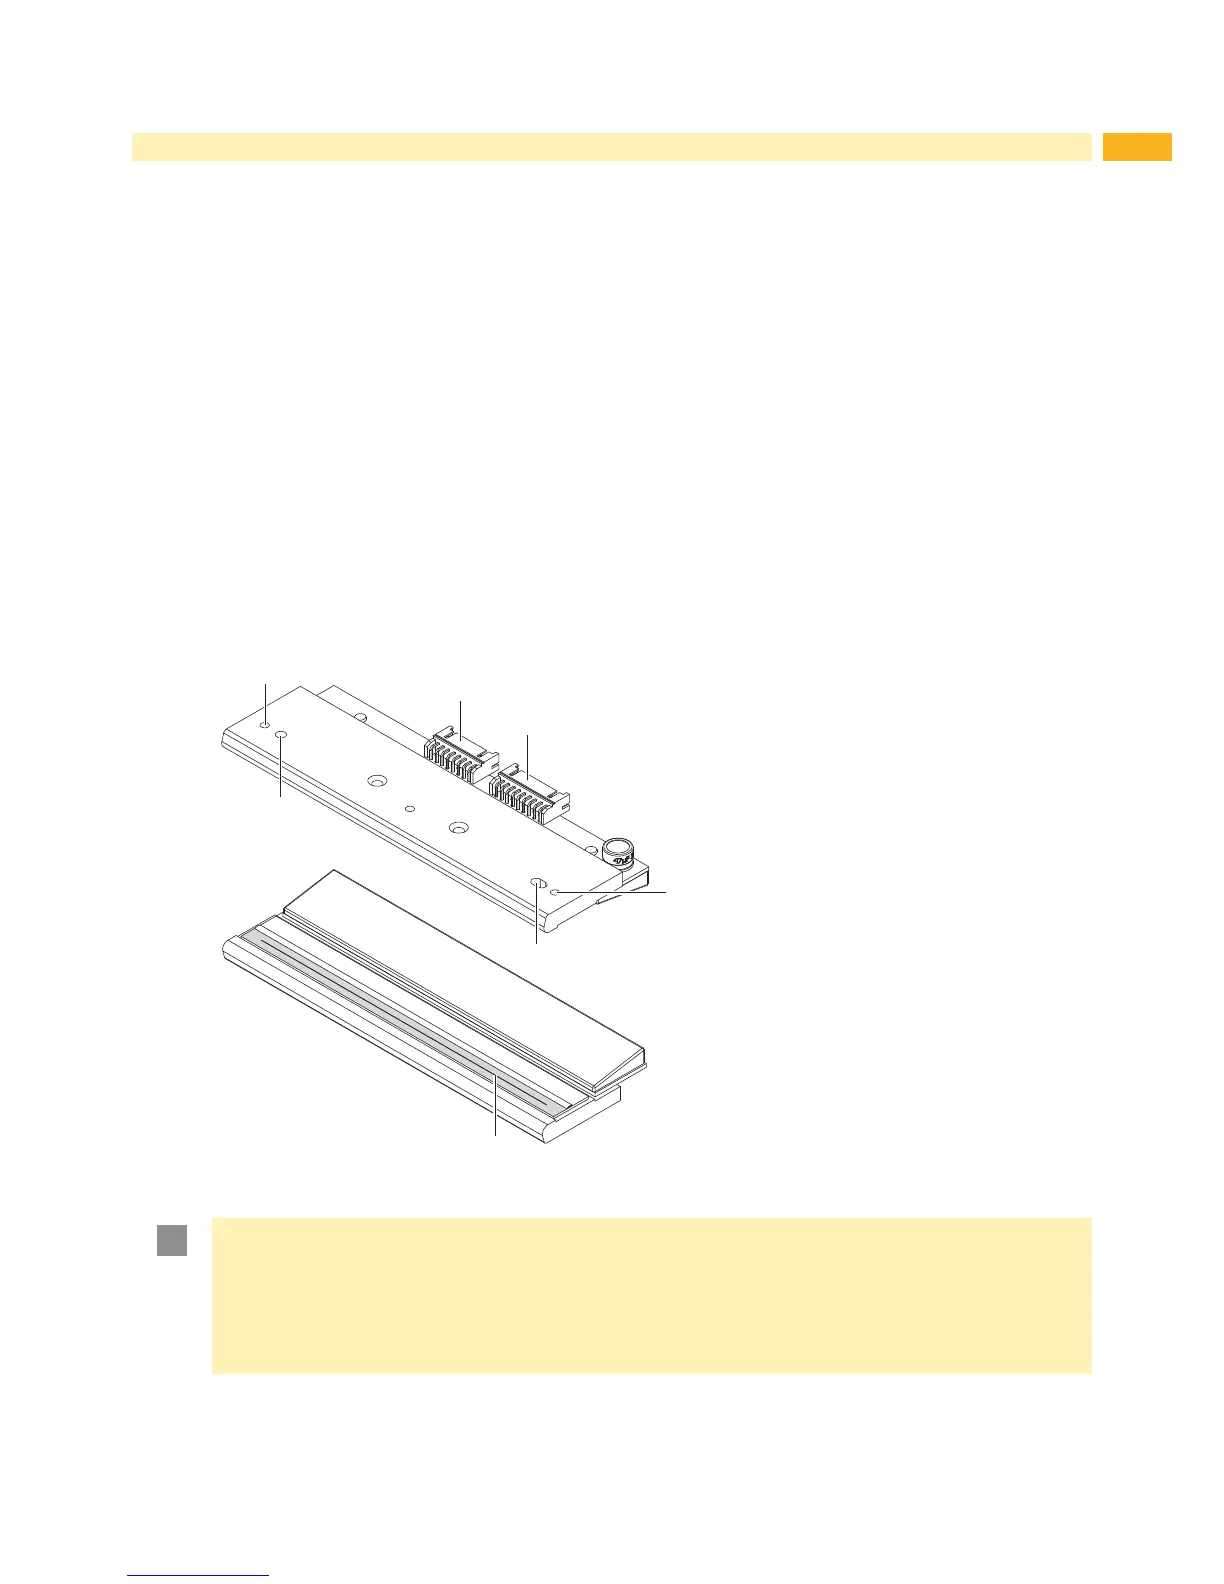
2.2 Replacing the Printhead
The printhead of the label printer can be replaced without the need for ne adjustment. The printhead must be
replaced if worn or when switching to a printhead with higher or lower resolution.
1
2
3
4
Attention!
The printhead can be damaged by static electricity discharges and impacts!
Set up printer on a grounded, conductive surface.
Ground your body, e.g. by wearing a grounded wristband.
Do not touch contacts on the plug connections (1, 2).
Do not touch heating line (5) with hard objects or your hands.