65
CUSTOM STRIP CONFIGURATION
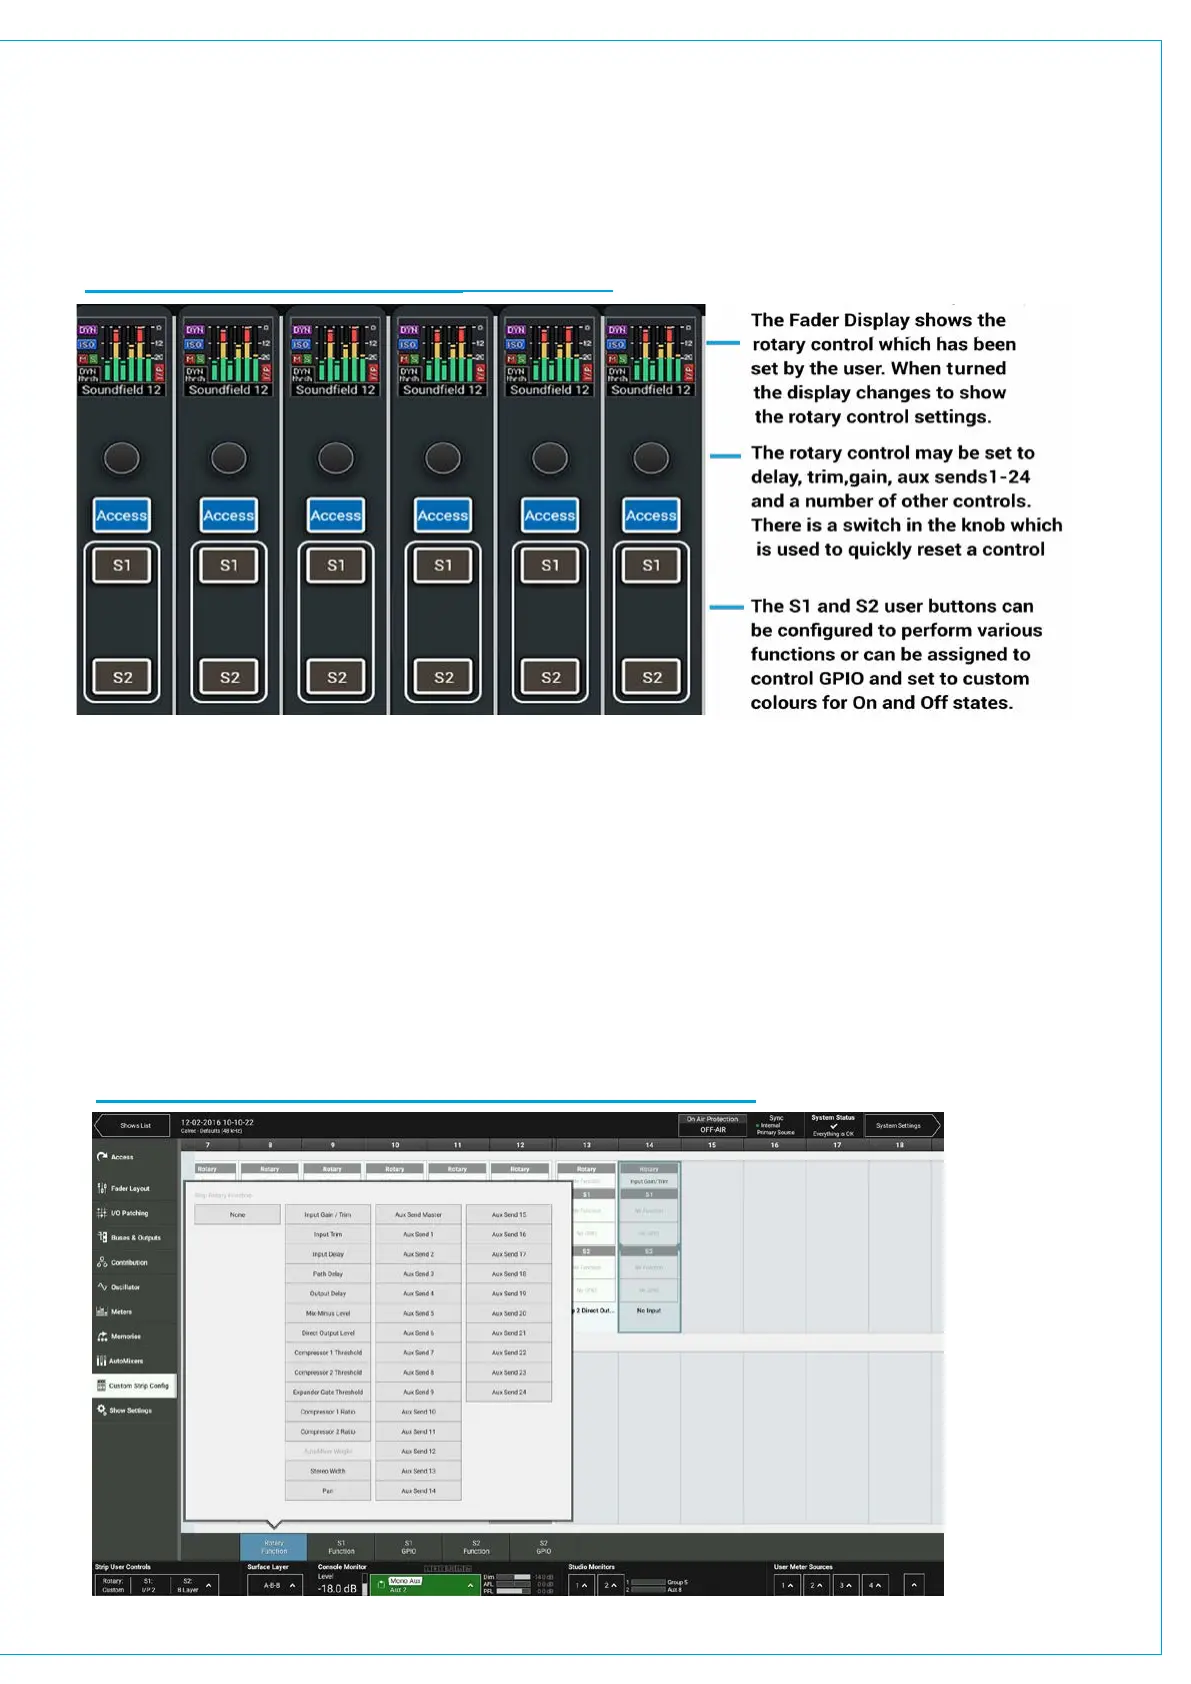
Each Fader strip has a Rotary control and 2 Strip User Buttons each of which have RGB LED indicators in them.
They can be assigned to directly control a range of functions console wide, using the button in the left side of the
touch UI’s footer. The ‘Custom’ option allocates functions defined by the Custom Strip Configuration screen which
allows for different functions on each strip as well as connecting with GPIO.
FIGURE 1 - FADER STRIP ROTARIES & USER BUTTONS
To create or change a Custom Strip Configuration, select the desired fader/s on screen, then choose to apply functions
using the Rotary, S1 or S2 buttons below.
GPIO can be assigned to the buttons as well as console functions. If a console function is assigned, the state of that
function will determine whether the button is lit. If no console function being controlled, the button can be lit by GPI tally,
and the illumination colour for both on and off state can be chosen. GPIO is connected to buttons via triggers. Select
a GPIO trigger to work with the S1 or S2 buttons from the footer. Go to the GPI and GPO patching screens in System
Settings to connect the specific GPI and or GPO to the user button triggers.
A separate Custom Strip Configuration is available to each user memory. The custom configuration is only active on
the surface when Custom is selected from the button in the bottom left of the UI footer. Users can choose to apply the
custom configuration to the rotary and/or each of the buttons independently.
FIGURE 2 - CUSTOM STRIP CONFIGURATION-ROTARY FUNCTIONS
 Loading...