PARTS TO BE INSTALLED
6. Tighten screws to specification as per the fol-
lowing sequence.
TIGHTENING TORQUE
Rear fender sc
rews
7.5 N•m ± 0.5 N•m
(66 lbf•in ±4lbf•in)
rbs2011-00
8-003_a
TIGHTENING SEQUENCE
7. Lightly tighten RH and LH fender support
screws as per the following sequence.
rbs2011-008-002_b
TIGHTENING SEQUENCE (M6 X 20 SCREWS)
1. Tighten 1
st
screw
2. Tighten 2
nd
screw
3. Tighten 3
rd
screw
8. Retighten LH and RH support screws to speci-
fication as per the same sequence.
TIGHTENING TORQUE
Fende
r support screws
7.5 N•m ± 0.5 N•m
(66 lbf•in ±4lbf•in)
9. Repo
sition harness if brake light harness makes
cont
actwithreartire.
Low Beam Light (CE Models)
Countries with Left-Hand Traffic
The l
ow-beam headlights must be changed for
left
-hand traffic countries to ensure proper low
beam
aiming.
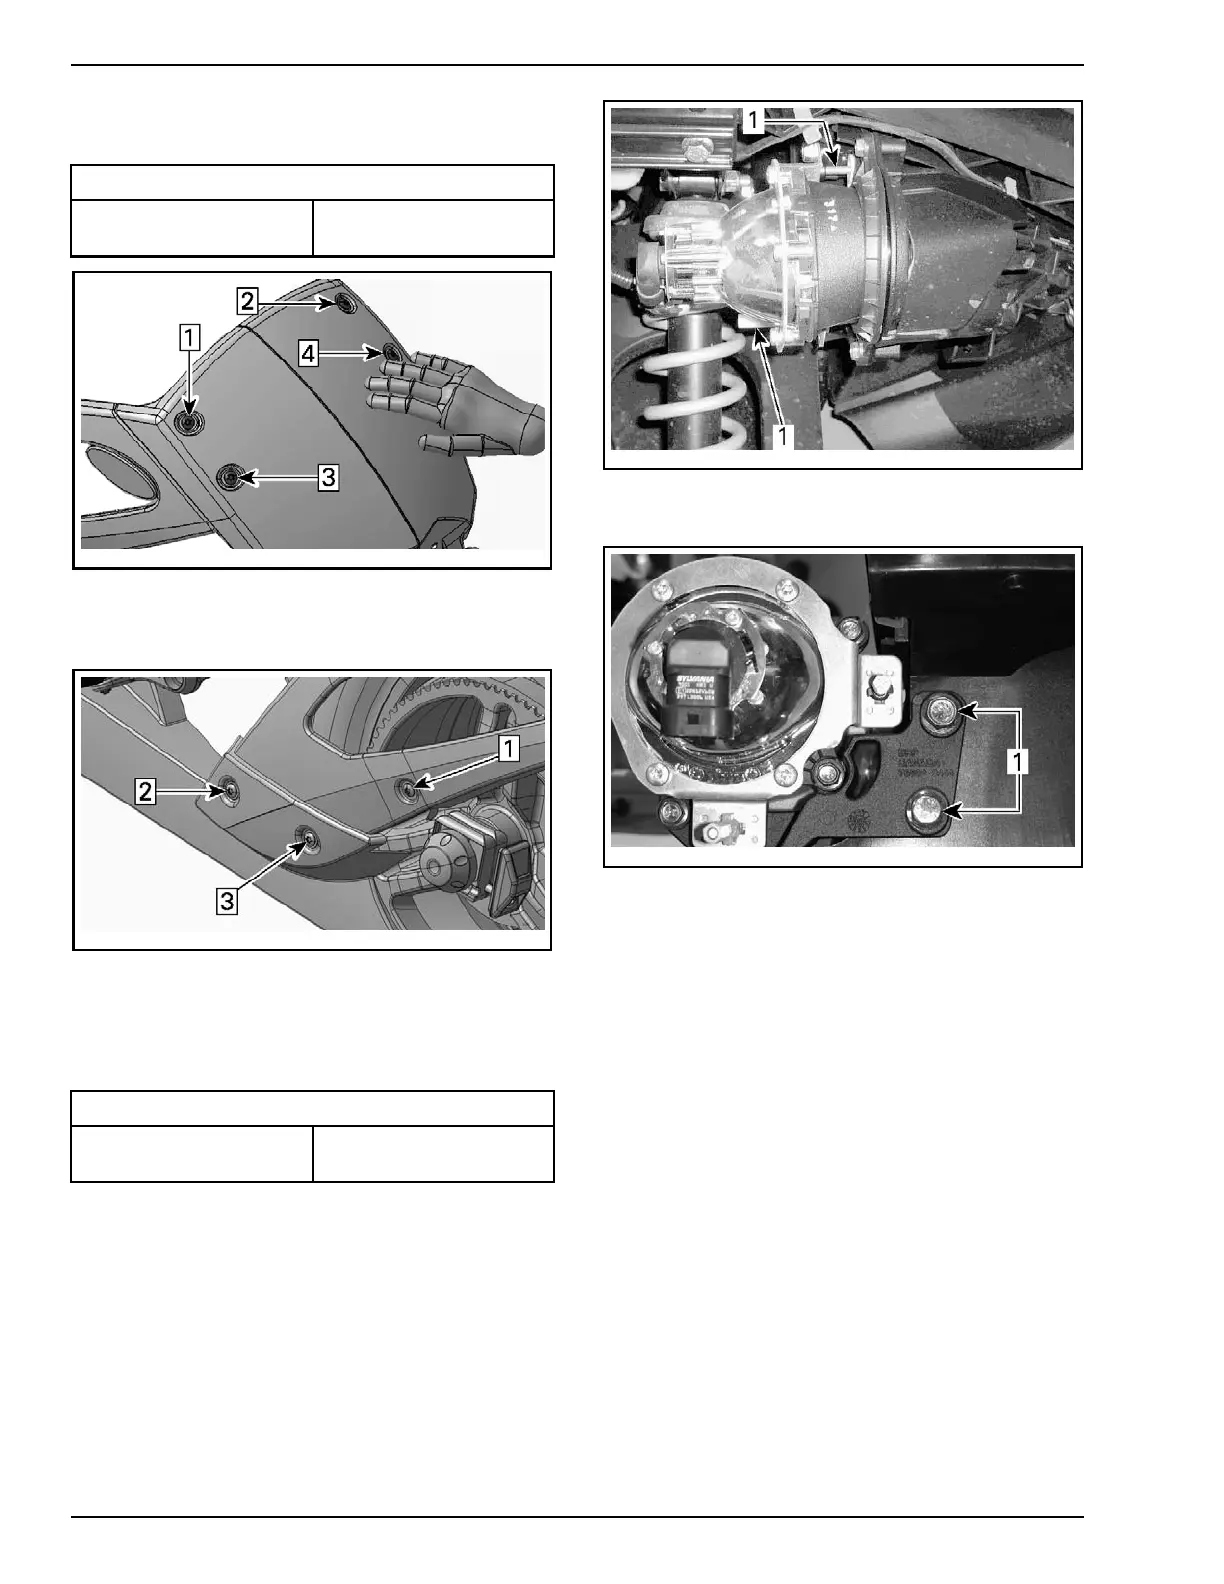
1. Note the position of the adjustment screws on
the installed headlight.
rbl2009-001-006_a
1. Adjustment screws
2. Remove retaining screws from headlight.
rbl2008-003-215_c
1. Retain
ing screws
3. Pull out headlight.
4. Repeat
the procedure for the remaining head-
light
.
5. Discard the removed headlights. Keep the
screws for installation.
6. Install the new headlight into position.
NOTE:
The left-hand traffic headlights can be rec-
ogniz
ed by the number 10895 on the lens rim (the
righ
t-hand traffic ones have the number 10894).
12 / 37 2012-1 PREDELIVERY
 Loading...