PARTS TO BE INSTALLED
rbl2010-002-032
TYPICAL
15. Reinstall the LH rear panel.
15.1 Plug turn si
gnal connectors.
15.2 Secure panel with previously removed
screws and plastic rivets.
NOTICE
Do not over
tighten screws. Any de-
formation
on the panel around the screw head
is an indic
ation that it is too tight. Be careful
not to dama
ge the panels.
Front Storage Compartment
1. Open front storage compartment cover.
2. Remove pl
astic rivets securing front panels.
rbl2008-003-100_d
FRONT PANELS PLASTIC RIVETS LOCATION
3. Remove and discard bolts holding the bottom
and the top sections of sub-crate.
rbl2008-003-204_a
1. Lower retaining bolt
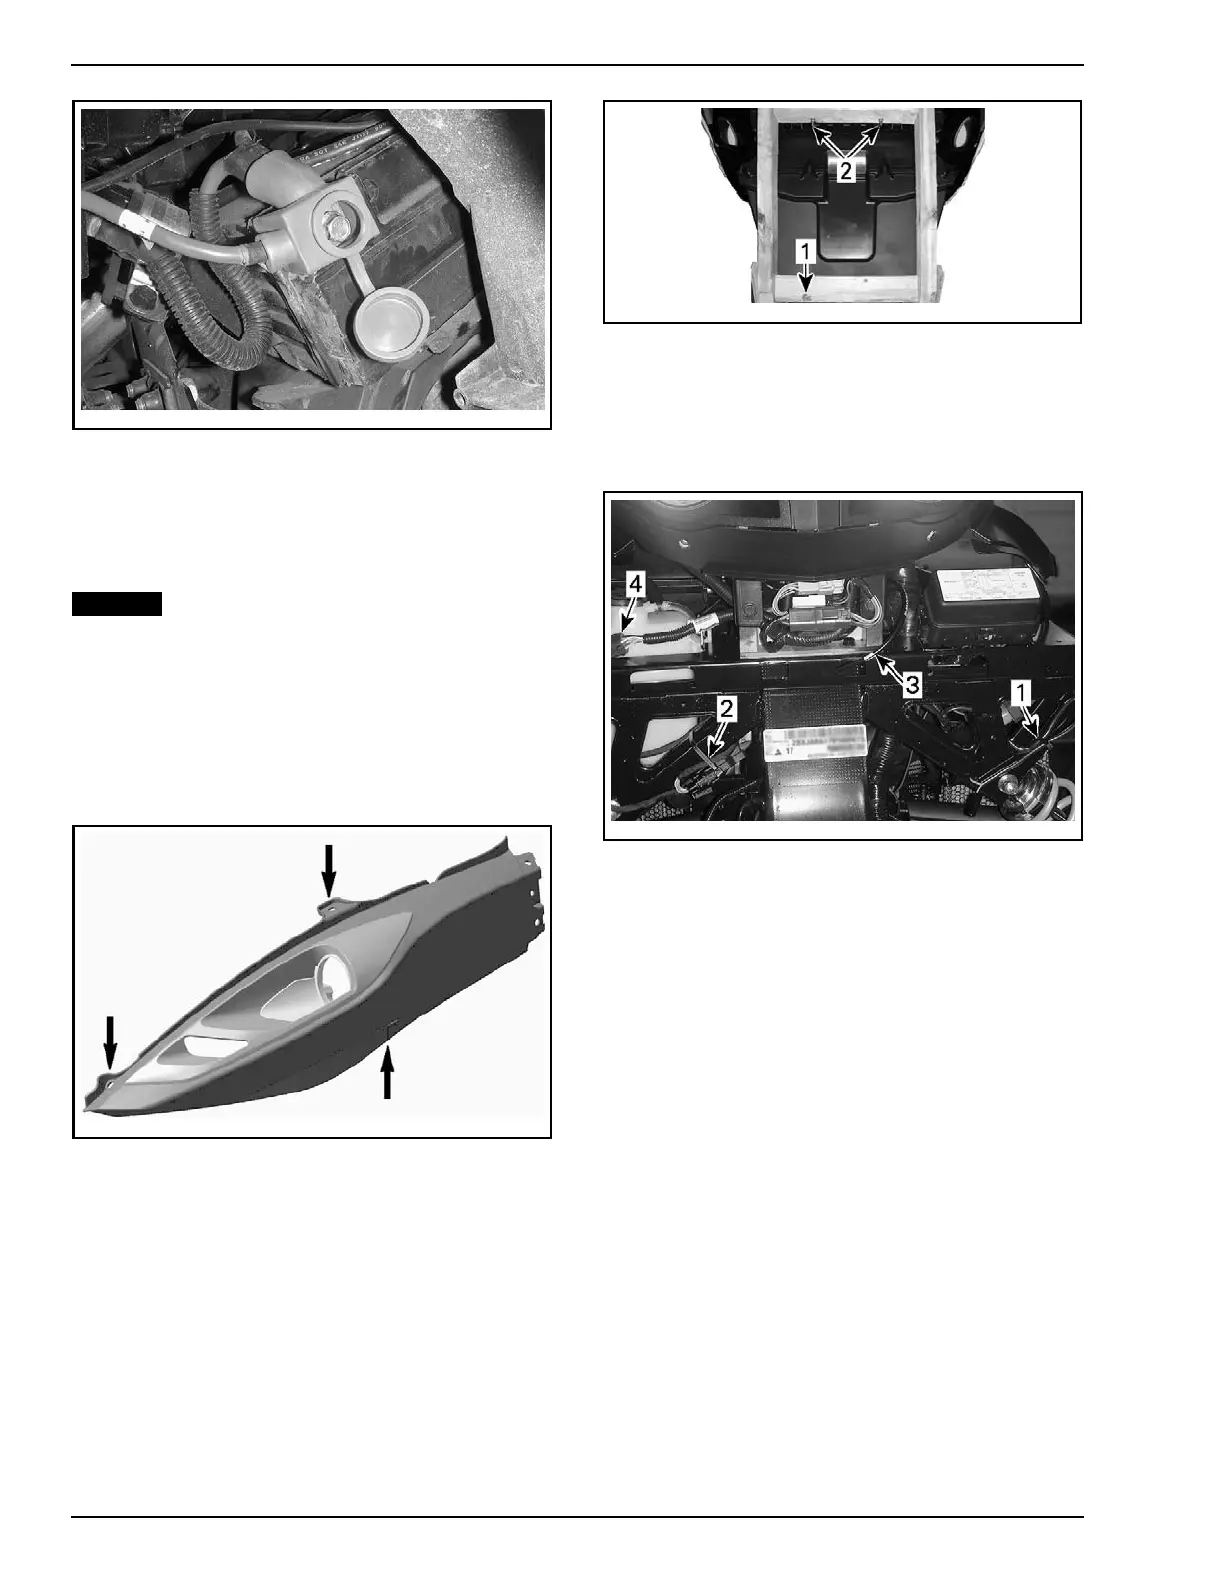
2. Upper retaining bolts
4. Cut locking ties securing horn and AAPTS har-
ness to frame.
5. Free the front storage compartment cover ca-
ble.
rbl2011-002-006_a
1. Horn har
ness
2. AAPTS (Ambient Air Pressure an d Temperature Sensor) harness
3. Front storag e compartment cover cable
4. DLC ( Dia
gnostic link cable connector)
CE Models — Countries with Left-Hand Traffic
6. Before
installing storage compartment, replace
the low
beam lights. Refer to
LOW BEAM
LIGHT (
CE MODELS)
.
All Models
7. Assisted by another person, position front stor-
age compartment into support s lots of vehicle.
NOTE: E
nsure that all cables are accessible prior
to ins
talling front storage compartment.
8. Secure the front storage compartment.
–OnTOP
, use four M6 x 20 hexagonal flange
screw
s
– At the bottom, use two M6 x 12 hexagonal
flange screws.
8 / 37 2012-1 PREDELIVERY
 Loading...