BODY PARTS INSTALLATION
Vehicle Parts Reinstallation
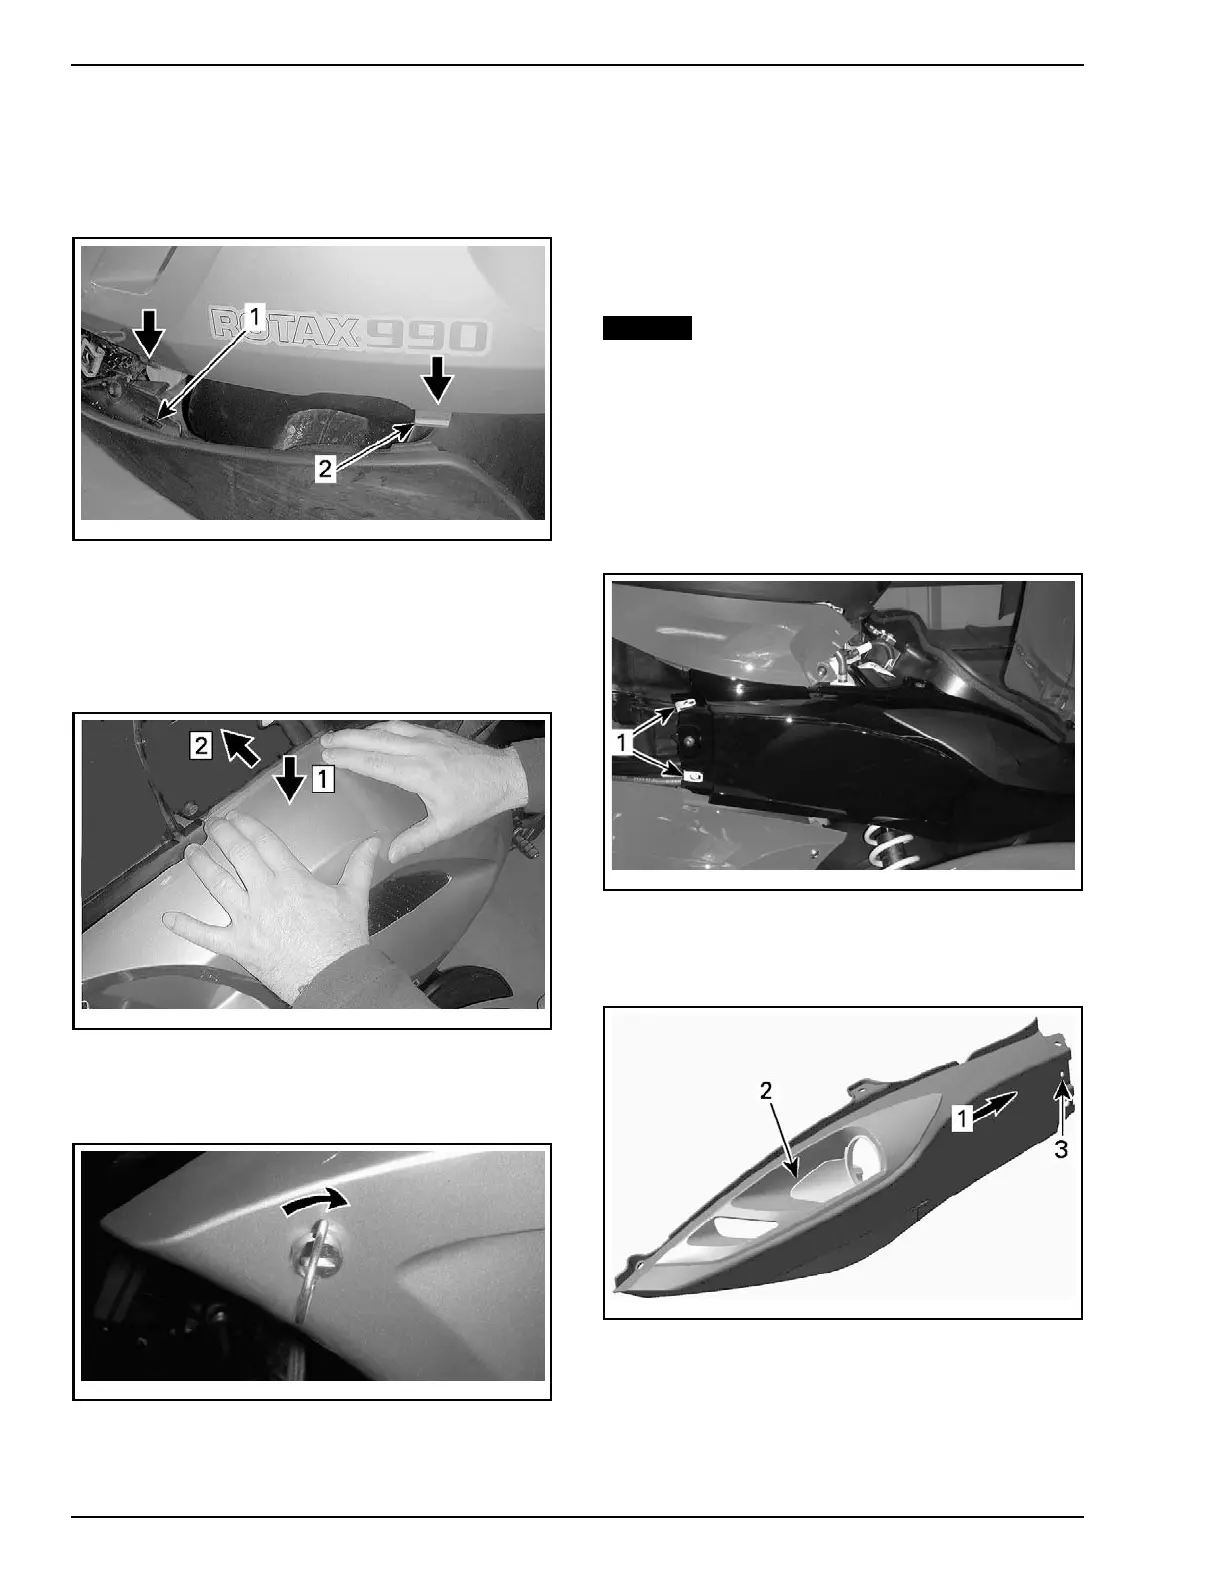
1. Install LH middle panel.
2. Insert the m iddle side panel tabs into the lower
side panel slots.
rmo2008-0
01-034_a
1. Lower side panel slot
2. Middle side panel tab
3. Press down
panel top edge with both hands
and push i
n.
4. Ensure that lower tabs remain in slots while
pressing.
rmo2008-001-033_b
1. Press down top edge
2. Push top edge under top side panel edge
5. Secure panel by pushing and turning each clip
clockwise (1 turn).
rmo2008-001-035_a
NOTE: Clip is properly fixed when a small amount
of force is required while turning clip to its maxi-
mum rotation. Clip is not properly fixed when it is
loose w hile turning.
BODY PARTS
INSTALLATION
NOTICE
Do not overtighten screws. Any de-
formation on the panel around the screw is an
indication that it is too tight. Be careful not to
damage the panels.
Front Panels
1. Install M6 panel nuts on front panels (included
in the PDI kit)
2. Install front panels on vehicle.
rbl2009-001-004_a
RH FRONT
PANEL SHOWN
1. Front M6 panel nuts
3. Secure front panels. Use screw removed dur-
ing front panel removal.
rbl2008-003-100_a
CE MO DEL SHOWN
1. Move side air deflector backward
2. Area that must be fit
3. Front panel screw
NOTE: On CE models,movesideairdeflector
backward for a best fit.
4. Install plastic rivets.
18 / 37 2012-1 PREDELIVERY
 Loading...