4
4
4-382
4-382
Parts Replacement and Cleaning > PCB > Removing Fixing High-Voltage PCB
Parts Replacement and Cleaning > PCB > Removing Fixing High-Voltage PCB
Removing Fixing High-Voltage PCB
<Preparation>
1) Open the Front Left Cover and the Front Right
Cover.
(Refer to page 4-54)
2) Pull Out Fixing Feed Unit.
(Refer to page 4-120)
3) Remove Secondary Transfer Outer Unit.
(Refer to page 4-86)
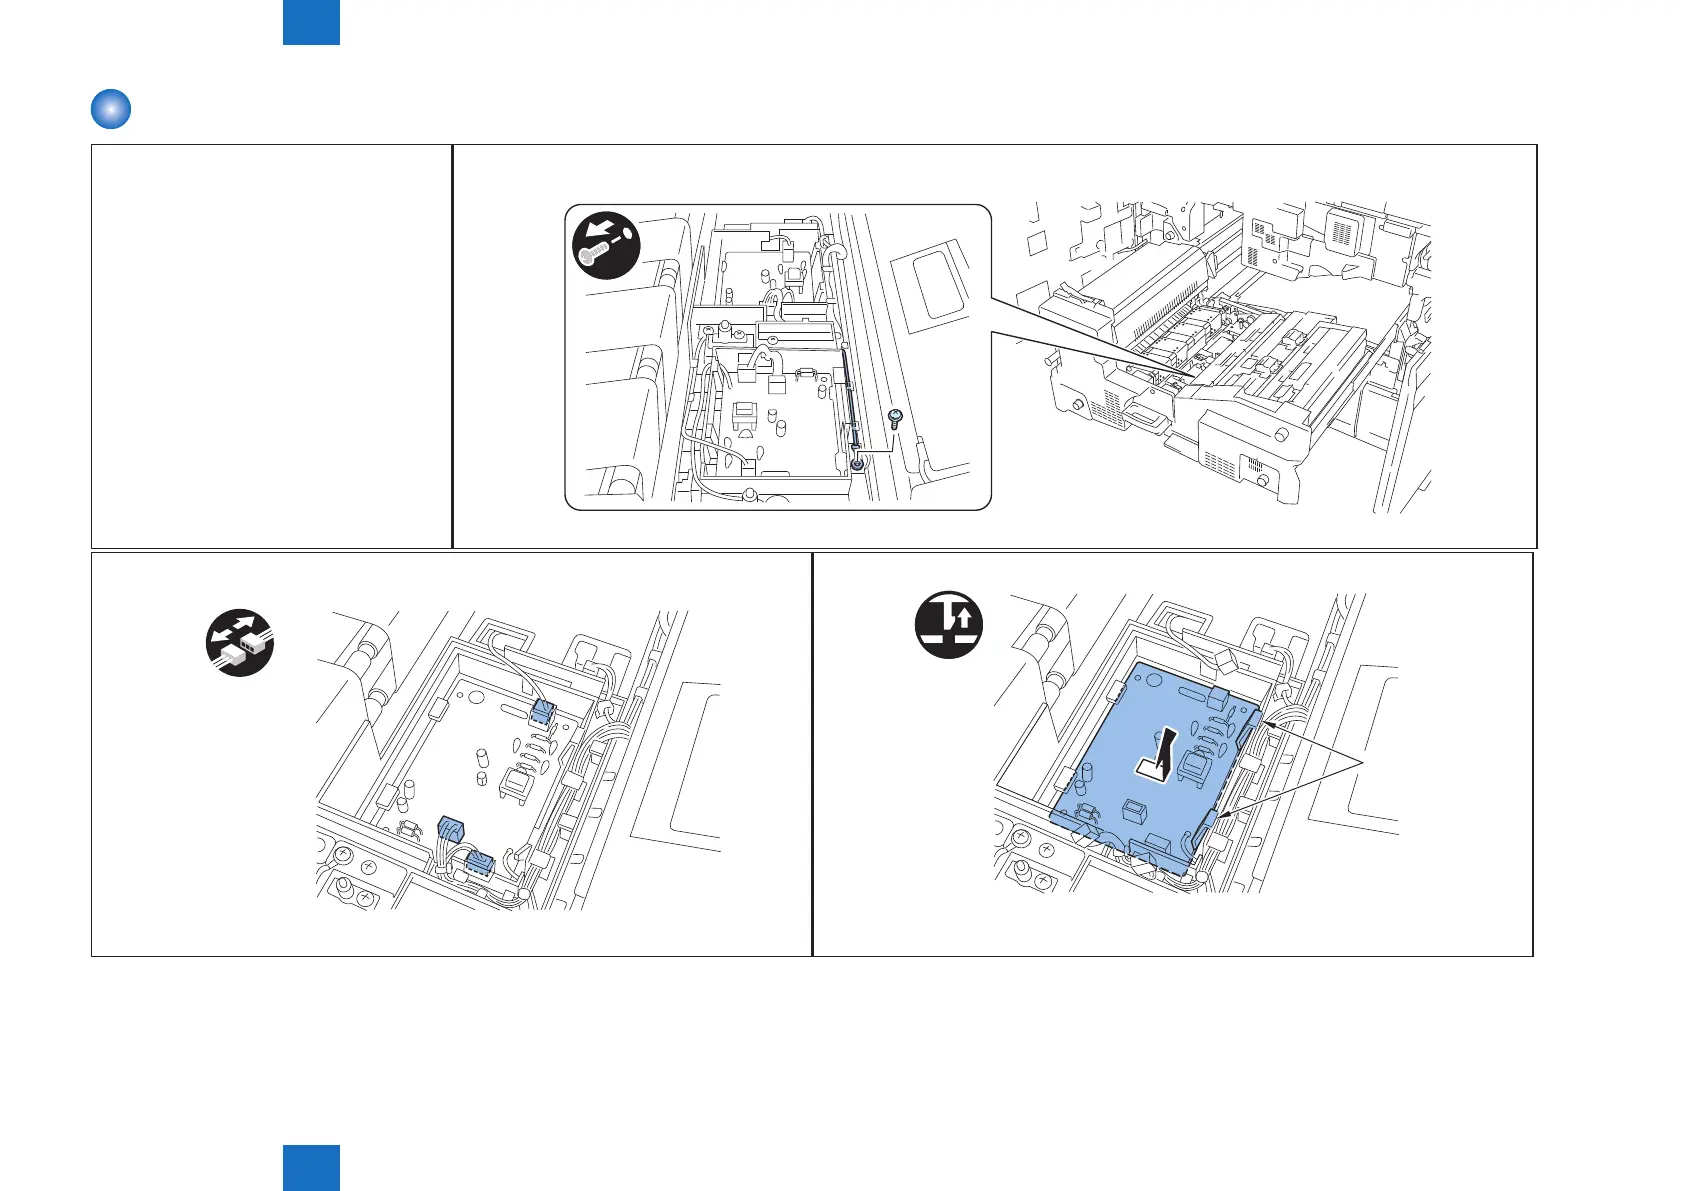
1) Remove the grounding wire.
• 1 screw
F-4-869
2) Remove the 3 connectors.
x3
F-4-870
3) Remove the claw in 2 places, and remove the xing high voltage PCB.
x2
Claw
F-4-871
 Loading...