IMPORTANT:
Do not open the power supply for service or troubleshooting purposes. Opening the power supply voids the warranty.
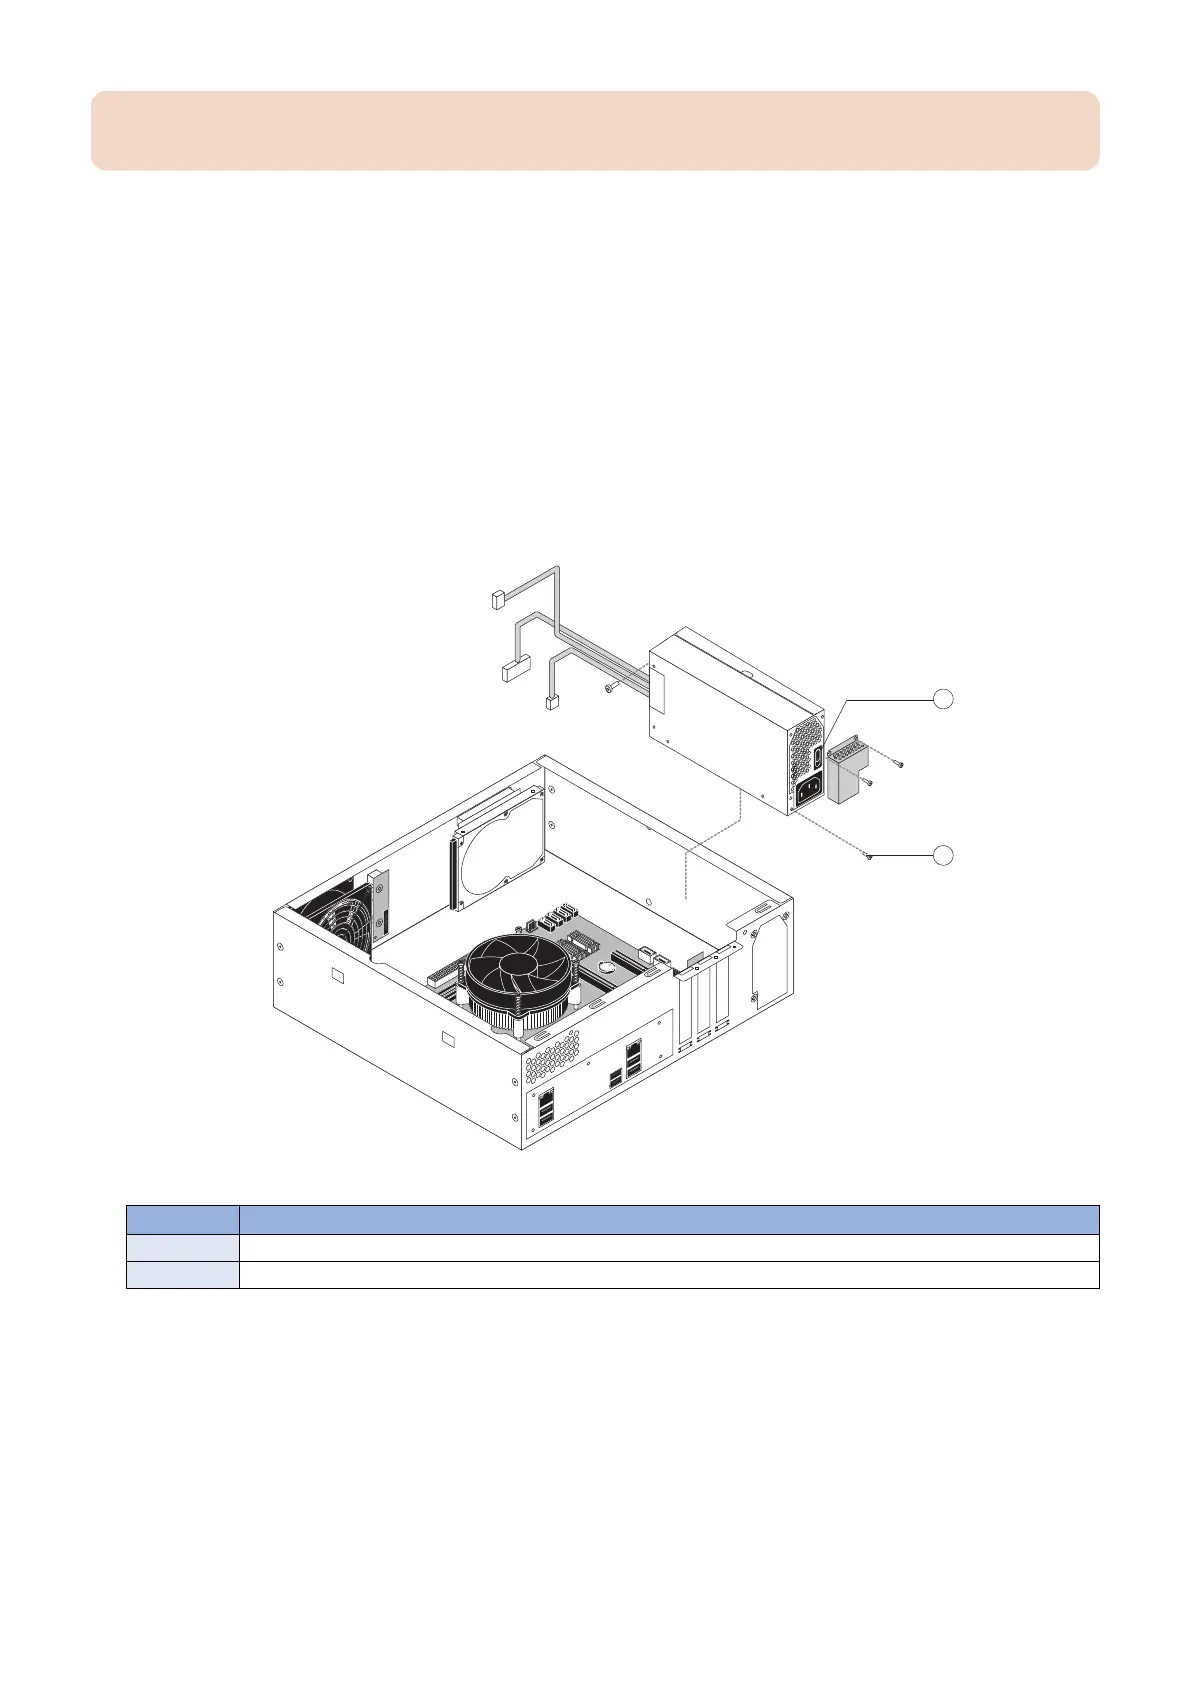
● To remove the power supply and power switch
1. Access and open the imagePRESS Server, as described on “Accessing the imagePRESS Server” on page 18.
2. Remove the 24-pin power cable from the motherboard (see “Motherboard jumpers” on page 25).
3. Remove the 4-pin power cable from the motherboard (see “Motherboard jumpers” on page 25).
4. Remove the power cable from the power connector on the HDD (see “Motherboard jumpers” on page 25).
5. Remove the power supply cables from the plastic clips that secure them to the chassis.
6. Remove the four screws that attach the power supply to the chassis (see below figure).
First remove the two screws that attach the power supply duct to the chassis. Remove the remaining two screws.
Set the screws aside so that you can replace them later.
7. Gently lift the power supply out of the chassis.
Figure 26: Removing the power supply
No. Name
1 Power switch
2 Screw (1 of 4)
● To replace the power supply
1. If you are replacing the power switch, locate the new power switch included with the replacement power supply kit.
Orient the power switch as shown in “To remove the power supply and power switch” on page 39.
2. Place the power supply inside the chassis (see “To remove the power supply and power switch” on page 39). Make
sure to fit the power connector through the cutout in the chassis. Align the mounting holes in the power supply
with the holes in the chassis.
3. Using the four screws that you removed earlier, secure the power supply to the chassis.
Attach the power supply duct using the two screws that you removed earlier.
3. REPLACING PARTS
39