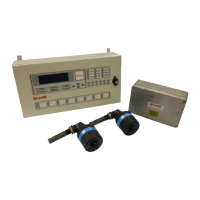
To identify which detector is at fault, from the Engine Overview Screen, Figure 148, select the required
engine.
Figure 166 Engine Screen Detector Fault
Select the faulty detector to access the Detector Status Screen.
Figure 167 Detector Status Screen Photodiode Fault
Identify the fault being indicated, in this case a Photodiode fault.
Alternatively, an inspection of the engine event log, see section 3.6, will list the event:
Photodiode Fault Detector X
Having established which detector is in fault it is necessary to establish the cause of the fault using the
following steps.
1. See section 4.6 for proper Detector Head removal, cleaning and refitting. Ensure Detector Heads &
Detector base O-Ring seals are properly fitted with Molykote O-Ring Lubricant.
2. Clean the Detector twice using the recommended cleaning buds and fluid.
3. Connect the detector to the Control Unit.
4. Perform an Optics Test via the Test Menu, see 3.5.
5. Check if the Photodiode Fault reoccurs.
If the photodiode fault does not reoccur no further action is required.
If the photodiode fault reoccurs the detector has failed and should be replaced.
5.2.10 Warning Memory Limit Met
The manufacture of the memory used to store the event log and the system test log specifies a number
of memory erase cycles for the unit. To prevent a potential loss of data in the Control Unit a count of the
number of erase cycles performed is maintained in the Control Unit. When the specified limit is reached,
a fault indication is provided by the Control Unit.
 Loading...