7–13 T-362
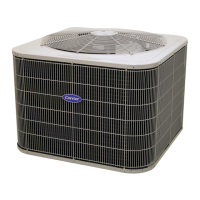
18. Remove the condenser fan, and place it on the shaft facing the correct direction. Adjust the fan to the
correct position, 37mm (1.5”) from the fan shroud, see Figure 7.7.
Figure 7.7 Condenser Fan Position
19. Use Loctite “H” on the fan set screws, and tighten.
20. Refit left and right infill panels.
21. Refit the condenser fan grille, ensuring the grille is properly centered around the condenser fan.
22. Evacuate the entire unit. See Section 7.6.
23. Recharge the unit with the charge shown on the unit serial plate. See Section 7.7. It is important for proper
unit operation that the charge is weighed into the unit.
7.11.5 Micro Channel Heat Exchanger (MCHE) Repair Instructions
Before proceeding with the installation, make sure power to the unit is OFF and the power plug is
disconnected.
Follow proper lockout / tagout procedures to ensure that the power cannot be inadvertently
energized.
Dress with personal protective equipment (PPE) gear before attempting any field repairs.
Aluminum fin is extremely sharp. Wear gloves and protective eye wear.
37mm (1.5”)
Fan
Shroud

 Loading...