7–29 T-362
7.21 Economizer Solenoid Valve (ESV)
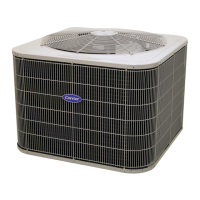
Figure 7.14 Coil View of Economizer Solenoid Valve (ESV)
1) Slotted Screw
2) Top Coil (small) O-ring
3) Solenoid Coil, Enclosing Tube
and Body
4) Bottom Coil (large) O-ring
5) Brass Spacer
- - - - -
7.21.1 Removing a Solenoid Valve Coil
Always turn OFF the unit circuit breakers (CB-1 & CB-2) and disconnect main power supply
before working on moving parts.
1. Turn unit power off and remove power from the unit. Disconnect leads.
2. Remove the top screw and o-ring. Remove the coil and save mounting hardware, seals and spacer for
reuse (see Figure 7.14). See Valve Coil Installation Procedure.
7.21.2 Removing the Solenoid Valve
1. Pump down the compressor (see Section 7.4) and frontseat both suction and discharge valves.
2. Remove the valve. The preferred method of removing the solenoid valve is to cut the connection between
the brazed section and the valve, using a small tube cutter. Remove valve.
Alternatively, heat inlet and outlet connections to valve body and remove valve.
3. Clean the valve stem with mild cleaner, if necessary.
7.21.3 Installing the Solenoid Valve
1. Fit the new solenoid valve into position and braze. Use a wet rag to keep valve cool whenever brazing.
7.21.4 Installing the Solenoid Valve Coil
1. Install the brass spacer on the valve stem.
2. Lubricate both o-rings with silicone provided in the kit.
3. Install bottom coil o-ring on the valve stem.
4. Install the solenoid coil on the valve stem.
5. Place the top coil o-ring on the coil mounting screw and secure the coil to the valve using a torque wrench.
Torque the screw to 25 in-lbs.
6. Connect coil wires using butt-splices and heat shrink tubing.
1
2
3
4
5

 Loading...